Harry Potter has been one of the most influential film series of the last twenty years, and its popularity has made its way into holiday traditions. Every Christmas, Harry Potter gingerbread houses become more common. The Hogwarts castle and the Hogwarts Express tend to be the most popular, and they are also the two hardest things on this whole page to make.
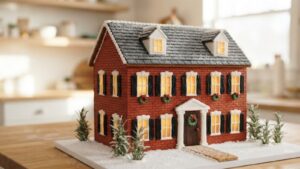
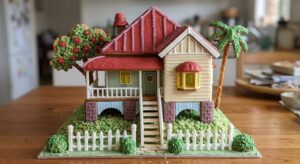
Which matters, because the pictures further down are mostly the work of people who have been doing this for years, and a few of them are professional installations. It is worth knowing that before you promise a nine-year-old a castle.
There are three real routes to a Hogwarts gingerbread house, and the gap between them is enormous. The middle one, baking from a template, is built out in full below: a free printable castle in 24 pieces that stands up as four separate boxes, so no wall has to lean on another.
Which Hogwarts Is Realistic for You
There are three genuinely different ways to end up with a Harry Potter gingerbread house, and the gap between them is enormous. Two questions sort it out.
Kits and availability from retailer listings and our own kit research, August 2026. Difficulty and timings are our assessment of what each route involves, not measurements from a build we made. Harry Potter and Hogwarts are trademarks of their respective owners, and we are not affiliated with them. Nothing you select is stored or sent anywhere.
Kits You Can Actually Buy
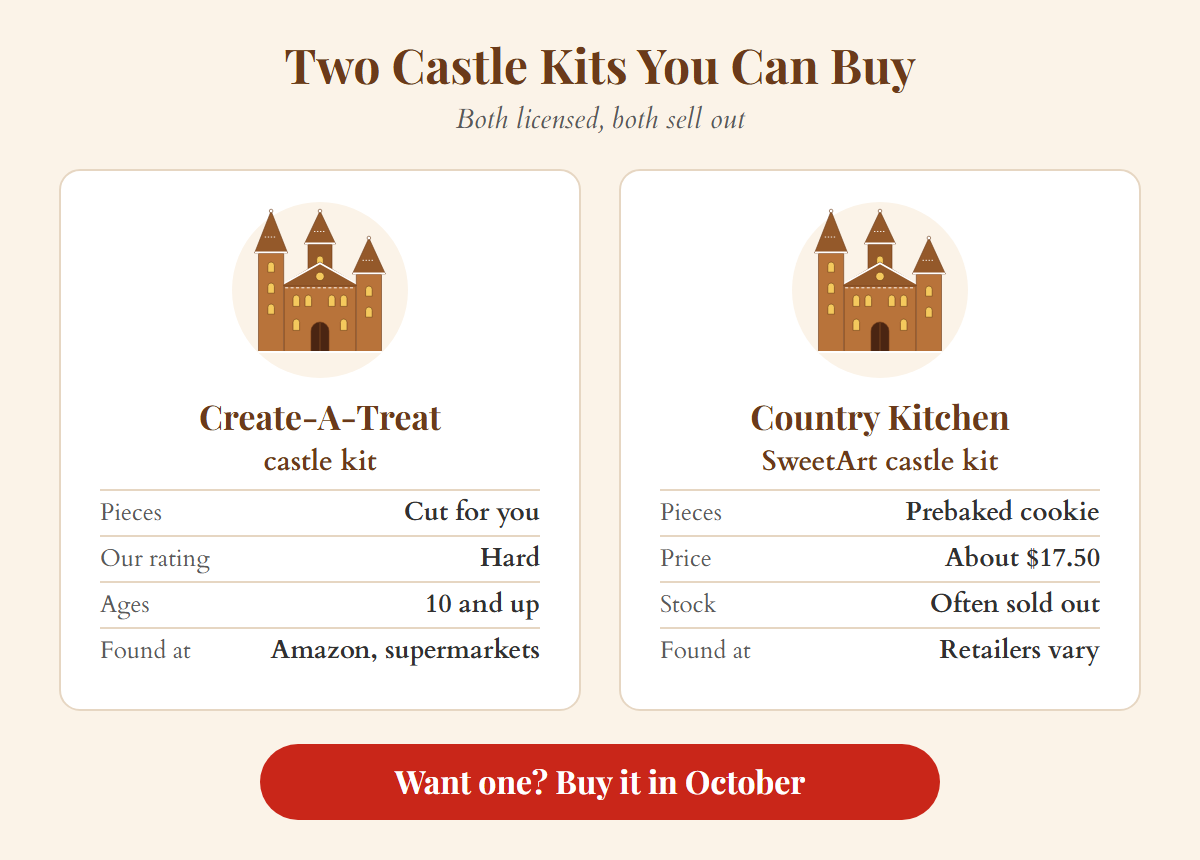
Two licensed options come up consistently. Create-A-Treat makes a Wizarding World Hogwarts castle kit, which appears on Amazon and in supermarkets; it is in our own thirty-one kit comparison where we rate it a hard build for ages ten and up, best suited to fans and families with older children who want a real project rather than an easy afternoon. Country Kitchen SweetArt sells a Hogwarts castle cookie kit with prebaked pieces, listed around $17.50 and frequently out of stock.
Both sell out, and both reappear at wildly different prices depending on the retailer and how close it is to Christmas. If you want one, buy it in October. The supermarket timing that applies to ordinary kits applies double to licensed ones, because far fewer are made.
World Market also sold a Hogwarts castle gingerbread cookie kit with prebaked vanilla panels, and its listing still sits at the top of Google for this search. When we opened that product page on November 5, 2026, it returned an error instead of the kit, so treat it as gone until World Market lists it again.
One thing worth being clear about: a castle kit is not an easy kit. The panels are cut for you, which removes the baking and the geometry, but a castle has more pieces, taller walls and more places to go wrong than a cottage. If someone in your house has never built a gingerbread house at all, read the tips first.
Free Printable Hogwarts Gingerbread House Template
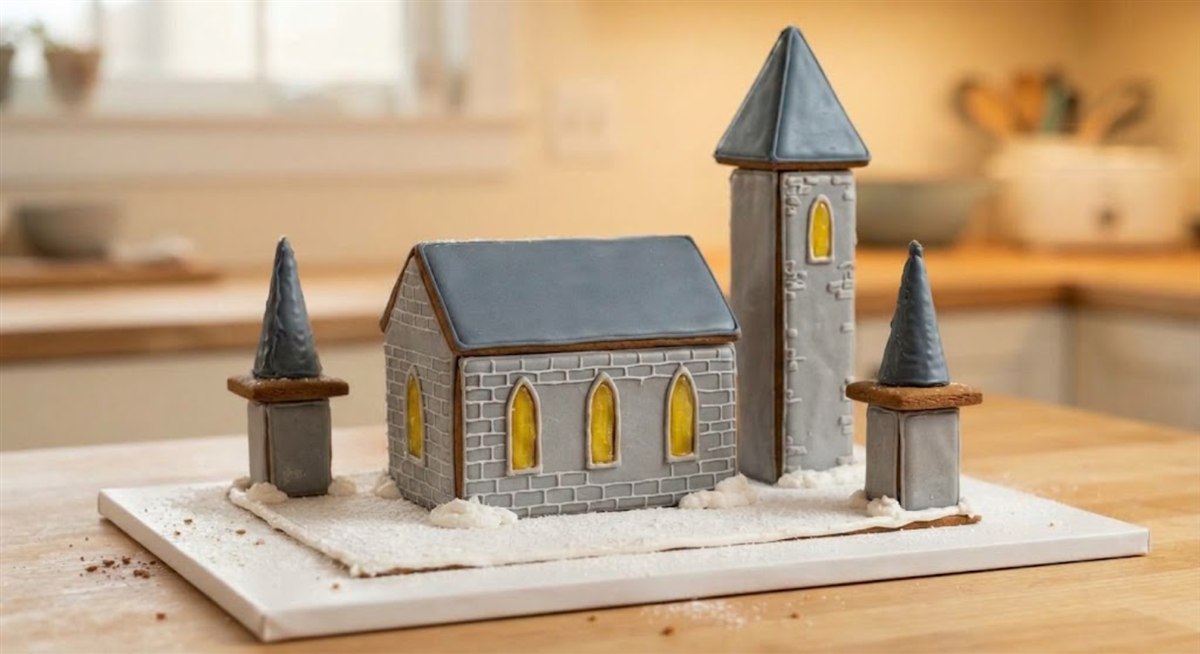
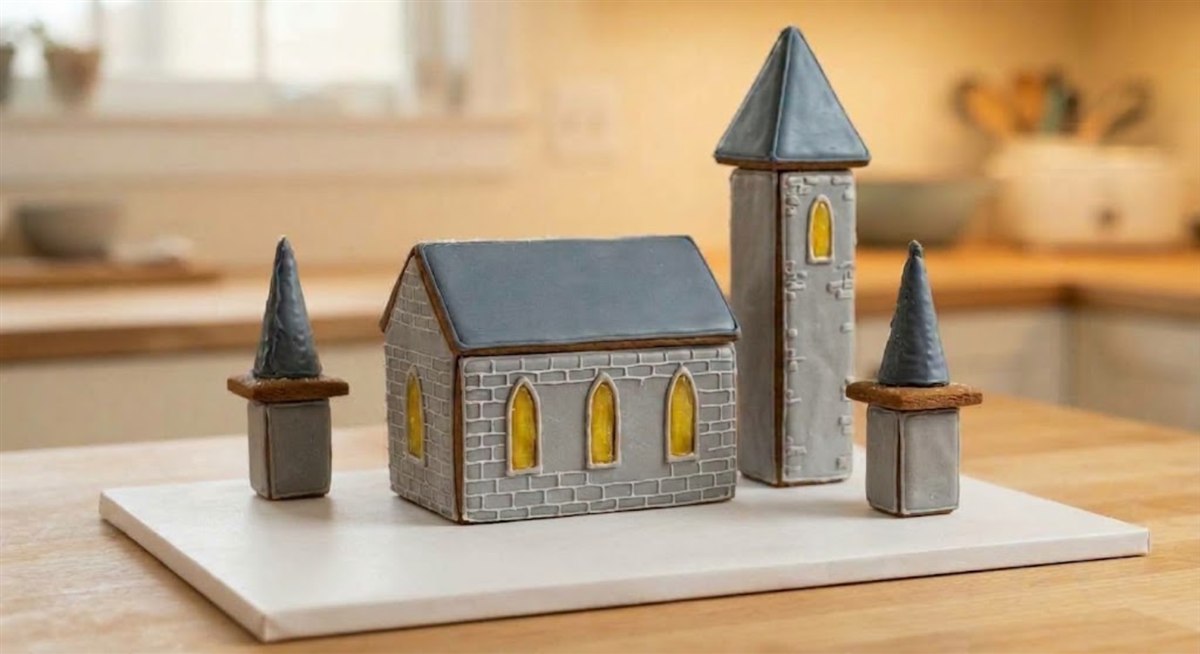
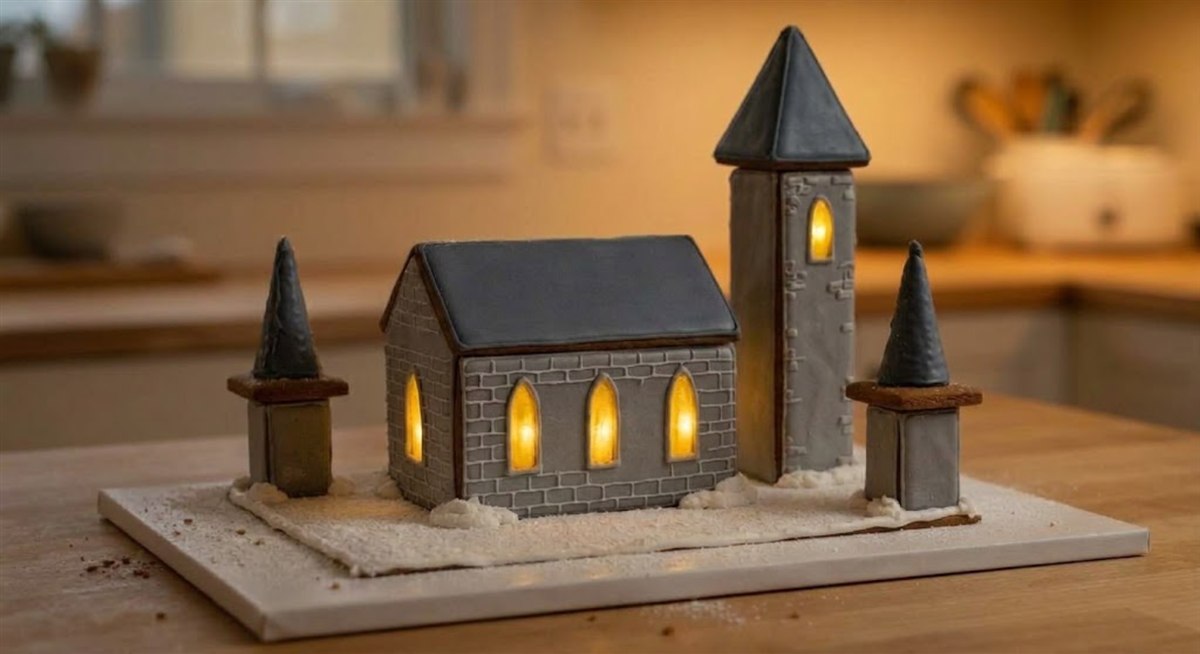
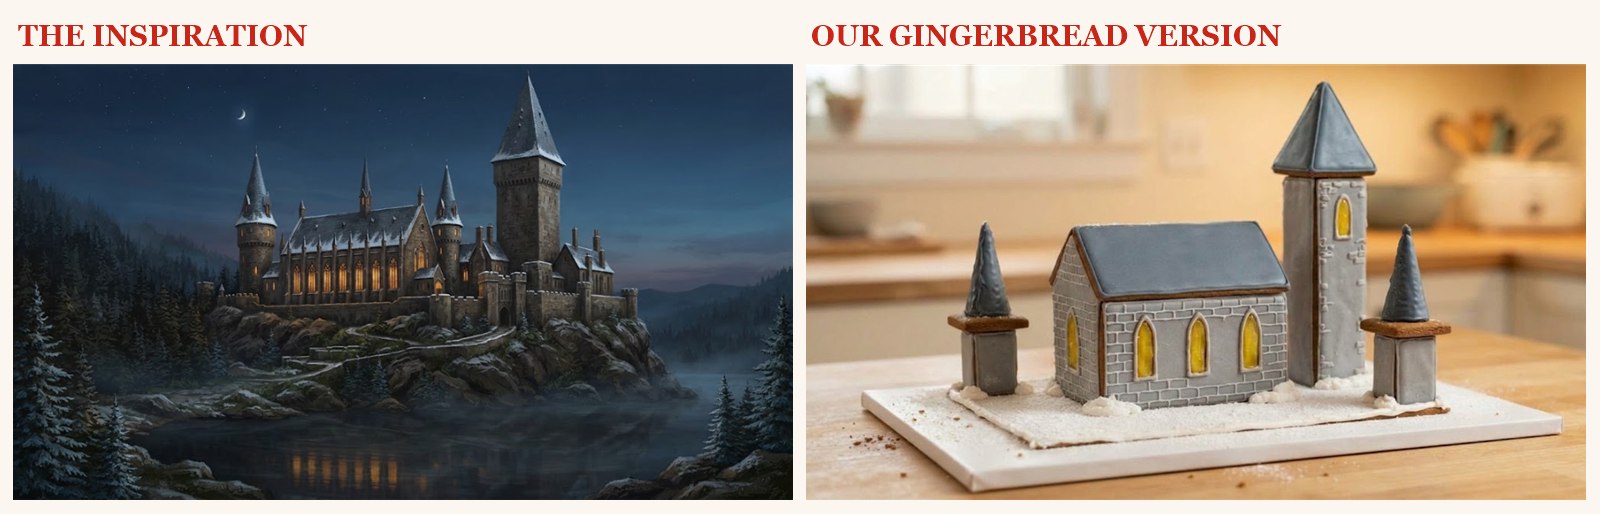
This is a Hogwarts castle you can actually finish: a long Great Hall with three glowing windows, one tall tower with a pointed roof, and two gate turrets with spires made from sugar cones. It prints on three letter-size pages, cuts into 24 pieces, and stands about 9 inches tall on a 16 by 8 inch board.
Download the Hogwarts gingerbread house template, PDF, 3 pages. Print it at Actual Size or 100 percent, never Fit to Page, and measure the red bar on any page before you touch the dough. It should read exactly 1 inch. If it reads short, your printer scaled the page, and every piece will come out small.
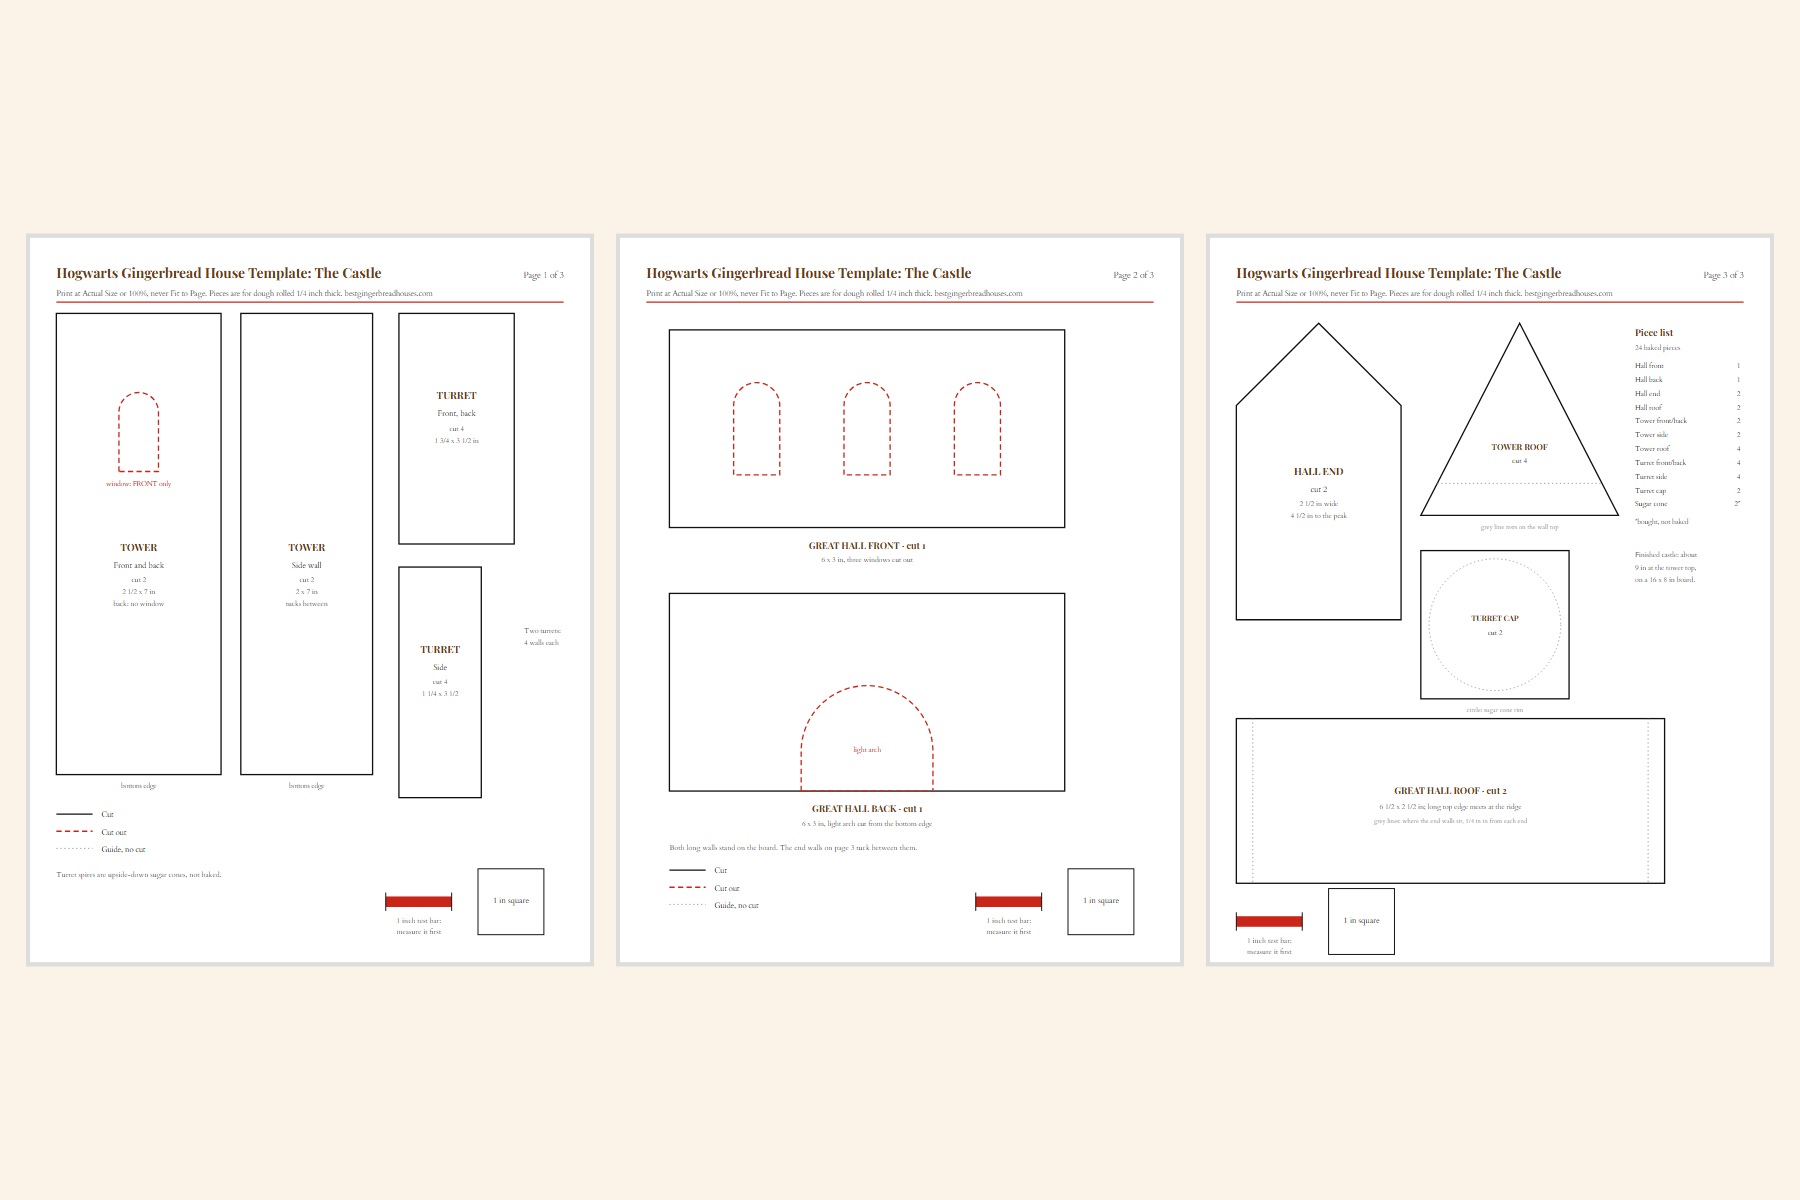
The template is a design of our own in the spirit of the castle, not an official Harry Potter or Warner Bros. design. Its geometry was checked by script before we published it: the end walls meet the roof exactly, the window in the back wall passes a 1.5 inch LED tea light, and the main tower stays the tallest point even with tall sugar cones on the turrets.
What You Need for the Castle
You need a batch and a half of dough, two batches of royal icing, a bag of yellow hard candies, two sugar cones and two gel colors. The rest is kitchen gear.
| Castle at a glance | |
|---|---|
| Pieces | 24 baked pieces, plus 2 sugar cones |
| Dough | About 214 square inches at 1/4 inch, so 1 1/2 batches |
| Bake | 300 degrees F, about 15 to 30 minutes depending on the piece |
| Hands-on time | About 8 hours, counting the chill and the bake |
| Start to finish | Two days, most of it waiting for icing to set |
| Finished size | About 9 inches tall and 14 1/2 inches wide on a 16 by 8 inch board |
Every oven runs a little hot or cool, so treat the bake times as a guide and judge each piece by its matte surface and firm edge.
For baking
- 1 1/2 batches of building-strength gingerbread dough. One batch covers about 225 square inches of finished panel and this castle uses about 214, which leaves no room for a cracked turret wall. The extra half batch is your spares.
- About 10 yellow or orange hard candies, crushed in a zip bag, for the hall windows and the tower window.
For the icing
- 2 batches of royal icing that holds a tall build, made one at a time. The first is stiff, for gluing and piping. The second is thinned with a teaspoon of water at a time for flooding the walls.
- Gel coloring: a tiny drop of black for gray stone, and blue with a touch of black for slate roofs and spires. Use meringue powder or pasteurized egg whites, because the USDA advises against eating raw or undercooked eggs and someone will eat a spire.
For the finish
- 2 sugar cones, the pointed kind. Most have a rim about 2 inches across, and the turret caps are cut 2 1/4 inches square to carry one. Measure yours before you cut the caps.
- Powdered sugar or extra white icing for snow, and a few small candies for the path if you like.
Tools
- Rolling pin with 1/4 inch guide strips, parchment and 3 half sheet pans
- Paring knife, scissors, a ruler and a small offset spatula
- 3 piping bags and a small round tip
- 6 cans for propping walls
- A heavy 16 by 8 inch cake board or a long cutting board
- 2 battery LED tea lights, 1.5 inches across: one for the hall, one for the tower
How Long It Takes, Day by Day
Plan on two days. The hands-on work adds up to about 8 hours, but most of the calendar is waiting, because each layer of the castle needs its icing hard before the next goes on top.
| When | What you do | Hands-on | Then wait |
|---|---|---|---|
| Day 1, afternoon | Print, make and chill the dough, then cut, bake and trim, and melt the candy windows. | About 4 1/2 hours with chilling and baking | Until cool |
| Day 1, evening | Flood the walls gray, pipe the stone lines, and ice the roof panels and sugar cones slate blue, all lying flat. | 50 minutes | Overnight |
| Day 2, morning | Stand the Great Hall walls and the tower walls. | 30 minutes | 2 hours |
| Day 2, late morning | Set both roofs and stand the two turrets. | 35 minutes | 2 hours |
| Day 2, early afternoon | Glue the caps on the turrets. | 10 minutes | 2 hours |
| Day 2, afternoon | Set the sugar cone spires. | 15 minutes | 4 hours |
| Day 2, evening | Pipe the roof seams, spread the snow and light the windows. | 40 minutes | Overnight before you move it |
The waits are the ones our icing guide gives for any house: 2 hours before anything sits on new walls, 4 hours before decoration, and overnight, 8 to 12 hours, for a full cure. In a damp kitchen, add time.

Picture a Saturday that starts with an ambitious plan and a nine-year-old. By four in the afternoon the dough has been chilled for forty minutes instead of overnight, the walls are bowing gently outward, and the turrets have cracked. Nobody did anything wrong except pick the two-day project for the one-day slot. The version of that afternoon that works is a plain house, a bag of red and gold icing, and a lightning bolt on the door. The planner below does the arithmetic for the version that works over a weekend.
Hogwarts Castle Build Planner
Pick when you want the castle finished and how damp your kitchen is. The planner works backward through the seven sessions and their icing waits and tells you when to start baking.
For planning only: icing sets faster or slower with the weather, so treat each wait as a minimum and check that joints feel firm before moving on. Not professional baking advice. Nothing you enter leaves your browser.
How to Make a Hogwarts Gingerbread House Step by Step
Each step does one job, and the "why this matters" lines explain the reasoning behind the steps that keep a tall castle standing.
1.Print the template and measure the test bar
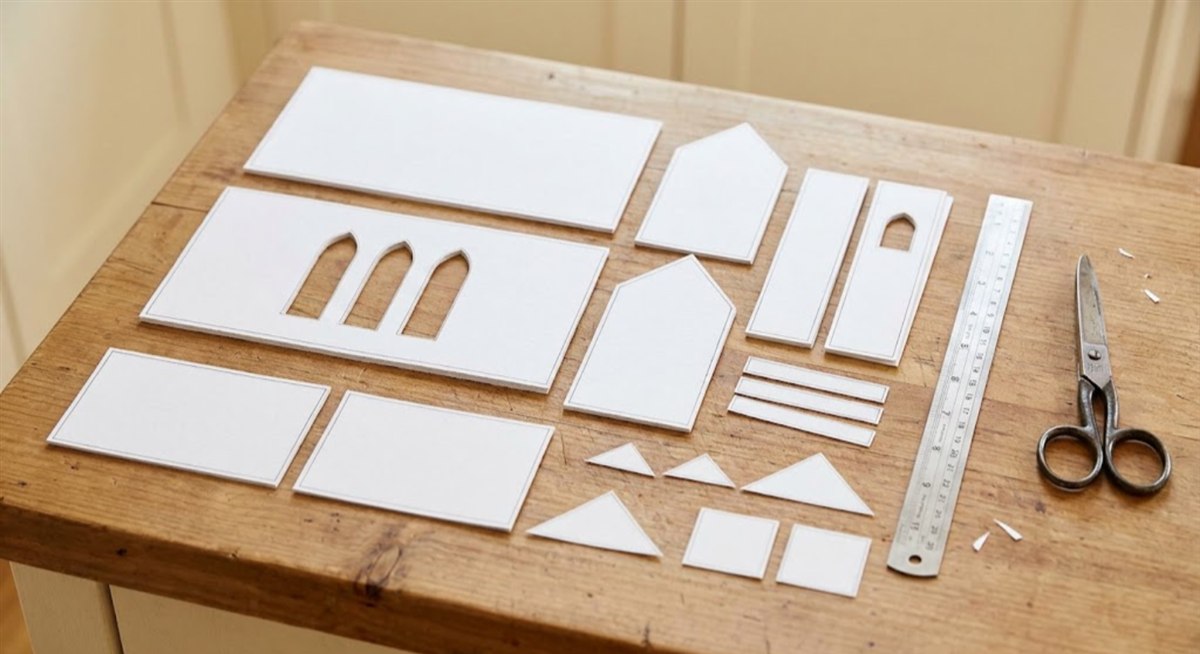
Print all three pages at Actual Size and put a ruler on the red bar, which should read exactly 1 inch. Cut out the paper pieces, including the three hall windows, the tower window and the light arch in the hall back wall.
Why this matters: the bar is the only way to know the pages printed true before you spend an afternoon on dough.
2.Make the dough and chill it
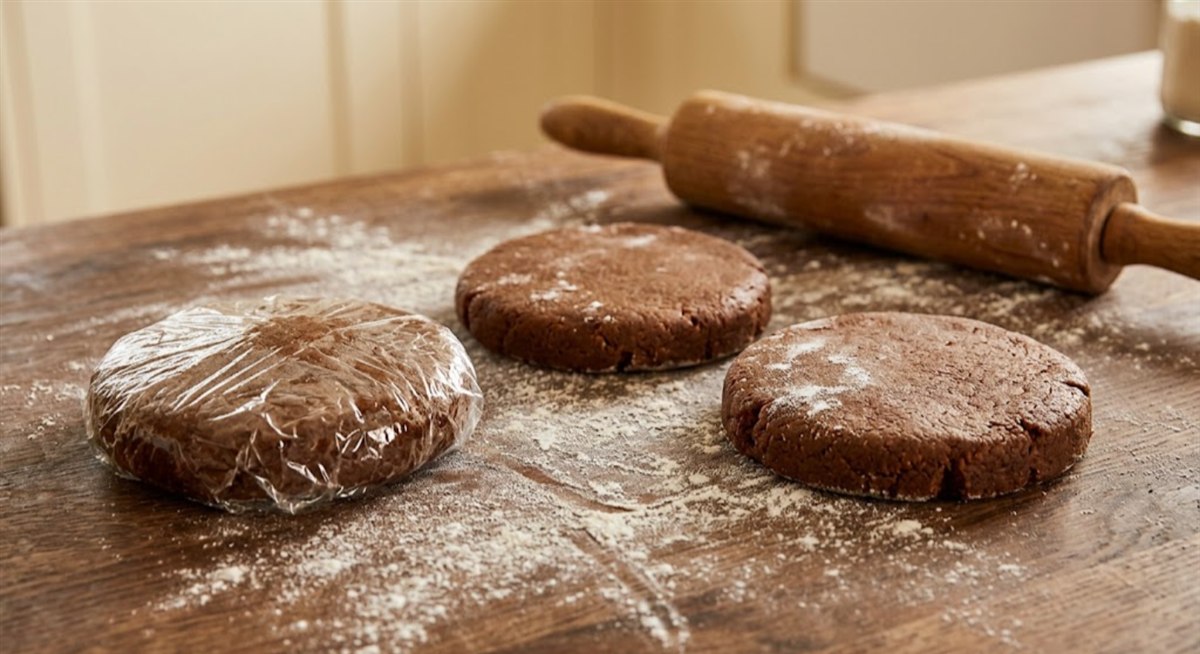
Make a batch and a half of the house dough, divide it into three, and flatten each piece into a disc about an inch thick. Wrap the discs and chill them for at least an hour, or overnight. They are ready when a poked disc dents and stays dented.
Why this matters: cold dough cuts clean and spreads less, so a 7 inch tower wall comes out of the oven as 7 inches, not 7 1/4.
3.Roll the dough and cut the tall walls
Roll one disc between sheets of parchment to an even 1/4 inch, using the guide strips. Lay the paper pieces from page 1 on top and cut the 4 tower walls and the 8 turret walls with a paring knife held straight up. Cut the windows out of one tower wall only. Slide the parchment, pieces and all, onto a sheet pan, then lift away the scraps.
Why this matters: moving cut pieces by hand stretches them. Moving the parchment does not.
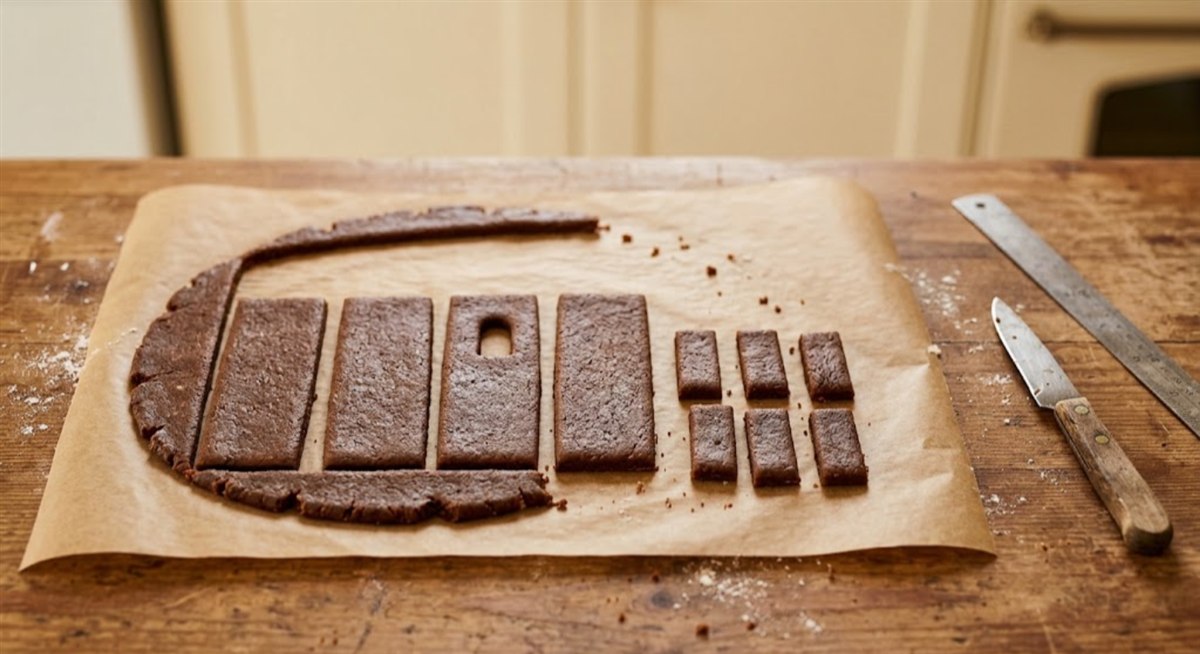
4.Cut the hall walls, roofs and caps
Roll the other discs and cut the pieces from pages 2 and 3: the hall front with its three windows, the hall back with the light arch, the 2 pointed end walls, the 2 hall roof panels, the 4 tower roof triangles and the 2 turret caps. Reroll the scraps once and cut a spare of the small turret walls.
Why this matters: the turret walls are narrow, and narrow pieces are the ones that snap when you trim them. A spare costs five minutes now.
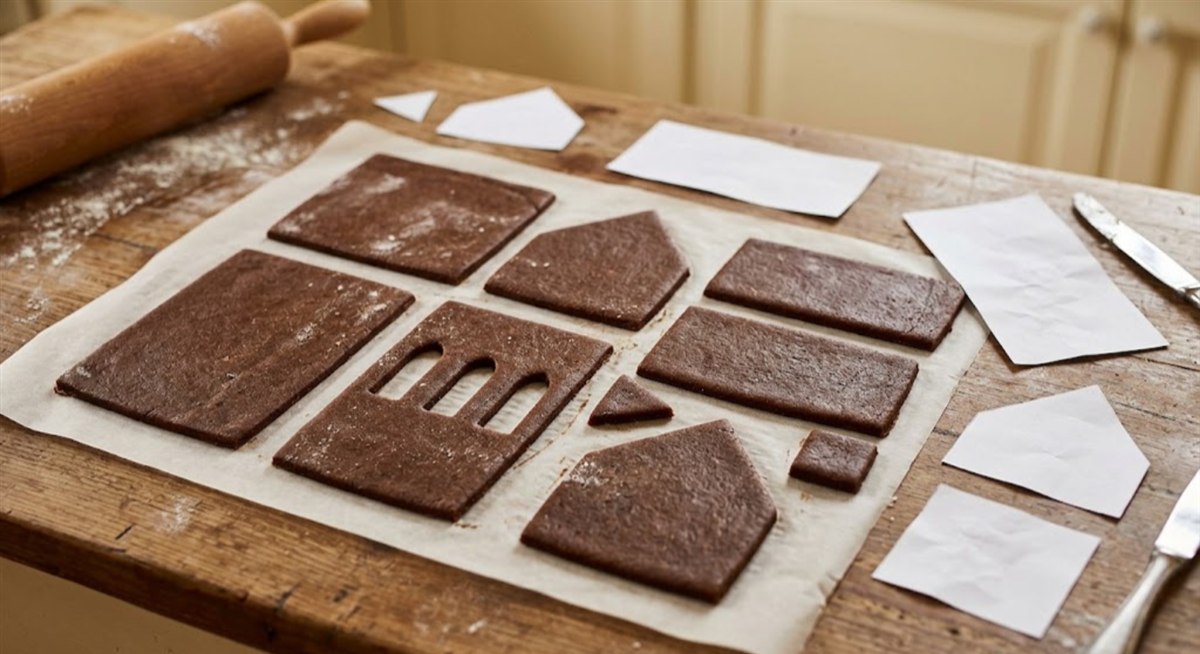
5.Bake the pieces, then melt candy into the windows
Check as you go: every oven runs a little hot or cool, so use these times as a guide, not a timer. Trust the matte surface and the firm edge over the clock.
Bake at 300 degrees F. The tall tower walls and the hall walls take 22 to 30 minutes, until the surface looks matte and the edge feels firm under a fingertip. Start checking the roof panels, turret walls and caps at about 15 minutes. Pull the hall front and the tower front about 5 minutes early, fill each window two candies deep with crushed yellow candy, and bake again until it melts flat and glassy, checking after 5 minutes.
Melted candy windows work because hard candy flows once it reaches the hard crack stage, which Colorado State University Extension puts at 300 to 308 degrees F at sea level. That is right at this oven's temperature, so it melts slowly. If it is still lumpy after about 10 minutes, raise the oven to 325 degrees F and watch closely.
Why this matters: melted candy gets far hotter than the cookie around it, and it scorches fast once it pools.
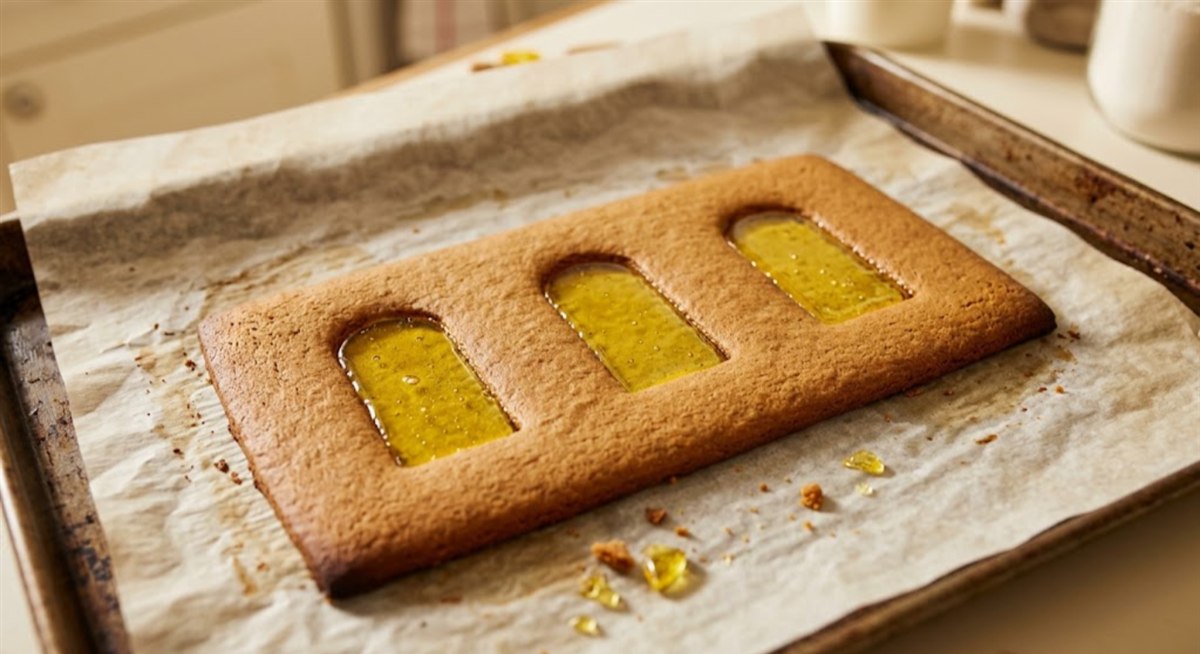
6.Trim every piece while it is warm
While the pieces are still warm, lay each paper piece back on top and shave any edge that spread past it with a sharp knife. Then leave everything on the pans until completely cool.
Why this matters: one Reddit baker who built a gingerbread Hogwarts put it plainly: stiff dough, and cut and trim the pieces while they are warm. Cooled gingerbread shatters under a knife, and a castle with sixteen corners needs every edge straight.
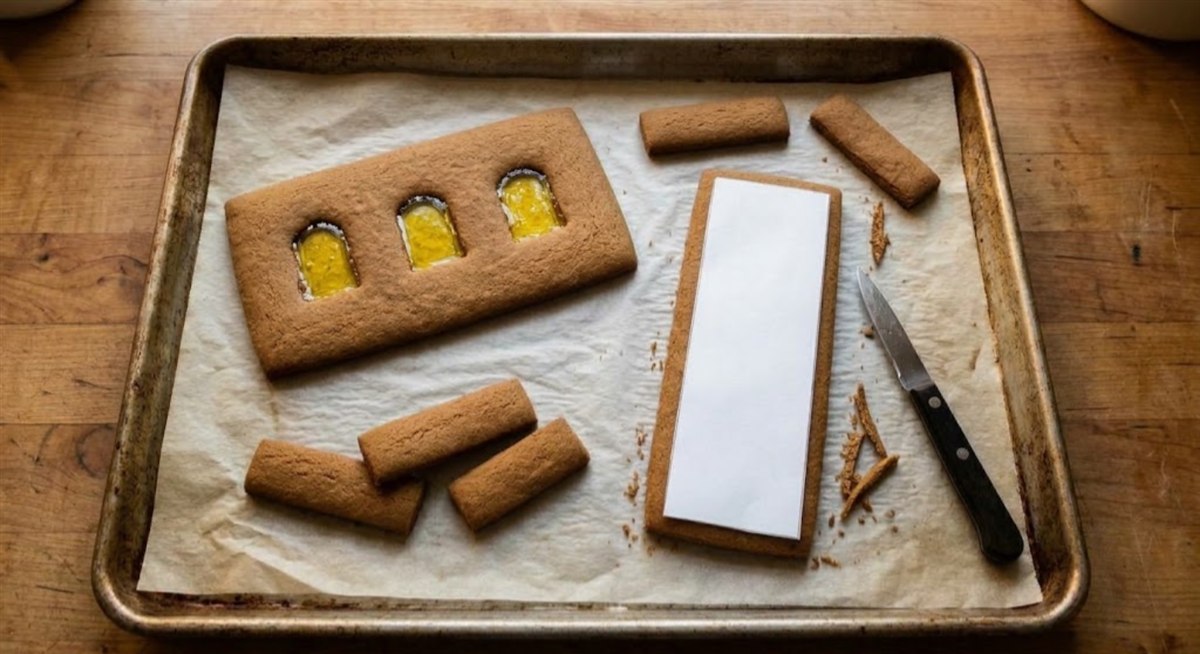
7.Ice the walls gray and the roofs and cones slate blue
With the pieces lying flat, flood the hall, tower and turret walls with thinned gray icing, leaving the candy windows clear. Once the gray has crusted, after about an hour, pipe thin white lines across it for stonework. Ice the roof panels slate blue and leave the turret caps plain. Then hold each sugar cone by the rim, spread it with stiff slate blue icing, and lay it on parchment. Let everything dry overnight.
Why this matters: icing a wall flat takes minutes. Icing the same wall once it is standing takes an hour and drips down the board.
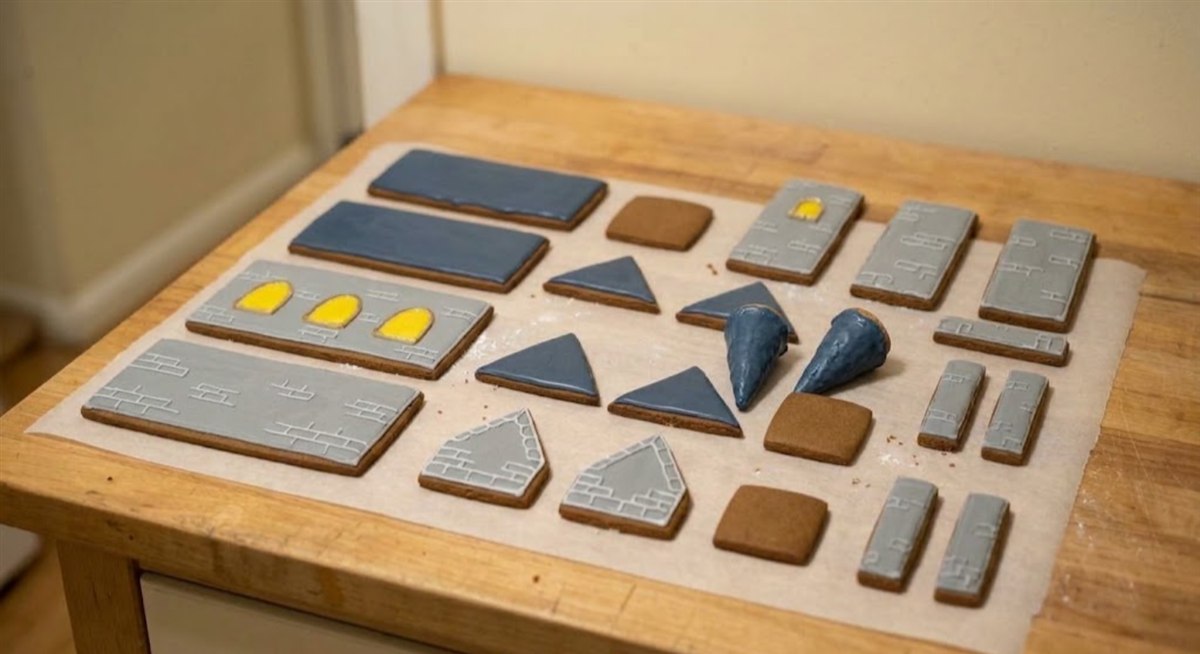
8.Stand the Great Hall and the tower walls
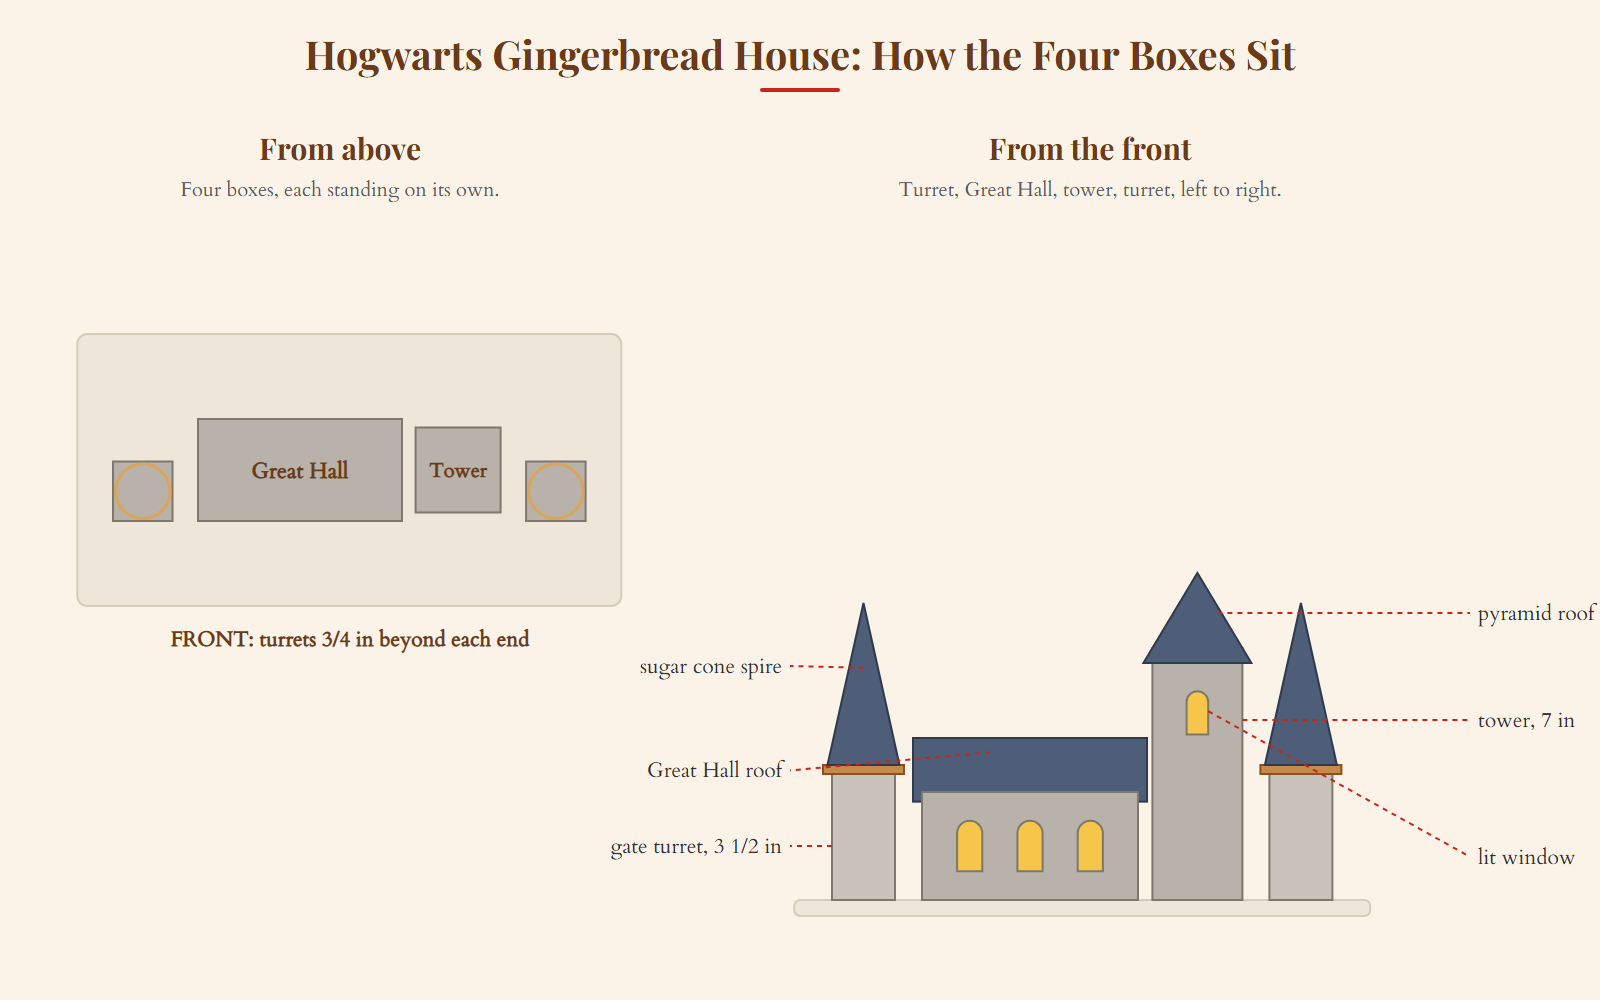
Pipe a thick line of stiff icing on the board and stand the hall front and back, then tuck the two pointed end walls between them. Build the tower 0.4 inch to the right of the hall: front and back walls first, sides tucked between. Prop every wall with cans.
Why this matters: the tower stands on its own, a finger width from the hall, so the hall roof can overhang without touching it, and a slip in one building does not pull down the other.
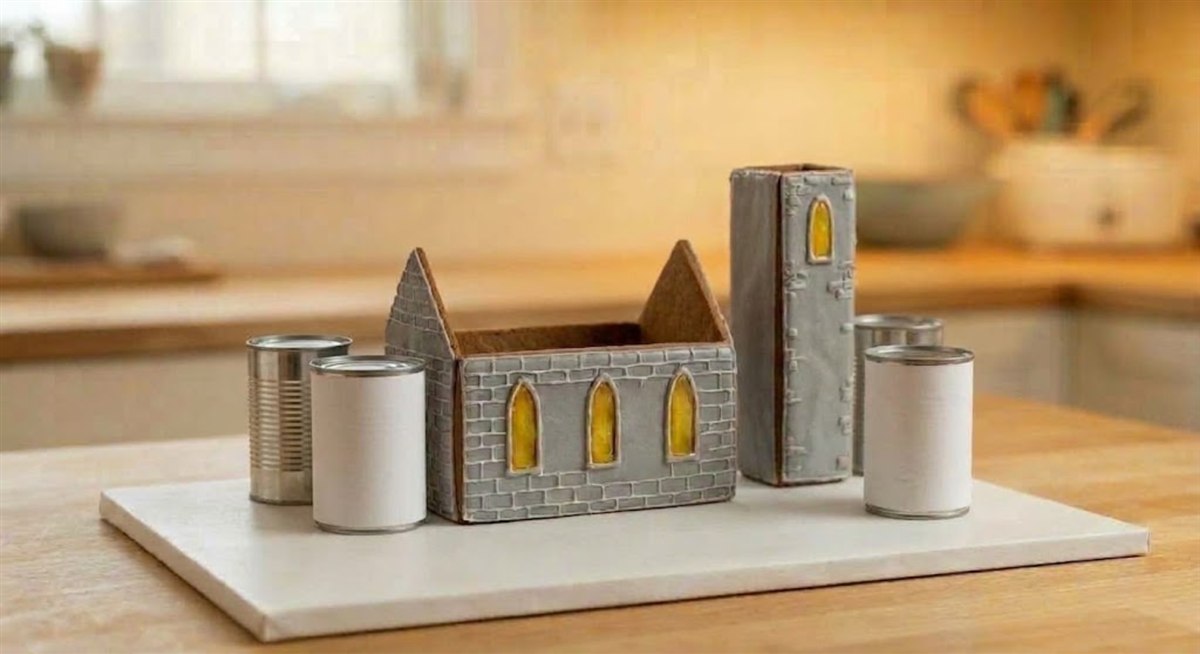
9.Set both roofs and stand the turrets
After 2 hours, pipe icing along the tops of the hall walls and lay on the two roof panels so their top edges meet along the ridge. Set the four tower roof triangles one opposite pair at a time, with the grey line on each panel resting on the wall top. Then stand the two turrets 3/4 inch beyond each end: one to the left of the Great Hall, one to the right of the tower.
Why this matters: a roof is the heaviest thing a wall carries. Two hours of set time is the difference between a roof that sits and one that slides.
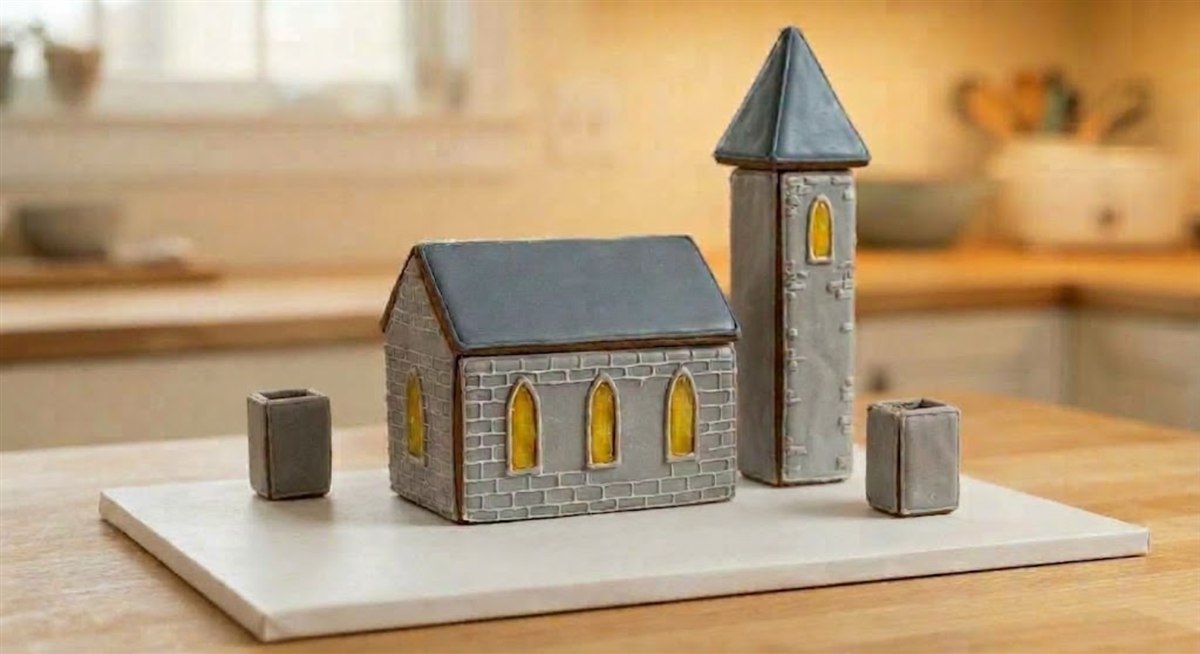
10.Glue the caps on the turrets
Pipe icing around the top edge of each turret and press a square cap on, centered so it overhangs about 1/4 inch all round.
Why this matters: the cap ties the four narrow walls into one solid box, and it gives the cone a flat platform instead of four thin edges.
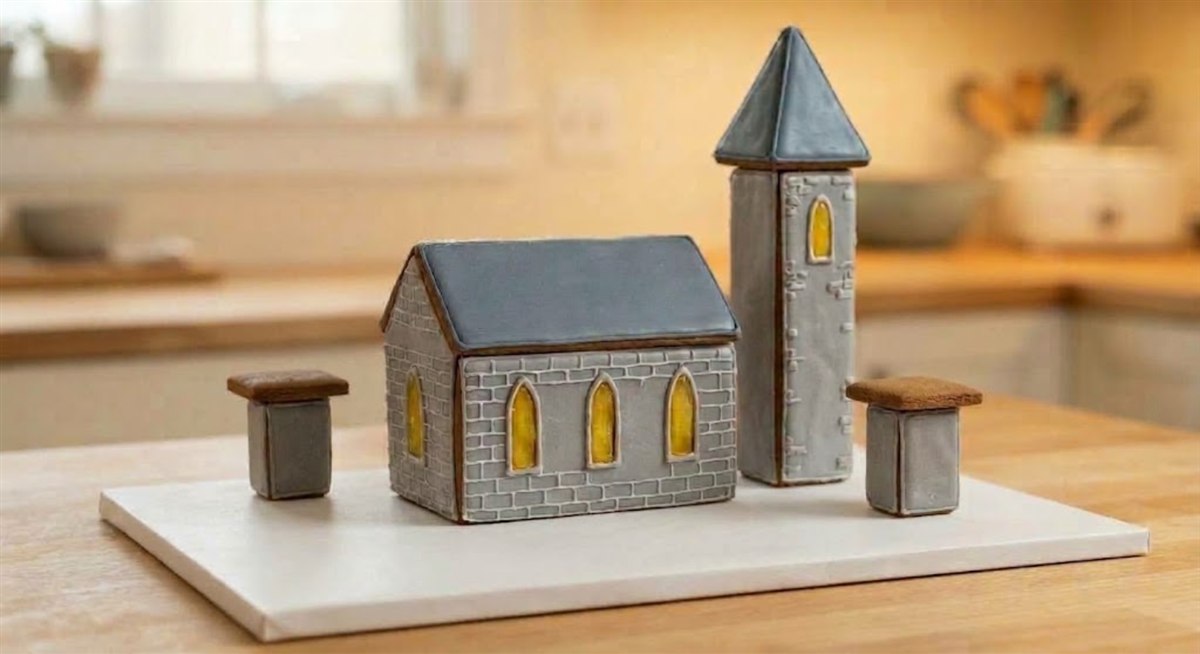
11.Set the sugar cone spires
After 2 more hours, pipe a ring of stiff icing inside the circle on each cap and set an iced sugar cone on it, point up. Check from the front and the side that each one stands straight.
Why this matters: a sugar cone is light and already pointed, which is exactly what a baked cone struggles to be. This one swap removes the hardest part of most castle builds.
12.Pipe the seams and snow, then light the windows
After 4 hours, pipe the roof ridge and the corner seams. Spread icing snow over the board, add a candy path if you like, and slide a tea light through the arch in the hall back wall and another into the tower.
Why this matters: the snow hides the gaps between the four boxes, and the lit windows are what turn them into a castle. Let it stand overnight before you move it.
Castle Build Checklist
Tick each step as you finish it. When a step needs icing to set, the checklist tells you the time it is safe to carry on. Your ticks are saved on this device.
0 of 12 steps done
No waits running yet.
For planning only: set times change with the weather, so press a joint gently before you load it. Not professional baking advice. Your progress is saved in this browser only and never sent anywhere.
Why the Castle Is Four Boxes, Not One
Most homemade castles fail at the corners. As one baker on Reddit put it, the hardest part by far is keeping the walls up where the corners meet, and a single castle with wings, towers and turrets attached to each other has a lot of corners leaning on a lot of other corners. When one joint slips, it drags the rest with it.
Three things make a castle harder than a cottage, and the design answers each one.
- Height. A castle is tall, and tall gingerbread walls carry the weight of everything above them. This is the one build where the dough recipe genuinely decides the outcome. Use a structural dough, not a cookie dough, and give it the full cure.
- Turrets. Cones are the part everyone underestimates. A cone is a curved surface made from a flat biscuit, which means it has to be rolled or scored while warm and it cracks if you wait. This template skips that problem with sugar cones, but bake spares of the small turret walls anyway.
- Time. Two days is the realistic figure, most of it waiting. Dough chills overnight, panels cool completely before assembly, and each stage of the structure sets before the next goes on. There is no version of this that fits into one afternoon, and trying is how castles end up on their sides.
This template splits the castle into four freestanding boxes. The Great Hall, the tower and each turret stand on the board by themselves, with a small gap between them. Each box is a plain four-wall build, the kind you would make for any gingerbread house, and the gaps disappear under snow once it is finished. The towers are square, with a pyramid roof or a sugar cone spire, because a square tower is four flat walls and a round one is a curved bake that cracks.
Say a turret wall cracks on the second morning. In a castle built as one piece, that crack runs into whatever the turret was holding up. Here you lift the turret off the board, glue in the spare wall, and stand it back where it was, and nobody looking at the finished castle can tell which turret was rebuilt.

Troubleshooting
| Problem | Likely cause | Fix |
|---|---|---|
| The pieces came out bigger than the template | Dough too warm, or rolled thinner than 1/4 inch | Trim them back while warm. Next time chill the cut pieces for 10 minutes before baking. |
| A turret wall snapped | Narrow pieces break when trimmed cold | Use the spare, or glue the break with stiff icing and face it to the back. |
| The hall roof slides | Walls not set, or icing too thin | Lift it off, wait another hour, and use stiffer icing. Prop each panel with a can for 20 minutes. |
| The tower leans | Board not flat, or walls stood before the icing line firmed | Push it straight and prop it on two sides until it sets. Check the board on a level counter. |
| A sugar cone tips over | Not enough icing in the ring, or the cap was still soft | Pipe a thicker ring and hold the cone for a minute. Wait the full 2 hours after the caps. |
| Candy windows are cloudy or bubbly | Too hot, or the candy pieces were too big | Crush finer and watch the second bake closely. Cloudy glass still glows once lit. |
House Colors and Decorating
Whichever route you take, the decoration is what makes it read as Harry Potter rather than as a castle. Most of that work is four colors, and two of the four are genuinely difficult to mix.
House Colors, and How to Actually Get Them
Picking a house is the easy part. Two of the four colors are genuinely difficult to mix in royal icing, and knowing which two before you start saves an afternoon.
Decorating guidance based on how royal icing behaves with gel colors. Sweet brands vary by country, so treat the candy suggestions as the type to look for rather than a shopping list. Harry Potter and the Hogwarts houses are trademarks of their respective owners, and we are not affiliated with them. Nothing you select is stored or sent anywhere.
Beyond the house colors, the details that do the most work are the cheapest ones: round black glasses piped in icing, a lightning bolt, a striped scarf. A plain gingerbread man with those three things on it is unmistakable, and it takes about ninety seconds.
The Easiest Version That Still Works
If you take one thing from this page, take this: you do not need a castle.
A plain gingerbread house with a Gryffindor roof and four house flags reads as Hogwarts. A tray of gingerbread men in scarves and glasses reads as Harry Potter to any child who has seen the films. Both are an afternoon, both work with young children, and neither has any way of collapsing. Star Wars fans get the same treatment on our gingerbread AT-AT page, which covers the LEGO set and a real baked walker.

Picture the version that actually happens in most kitchens: a five-year-old who wants to put sweets on things, a supermarket kit, and one piping bag of red icing. Twenty minutes in, there is a scarf on the gingerbread man and a lightning bolt drawn slightly too large across his forehead, and it is perfect. The castle in the photographs below took somebody two days and it is not better than that.
No oven at all is fine too. For small children, glue graham crackers around a small box for the hall, stand an upside-down sugar cone on a second box for a tower, and ice the lot gray. Our graham cracker gingerbread house guide covers the gluing, and it is a castle a six-year-old can finish before dinner.
Our candy guide covers what to buy for the house-color work, and the templates will give you a plain house to start from if you would rather bake than buy.
What Other People Have Made
For scale and for ideas. Some of these are hobby builds and some are professional displays, and the difference is not always obvious from a photograph.
Castles People Have Actually Built


Diagon Alley and the Village


House Crest Cookies


The Simplest Version That Still Works


How Long the Castle Keeps
Kept dry, out of the sun and away from the kettle, a royal icing castle holds its shape for the whole season as a display piece. If dust is a worry, drape it loosely with a clean cloth rather than wrapping it. For eating, sooner is better, because the gingerbread dries out the longer it stands. How long gingerbread lasts covers display and eating times in detail.
FAQ
Is this an official Harry Potter design?
No. The template is our own design in the spirit of the castle. Harry Potter and Hogwarts are trademarks of their owners, and we are not affiliated with them.
How tall is the finished castle?
About 9 inches at the top of the tower roof. The turrets reach about 8 1/4 inches with a 4 1/2 inch sugar cone, so the tower stays the tallest point.
Can I put a real candle inside?
No. Use battery LED tea lights. A flame inside a sugar and gingerbread box can scorch the walls and melt the candy windows.
Can I make it bigger?
Not by scaling the print. The pieces are sized for dough rolled 1/4 inch thick, so a print at 125 percent leaves gaps where walls tuck between each other. Bake a second tower or two more turrets from the same pages instead.
Where can I buy a Hogwarts gingerbread house kit?
Create-A-Treat's Wizarding World Hogwarts castle kit is the one most often in stock, at supermarkets and online. The kits section near the top of this page covers it and the alternatives, and our kit comparison rates it against thirty other kits.
Make One with Best Gingerbread Houses
Whichever route you picked, the rest of the build is the same as any other gingerbread house, and we have the rest of it. The full method takes it from dough to finished roof, the royal icing guide covers the mortar that holds a tall build up, and the ideas gallery is where to go when the turrets are done and you have run out of plan.