
A red barn is the gingerbread house kids ask for once they have built a cottage. The trouble is the roof. A barn roof bends halfway up, and on most homemade barns that bend sags between the end walls within a day.
Our house dough and royal icing recipes set every bake temperature and wait, and a script checked the free template, down to the doors and the silo. One Food Network barn is rated advanced and dries 24 hours between stages. Ours hides a truss in the middle that holds the bend.
You get a barn about 6 inches tall, an optional silo, a page of farm animal cookies and a party plan. Start with the template.
Gingerbread Barn: At a Glance
- Difficulty: Medium. The walls are simple. The four piece roof is the part that needs patience, and the hidden truss makes it behave.
- Total time: about 2 days, in seven sessions. Most of it is icing drying.
- Active time: about 8 hours with the silo and 7 1/2 without, counting the dough chill and the bake. Add 1 1/2 hours for animal cookies.
- Makes: a barn 5 1/2 inches wide, 6 1/2 inches deep and about 5 7/8 inches to the ridge, a silo about 6 5/8 inches to the lid plus its dome, on a 14 by 12 inch board. 13 baked barn pieces and 7 silo pieces.
- Template: free 7-page PDF, US Letter, true size with a 1 inch test bar on every page, including the animal cookies.
Tools: printer, ruler, scissors, rolling pin with 1/4 inch guides, parchment, 2 half sheet pans, paring knife, 6 piping bags, a small round tip, cans for propping, a 14 by 12 inch cake board or wooden board, 1 battery LED tea light.
Materials
- 1 batch of our construction dough that bakes flat for the barn, and a second batch for the silo
- 2 batches of stiff royal icing that sets like glue
- Gel food coloring: red, brown, black and leaf green
- 1 sugar cone for the silo dome
- 4 pretzel rods for the door track and fence posts, and a handful of pretzel sticks for rails
- About 1/2 cup of mini shredded wheat cereal for hay
- 1 cup of shredded coconut for snow or grass
- For animal cookies: 1 batch of cut-out cookie dough and 1 batch of cookie icing per 24 animals
Steps
- Print the template at Actual Size and measure the test bar.
- Make the dough and chill it for at least an hour.
- Roll and cut the front wall, the back wall and the hidden truss.
- Cut the side walls, the four roof panels and the two sliding doors.
- Cut the six silo panels and the lid, if you want a silo.
- Bake at 300 degrees F and trim every piece while it is warm.
- Flood the walls, the doors, the roof panels and the silo.
- Pipe the door X, the trim, the boards and the shingles, then leave it overnight.
- Stand the back wall and the two side walls.
- Set the hidden truss and the front wall, then wait 2 hours.
- Set the two steep lower roof panels and prop them.
- Lay the two upper roof panels, pipe the bends, then wait 2 hours.
- Ice the sliding doors open and set the pretzel track.
- Hang the hayloft door and fill the loft with hay.
- Stand the silo, then add the lid and the cone dome.
- Finish the yard, the fence and the animals, and light the barn.
Notes: times are worked out from the set times on our icing page, not timed on a build. Ovens and doughs vary, so treat every bake time here as a starting point: check early, go by the matte surface and firm edge, and bake a test strip before you build. The board and the tea light are not food. Construction dough bakes hard; for eating, use cookie dough for the animals.
Free Printable Gingerbread Barn Template
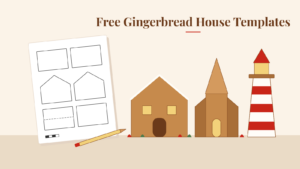
The template is seven US Letter pages: ten barn shapes, the silo and four farm animals, all at true size over a faint 1/2 inch grid. Download the PDF, print it at Actual Size, and check that the red bar measures 1 inch before you cut anything.

| Piece | Cut | Size |
|---|---|---|
| Front wall | 1 | 5 1/2 in wide, 3 in to the eaves, 5.6 in to the peak, with a big doorway and a hayloft opening |
| Hayloft door | 1 | The 1.1 x 1 in piece cut from the hayloft opening |
| Back wall | 1 | Same outline, with a light doorway |
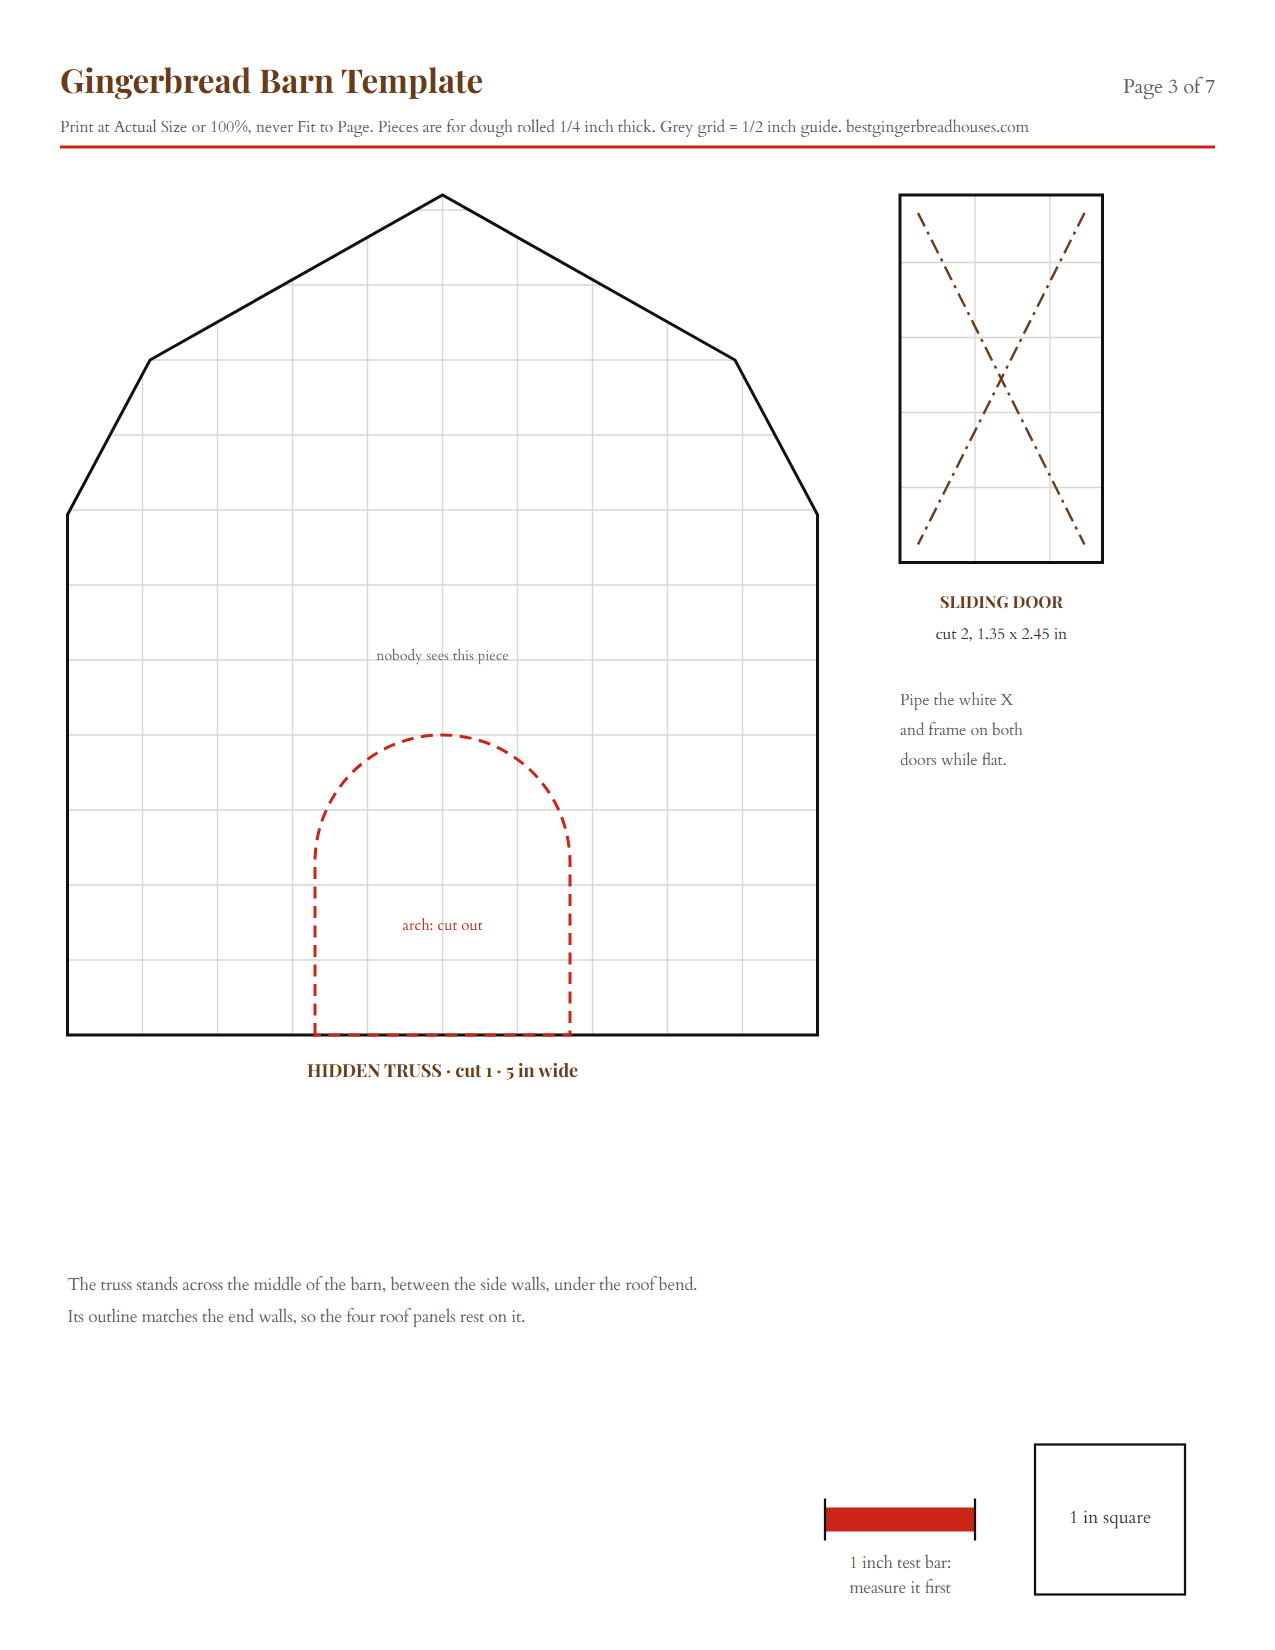
| Hidden truss | 1 | 5 in wide, same roof line, with an arch |
| Sliding doors | 2 | 1.35 x 2.45 in |
| Side walls | 2 | 6 x 3 in, two windows each |
| Lower roof panels | 2 | 2 x 7.2 in |
| Upper roof panels | 2 | 2.44 x 7.2 in |
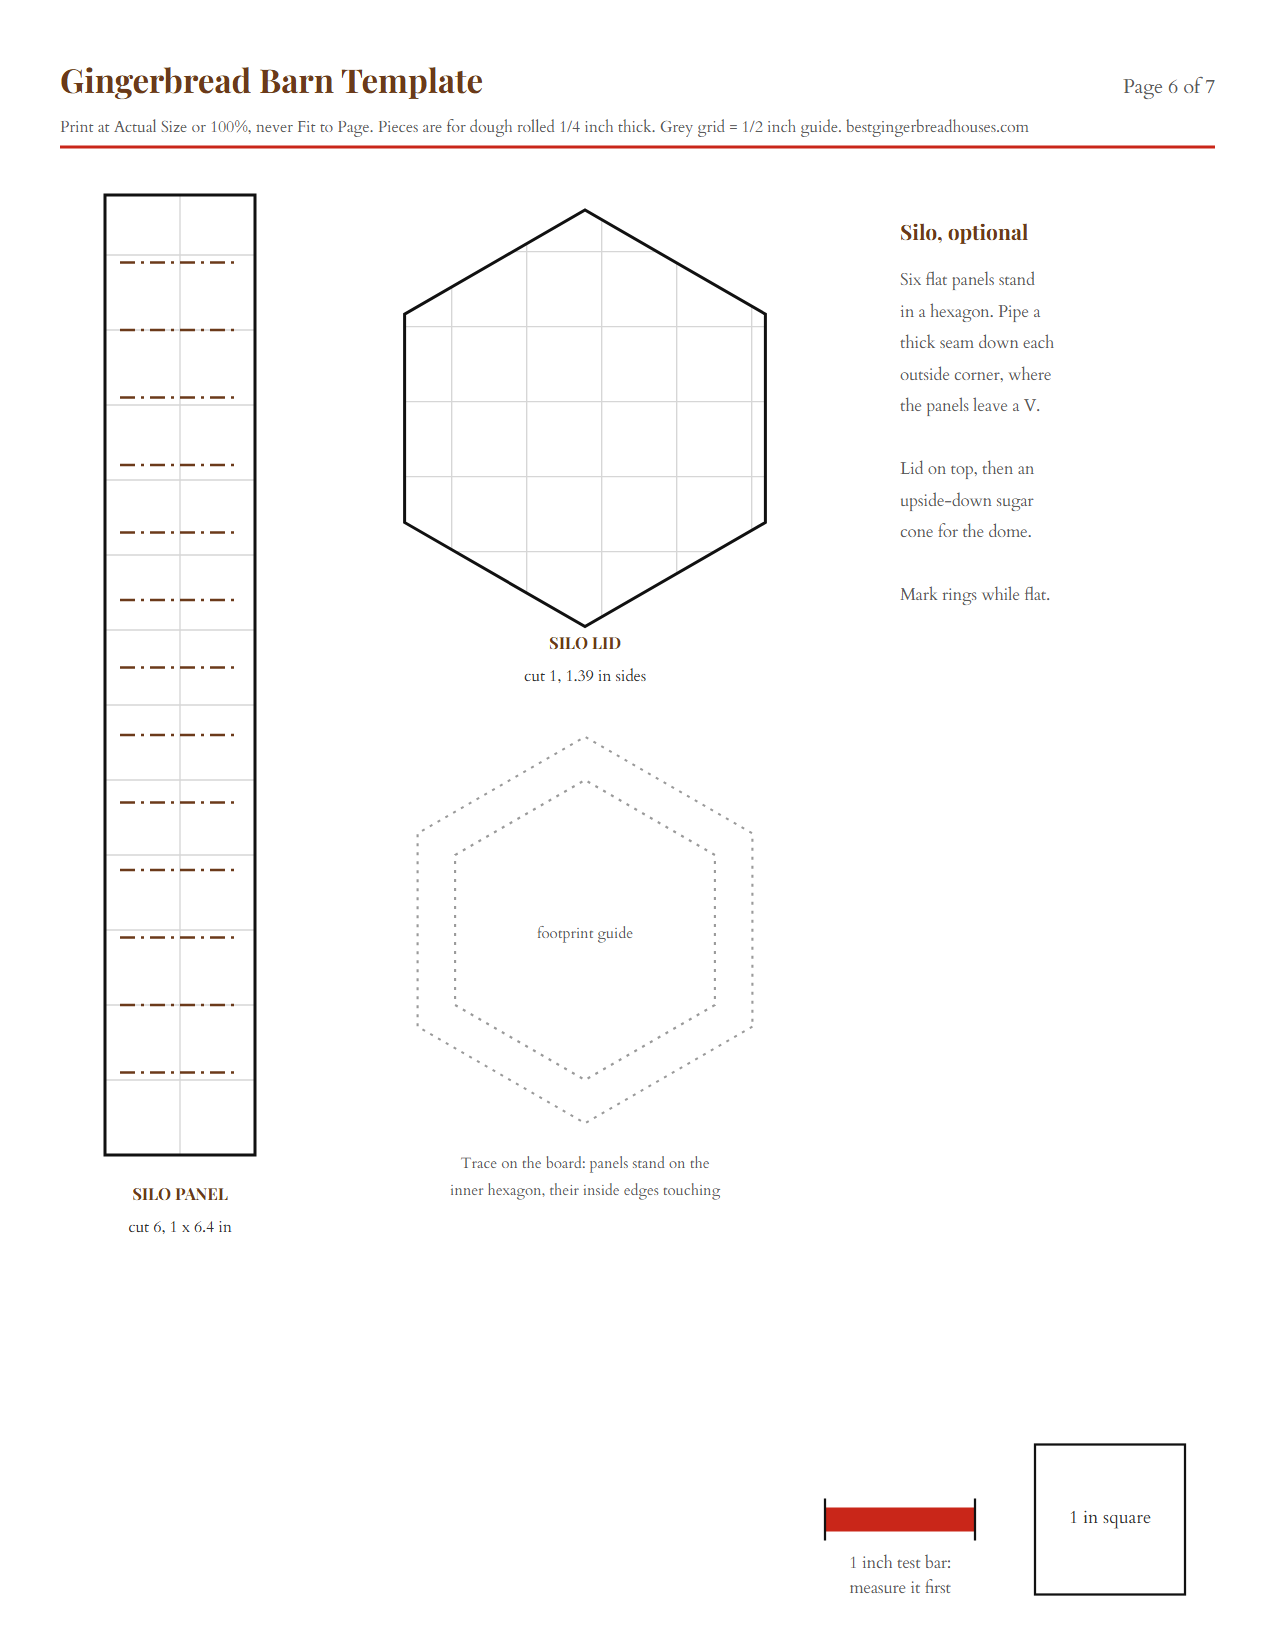
| Silo panels and lid | 6 + 1 | 1 x 6.4 in panels and a six-sided lid |
The barn pieces come to about 168 square inches, so one batch of house dough covers them. The silo takes about 43 more, which is why it comes from the second batch.

If you only want a small barn for a village, the small barn sheet on our templates page is 10 pieces and about 3 inches across. To weigh the barn against other shapes, see twelve house shapes compared side by side.
Why a Gambrel Roof Needs a Hidden Truss
A gambrel roof is what makes a barn read as a barn. Extension’s guide to barn roof styles describes it as two slopes on either side of a center ridge, the lower one steeper than the upper. Ours drops at about 62 degrees, then flattens to about 29.
That shape is easy to cut and hard to keep straight. In gingerbread, each roof panel only rests on the end walls. A plain cottage roof is one panel per side, and it braces itself. A gambrel has four panels and a bend where two of them meet. Nothing holds that bend in the middle of the barn, so it slowly drops while the icing sets, and the roof line ends up curved.
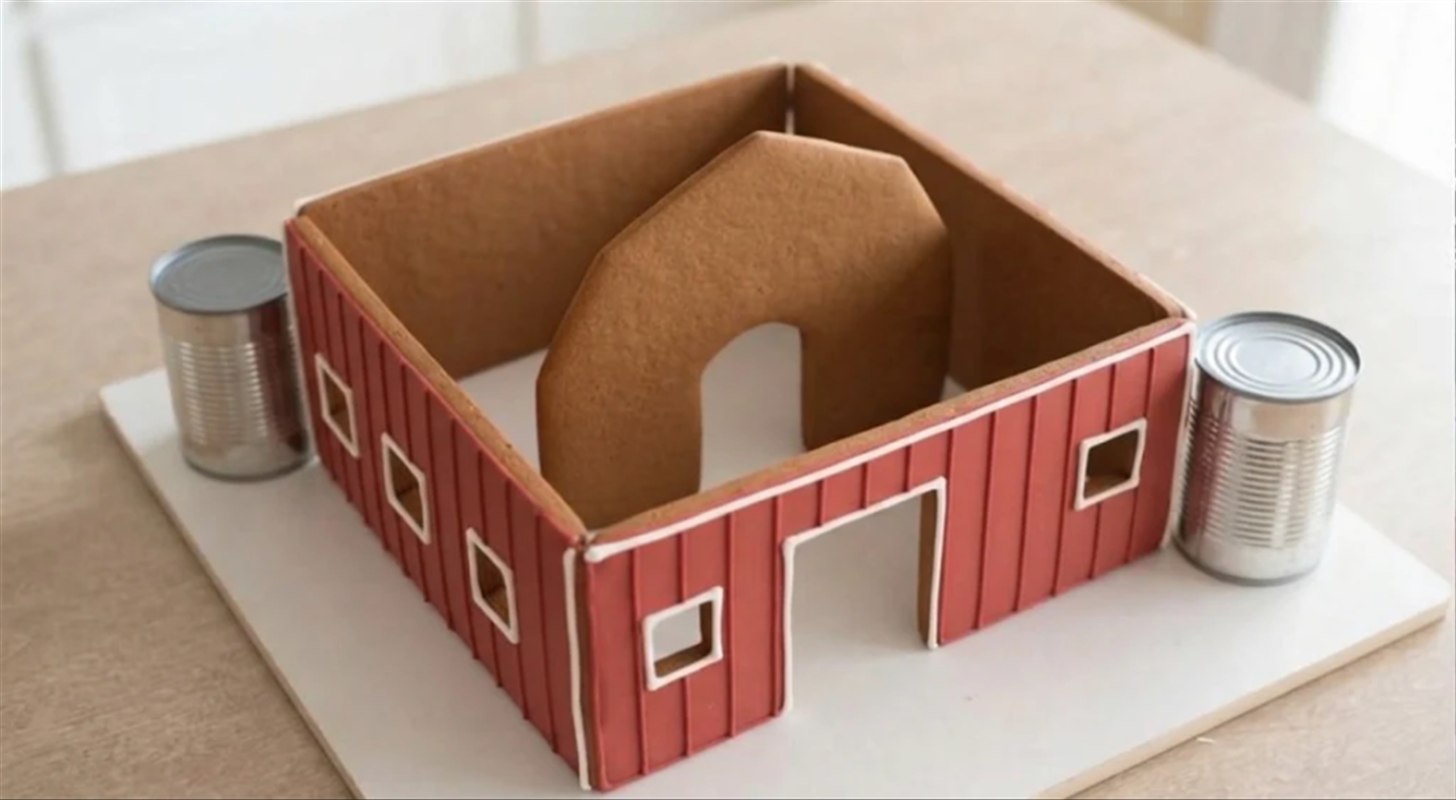
The fix is a third gable. The hidden truss is a piece with exactly the same roof line as the end walls, standing across the middle of the barn between the side walls. The four roof panels rest on it at the bend. Our template script checked the change: it cuts the unsupported stretch of roof from 6 inches to under 3. Real barns solve the same problem with braced rafters, per that Extension guide. Ours is one piece of gingerbread with an arch cut in it, so light still passes through.
Why the lower panels go first. The steep lower panels sit on the side walls and lean on the end walls, so they hold themselves once propped. The shallow upper panels then rest on the lower panels’ top edges and on the truss. Set them in the other order and the upper panels slide.
For comparison, the Food Network Kitchen gingerbread barn is 8 inches on every side, rated advanced, and dries about 24 hours between stages. Our truss lets you wait 2 hours instead.
Three Looks for a Red Barn
The template stays the same. Only the icing changes.
- Classic red barn. Barn red walls and doors, white X trim, white window frames and a slate grey roof. Mix barn red from red gel with a dot of brown, so it reads as old paint, not candy.
- Snowy Christmas barn. The classic red with a thick layer of white icing on the roof, a few piped icicles at the eaves, and a small green wreath on the hayloft door. Coconut snow on the board.
- Rustic brown barn. Brown walls with wood grain lines dragged through wet icing with a toothpick, cream trim and a dark green roof like painted metal.

Farm Animal Cookies for the Yard
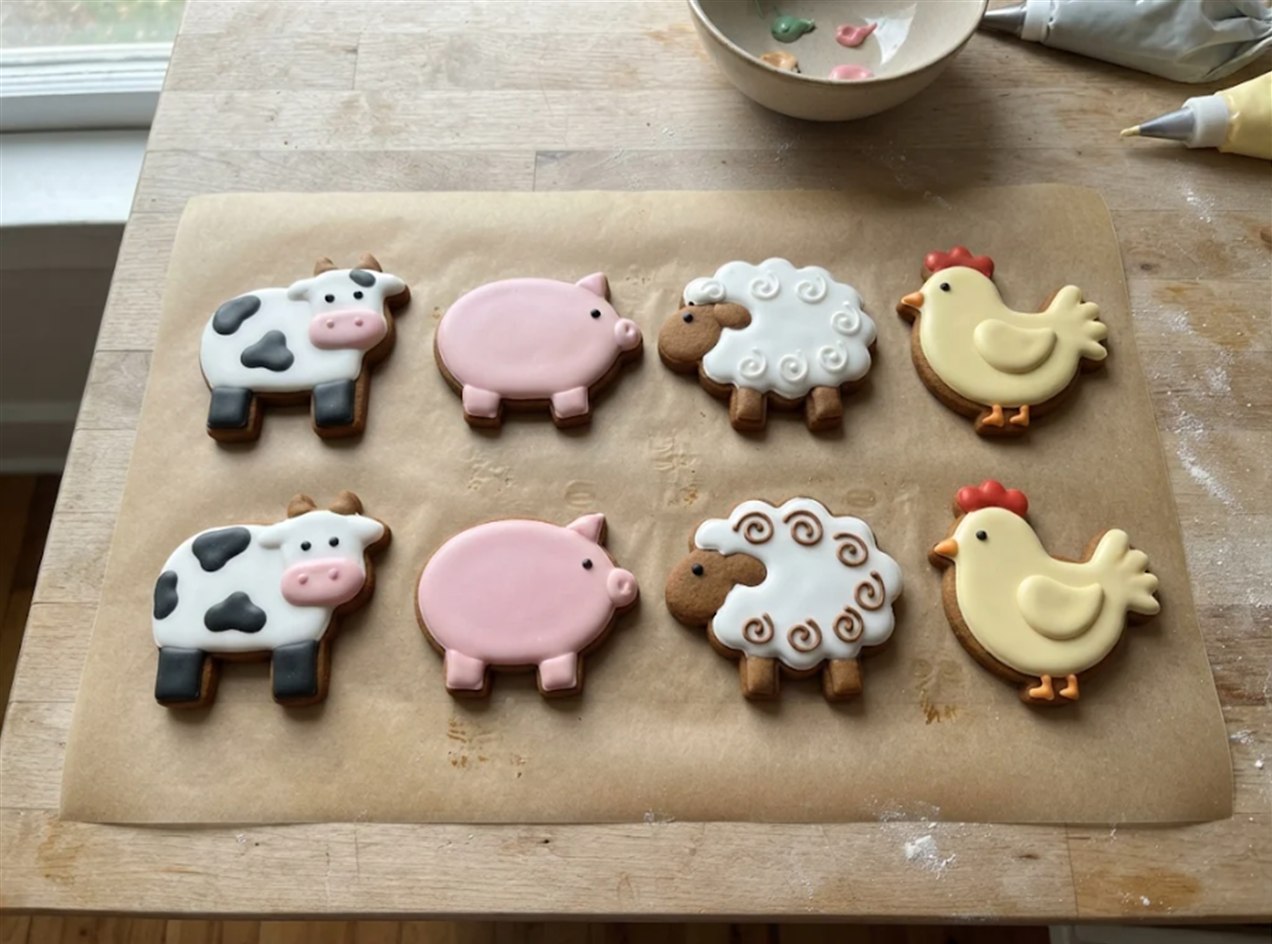
The last template page holds four farm animals: a cow, a pig, a sheep and a chicken, each about 2 1/2 to 3 inches across. They are chunky on purpose. On most animal cutters the legs are the first thing to break, the same weak spot we explain in why thin limbs snap on a gingerbread man. Here the legs merge into one solid block, and the script checked that no part of any animal pinches in thin.
Trace the animals onto card, cut them out, lay them on rolled dough and cut round them with a paring knife. For animals people will eat, use cut-out cookie dough that keeps its edges and decorate with glossy cookie icing for the animals. Each batch makes about 24 cookies.
Keep the faces simple. The brown dot on each template piece marks the eye. Pipe one small black dot there and stop. Little kids can manage a dot.
| Animal | Colors | Difficulty | 3 steps |
|---|---|---|---|
| Sheep | White body, brown face and legs | Easy | Flood the face and legs brown. Pipe white swirls or dots over the body for wool. Add the eye dot once the face has crusted. |
| Pig | Pink, darker pink snout | Easy | Flood the whole pig pink. Pipe a darker pink snout with two dots for nostrils. Add the eye dot and a curly tail line. |
| Cow | White, black or brown spots, pink nose | Medium | Flood white. Drop black spots into the wet icing so they dry flat. Pipe a pink nose and the eye dot once it crusts. |
| Chicken | White or yellow, red comb, orange beak | Medium | Flood the body. Pipe the red comb and the orange beak and feet. Add a wing line and the eye dot. |
How Long It Takes, Day by Day
Plan on seven sessions over two days, about 8 hours hands-on with the silo. Pick your party time and the clock counts back for you.
| When | What you do | Hands-on | Then wait |
|---|---|---|---|
| Day 1, morning | Print, make and chill the dough, cut, bake at 300 degrees F and trim. | About 3 1/2 hours | Until cool |
| Day 1, early afternoon | Flood the walls, doors and roof panels, and the silo. | 50 minutes | About 1 hour |
| Day 1, afternoon | Pipe the door X, trim, boards, shingles and silo rings. | About 75 minutes | Overnight, pieces flat |
| Day 2, early morning | Stand the walls and the hidden truss. | 25 minutes | 2 hours |
| Day 2, mid morning | Set the lower and then the upper roof panels. | 35 minutes | 2 hours |
| Day 2, midday | Doors, track, hayloft and the silo panels. | 55 minutes | 2 hours |
| Day 2, afternoon | Silo lid and dome, the yard, the fence, the animals and the light. | 45 minutes | Overnight before you move it |
Gingerbread Barn Build Clock
Pick when the barn has to be on the party table. The clock counts back through every drying time and tells you when to start baking.
For planning only: icing sets faster or slower with the weather, so treat each wait as a minimum and check that joints feel firm before moving on. Not professional baking advice. Nothing you enter leaves your browser.
Planning a Farm Birthday Party Around the Barn
A barn makes a good birthday centerpiece because the yard is the activity. In 2012 the Wagner Farm gingerbread jubilee in Glenview, Illinois handed families pre-assembled gingerbread barns, icing and candy, with up to six family members decorating one barn. That number works at home too: six kids round a barn is about as many as can reach it.
So build the barn before the party and keep it off limits. The kids decorate animal cookies at stations, then come up in small groups to set their animals and a bit of pretzel fence in the yard. Everyone helps, and nobody leans on the roof.
Tell the planner about your party. It counts the cookies, the dough and icing batches and the stations, and lays out the time.
Farm Birthday Party Planner
Tell it about the party. It works out how many animal cookies to bake, how much dough and icing, how many decorating stations, and a minute by minute plan.
Planning defaults, not rules: adjust for your kids. Ask every family about food allergies before the party; gingerbread and icing usually contain wheat, and many recipes use egg or milk. Nothing you enter leaves your browser.
Ask every family about allergies before the party. Gingerbread and icing usually contain wheat, and many recipes use egg or milk. Send the animals home flat, because cookie icing needs a full 24 hours before they can stack.

How to Make a Gingerbread Barn Step by Step
1.Print the template and measure the test bar
Print all seven pages at Actual Size or 100 percent, never Fit to Page, and check that the red bar reads exactly 1 inch. Cut out the paper pieces, keeping the hayloft square from page 1.
Why this matters: the truss and the end walls must match exactly. A page printed small makes a truss that cannot reach the roof.

2.Make the dough and chill it
Make one batch of house dough, split it in two, flatten each half into an inch-thick disc, wrap and chill for at least an hour. Make the second batch now if you are building the silo.
Why this matters: cold dough keeps the sharp angles at the roof bends. Soft dough rounds them off.
3.Roll and cut the end walls and the truss
Roll a disc on parchment to an even 1/4 inch between guide strips. Cut the front wall, the back wall and the hidden truss. Cut out the big doorway, the hayloft square, the back light doorway and the arch in the truss. Keep the hayloft square on the pan to bake as the hayloft door.
Why this matters: these three pieces set the roof line. Cut them from the same fresh roll so they bake the same.
4.Cut the side walls, the roof and the doors
From the second disc, cut the two side walls and their windows, the two lower roof panels, the two upper roof panels and the two sliding doors.
Why this matters: the lower and upper panels look alike but differ by almost half an inch. Pencil an L or a U on the parchment under each one.

5.Cut the silo panels and lid
From the second batch, cut six silo panels and the six-sided lid. Press the ring lines across each panel with the back of a knife.
Why this matters: six identical panels are what make the silo stand straight. Cut them all against the same paper piece.
6.Bake and trim every piece while it is warm
Bake at 300 degrees F. The walls, the truss and the roof panels take 22 to 30 minutes, until matte with a firm edge. Bake the doors, the hayloft door and the silo lid on their own pan and start checking them at about 12 minutes. Within two minutes of each pan coming out, lay the paper piece on top and trim any edge that spread.
Check as you go: lay the truss on the front wall while both are warm. Their roof lines should match. Trim whichever one is bigger.
7.Flood the walls, the doors, the roof and the silo
Thin most of the first batch of icing until a knife line closes in about 10 seconds. Flood the four walls and both sliding doors barn red and the hayloft door red. Flood the roof panels slate grey and the silo panels and lid light grey. Leave the truss bare.
Why this matters: trim and shingles only stay crisp on a flood that has crusted.
8.Pipe the door X, the trim and the shingles, then leave it overnight
With stiff white icing, pipe a frame and an X on each sliding door and on the hayloft door, white frames round the windows and the doorways, and thin board lines down the walls. Pipe rows of small scallops on the roof panels from the bottom edge up, and rings across the silo panels. Leave everything flat overnight.
Why this matters: the white X is what makes it a barn at a glance. Piped flat, the lines stay straight.
9.Stand the back wall and the side walls
Trace the barn’s 5 1/2 by 6 1/2 inch footprint on the board, about 1 1/2 inches in from the left and 2 1/2 inches from the back. Pipe thick icing along the back and side lines. Stand the back wall, then the two side walls against it, so the side walls tuck inside the back wall. Prop with cans.
Why this matters: the side walls fix the width the truss has to fit. Square corners now mean a truss that slides in snugly.
10.Set the hidden truss and the front wall
Pipe icing down both ends of the truss and along its bottom edge. Slide it in across the middle of the barn, at the dotted line on the side walls, between the two windows. Then stand the front wall, doorway down, across the open end. Check that the truss and both end walls line up when you sight along the roof line. Wait 2 hours.
Why this matters: a truss that sits low leaves the roof bend with nothing under it, which is the sag you are building it to stop.
11.Set the two steep lower roof panels
Pipe icing along the top edges of both side walls and the lower slopes of the end walls and the truss. Set one lower panel with its long edge on the side wall, overhanging the eave a little, and lean it onto the slopes. Prop it with a can, then set the other.
Why this matters: these panels carry the upper ones. They need to be firm before anything sits on them.
12.Lay the upper panels and pipe the bends
Pipe icing along the top edges of the lower panels and the upper slopes of the end walls and the truss. Lay each upper panel so it overlaps the lower panel’s top edge a little and meets the other at the ridge. Pipe a thick line along both bends and the ridge. Wait 2 hours.
Why this matters: the bend line is the weak spot. Icing over it ties the two panels together where the truss holds them up.
13.Ice the sliding doors open and set the track
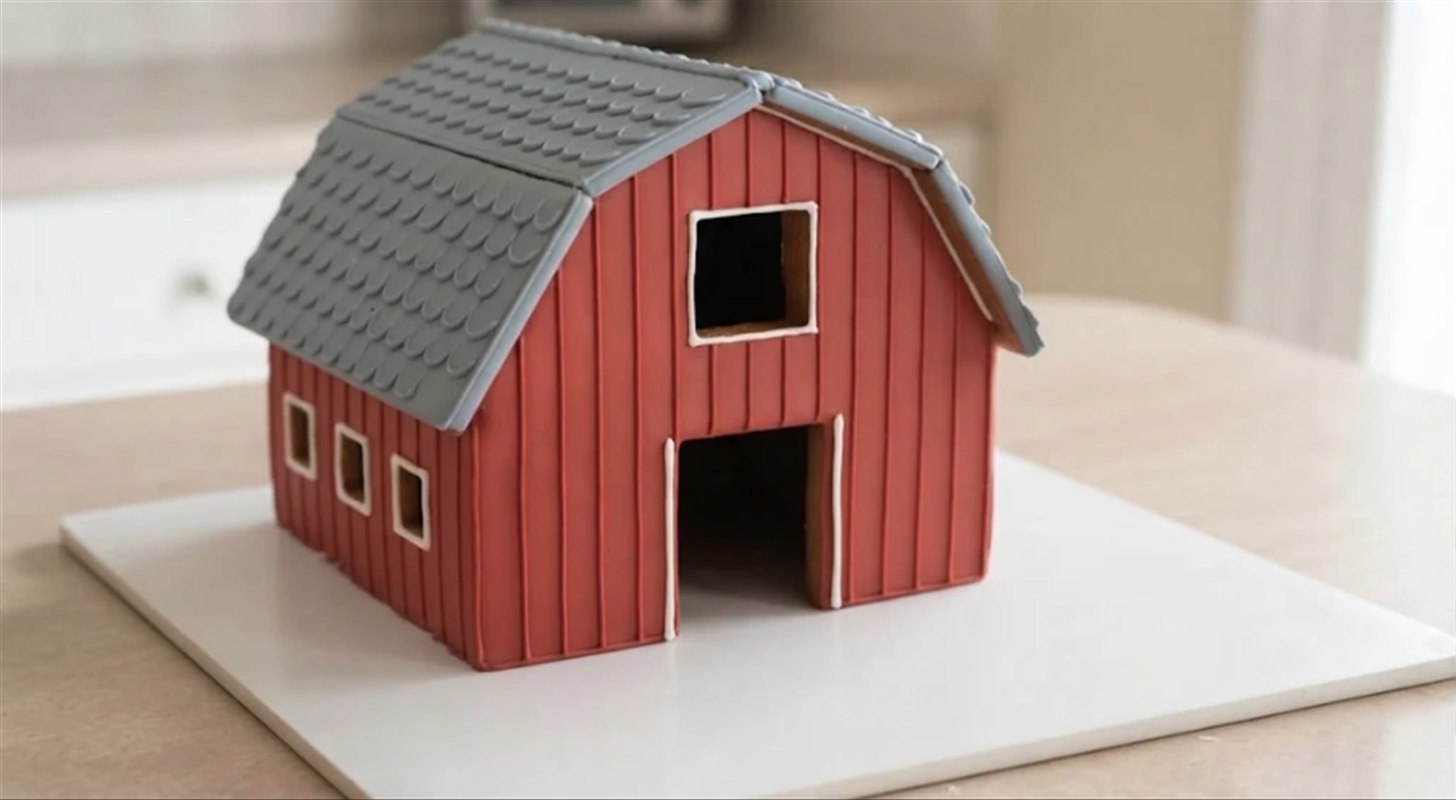
Pipe icing on the back of each sliding door and press it flat against the front wall beside the doorway, level with the bottom and about 1/8 inch in from the corner. Trim a pretzel rod to 5 1/4 inches and ice it across the wall just above the doors, as the track.
Why this matters: doors slid open show off the dark inside of the barn and the truss arch. The template places them on solid wall, clear of the corner.
14.Hang the hayloft door and fill the loft
Ice the hayloft door flat against the gable beside the opening, as if it has swung open. Push a few pieces of mini shredded wheat into the opening with a dab of icing, so hay spills out.
Why this matters: an open door with hay behind it is the detail people look for. Iced flat, it cannot fall off.
15.Stand the silo and add the dome
Trace the footprint guide on the board a little under 1/2 inch to the right of the barn. Stand the six panels on the inner hexagon, their inside edges touching, and pipe a thick seam down each outside corner. Wait 20 minutes, then ice on the lid. Trim the sugar cone flat and ice it upside down on the lid as the dome.
Why this matters: the corner seams turn six loose panels into one tube. Let them grip before the lid goes on.
16.Finish the yard and light the barn
Spread thin icing over the bare board and scatter coconut, white for snow or tinted green for grass. Build a fence from pretzel rod posts and pretzel stick rails glued with stiff icing. Set the animals in the yard. Slide an LED tea light in through the back doorway. Use only battery lights, as our guide to battery lights inside a gingerbread house explains. Let it stand overnight before you move it.

Troubleshooting
| What you see | Why it happens | What to do |
|---|---|---|
| The roof sags at the bend | The truss sits low, or the upper panels went on before the lower ones set | Prop the bend from outside for an hour. Next time, check the truss lines up with the end walls before the roof. |
| The truss will not fit | The side walls lean in, or the truss spread in the oven | Shave the truss ends on a fine grater until it slides in. |
| An upper panel slides down | The lower panel edge was still soft | Lift it off, wait 30 minutes and set it again with stiffer icing. |
| The front wall cracks over the doorway | The wall was moved before it cooled | Leave cut walls on the pan until cool, and glue the crack from behind. |
| A sliding door slips | Too much icing behind it, or icing too thin | Scrape it off, use a thin layer of stiff icing and hold it for a minute. |
| The silo leans | The panels were not on the guide, or the seams were thin | Pipe heavier seams and prop it against a can for 20 minutes. |
| The animal legs broke | The cookies came off the pan warm | Let them cool on the pan. The chunky legs are strong once cool. |
| The X trim runs into the red | The flood had not crusted, or the white was too thin | Wait until the flood is matte, and stiffen the white with powdered sugar. |
Easier Versions: Kits and a No-Bake Barn
A Barn Kit
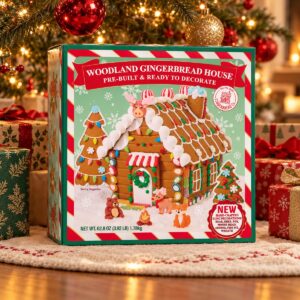
Store barns come and go. Costco’s holiday barn kit this year comes as a two-pack of flat houses you shape in a mold, and Target’s barn kits have appeared in past seasons.
No-Bake Graham Cracker Barn
Ice four graham crackers into a box, then cut two more into roof halves and lean them into a peak. Ice it red with a white X on a cracker door, and set animal crackers in a coconut yard. A graham cracker house that stands needs royal icing, not tub frosting.

Storage Instructions
Keep the barn in a cool, dry room, away from the stove and sunny windows. Damp air softens icing and lets the roof creep. Move it only by the board.
FAQ
What goes with the barn?
The farmhouse that goes beside it has its own template, and the two make a farm scene on a bigger board.
More Gingerbread House Builds and Recipes
Browse more gingerbread house ideas for other themes. When a wall leans, our fixes for leaning walls work on any house.
Build Your Next House With Best Gingerbread Houses
A barn comes down to a few details: a roof that bends in the right place, doors slid open and animals in the yard. When you want a head start, our ranked list of gingerbread house kits sorts the good boxes from the wobbly ones.