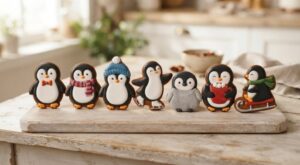

Penguin cookies are the easiest winter animal to get right. A black body, a white belly and a dot of orange for the beak, and anyone at the table knows what it is before they bite.
This set uses one free printable template with four penguin shapes, a cut-out dough that keeps thin flippers from spreading and the royal icing cure times from our icing pages. It is written for anyone filling a winter cookie tray, planning a penguin party for a kid, or baking for a classroom.
You get an icing palette, three steps for each design, a picker and a party batch planner. Start with the recipe card, then the shapes.
Penguin Gingerbread Cookies
Makes about 28 cookies, about 3 inch penguins and 3 1/2 inch sleds · Prep 30 minutes · Bake 11 minutes · Chill and freeze 2 hours 30 minutes · Icing cure overnight, 8 hours
Total time about 11 hours, most of it hands off. The overnight cure is what lets you stack them in a tin.
Equipment: Stand or hand mixer, Rolling pin with 1/4 inch guides, The free template printed on card stock, A small sharp paring knife, Two light-colored half sheet pans, Parchment paper, Piping bags with small round tips, Toothpicks or a scribe tool.
Template: free 1-page PDF, US Letter, a standing penguin, a baby penguin chick, a penguin on skates and a penguin in a sled, with icing guides and a 1 inch test bar.
Ingredients
Dough
- 3 cups all-purpose flour, 360 g, spooned and levelled
- 1 teaspoon baking soda
- 1/2 teaspoon salt
- 1 tablespoon ground ginger
- 1 1/2 teaspoons ground cinnamon
- 1/2 teaspoon ground cloves
- 1/4 teaspoon ground nutmeg
- 3/4 cup unsalted butter, 170 g, softened but still cool
- 3/4 cup dark brown sugar, packed, 150 g
- 1/2 cup unsulphured molasses, 170 g
- 1 large egg
- 1 teaspoon vanilla extract
Royal icing, a double batch
- 1/4 cup meringue powder
- 1/2 cup cold water, plus a few drops more for flooding
- 1/2 teaspoon cream of tartar
- 4 cups confectioners sugar, unsifted, 454 g
- Black, orange, red, blue, green, gray and pink gel food coloring, or the shades from the palette chart
- 1 teaspoon unsweetened cocoa powder, for the black
- For the no-bake penguins: chocolate sandwich cookies, white frosting, candy eyes and orange candy-coated chocolates, optional
Method
- Make the dough: whisk the flour, soda, salt and spices, cream the butter and brown sugar until lighter in color, beat in the molasses, egg and vanilla, then mix in the dry ingredients on low and stop the moment no dry flour remains.
- Chill the dough as two flat wrapped discs about an inch thick for 2 hours, until a pressed thumb leaves a clean dent rather than a smear.
- Roll each disc to 1/4 inch between two sheets of parchment, so the dough never picks up extra flour.
- Cut round the paper shapes laid on the dough with a small sharp knife held straight up, cutting the flippers and the skate bar last.
- Freeze the cut penguins on the parchment-lined pan for 30 minutes, until the flippers and feet feel hard and lift without bending.
- Bake at 350F for 9 to 11 minutes straight from the freezer, until the surface looks matte and the edges are set, then cool completely on the pan.
- Mix the icing to stiff peaks, tint the biggest bowl black and keep a big bowl white, then tint small bowls of orange and the accent colors your designs need from the palette chart.
- Flood the black and the white wet-on-wet, let them crust for an hour, flood the scarves, hats, mugs and sleds, then pipe the beaks, eyes and small details and leave the cookies flat overnight.
Notes: times are worked out from the set times on our icing pages, not timed on a build, and ovens vary, so judge by the surface rather than the clock. The yield is an estimate: a batch rolls to about 162 usable square inches at 1/4 inch, and the four shapes average about 5.4 square inches, which gives about 30, rounded down to 28. Bake one test tray before you shop for a big party. Dough adapted from King Arthur Baking gingerbread cut-outs.
What Makes a Cookie Read as a Penguin
A penguin is mostly two colors and one bright beak, a gift for a cookie decorator. Each part of the template is built round the detail people look for first.
| Penguin feature | Why a real penguin has it | What the cookie does with it |
|---|---|---|
| Black back, white front | Camouflage from above and below in the water | A big belly oval and a face oval, flooded white against the black |
| Short flippers held at the sides | Wings built for swimming, not flying | A flipper on each side of the standing penguin, cut wide so it does not snap |
| Gray fuzzy chick | Emperor chicks wear silver-gray down with a black head and a white mask | A round baby shape with a face mask guide, flooded gray and flicked fuzzy |
| Sliding on the belly | Penguins slide across snow on their bellies and push with their feet | A side view penguin riding in a sled, the cookie version of a belly slide |
The tuxedo is not just for looks. All penguins are countershaded, with black backs and wings and white fronts, and the same article explains why: a predator looking up from below struggles to tell a white belly from the reflective water surface, while the dark back blends in from above. That makes the white belly the most important part of the cookie: get the oval clean and the penguin reads from across the room.
The chick has a real model too. Emperor penguin chicks are covered in silver-gray down, with black heads and white masks, which is exactly the palette of the baby penguin design. The same page notes that an emperor father balances the egg on top of his feet for more than two months until it hatches, a fun fact to tell a child while the gray icing dries.
And one more for the cookie tray. Penguins live almost entirely in the Southern Hemisphere, with just one species living at, and slightly north of, the equator. So a penguin in a Christmas scarf is a little bit of a joke: wild penguins do not live anywhere near the North Pole.
One Template, 4 Penguin Shapes
Every baked design starts as one of four cookies on one page. The standing penguin and the skater are about 3 1/4 inches tall, the chick about 3 inches, and the sled 3 1/2 inches long.

The free template prints on one US Letter page at 100 percent. Measure the red bar first: if it is not exactly 1 inch, your printer scaled the page.
The red dashed lines are icing guides, not cut lines: belly and face ovals, the beak, the scarf curve, the beanie brim, the skate blade and the sled rim. Dotted circles mark the eyes, so a whole batch looks the same way.
A script checked the parts most likely to snap. The skate bar is 0.36 inches thick, the flipper held out for balance is 0.44 inches across, and the sled runner is still 0.28 inches thick at its rounded tips, and every guide sits inside its cut line. Print on card stock so the paper lies flat on the dough.
Icing Palette for All 8 Designs
Each row lists the colors one design needs and what each covers, so you can pick the penguins you want and mix only those bowls. Gel brands vary, so tint a spoonful and test it on a scrap cookie first.
| Design | Shape | Colors and what they cover | Difficulty |
|---|---|---|---|
| The Classic Tuxedo Penguin | Standing penguin template | penguin black for the body, flippers and eyes; snow white for the belly and face; beak orange for the beak and feet; cranberry red for the bow tie | Easy |
| The Penguin in a Scarf | Standing penguin template | penguin black for the body, flippers and eyes; snow white for the belly, face and scarf stripes; beak orange for the beak and feet; cranberry red for the scarf | Medium |
| The Beanie Penguin | Standing penguin template | penguin black for the body, flippers and eyes; snow white for the belly, face, brim and pom-pom; beak orange for the beak and feet; winter blue for the beanie | Medium |
| The Penguin on Skates | Penguin on skates template | penguin black for the body, flippers and eyes; snow white for the belly, face and skate boots; beak orange for the beak; silver gray for the skate blade | Medium |
| The Baby Penguin Chick | Baby penguin template | fluffy gray for the body and flippers; penguin black for the head, beak and eyes; snow white for the face mask; cheek pink for the cheeks | Easy |
| The Penguin Holding a Cocoa Mug | Standing penguin template | penguin black for the body, flippers and eyes; snow white for the belly, face and marshmallows; beak orange for the beak and feet; cranberry red for the mug; cocoa brown for the cocoa | Hard |
| The Penguin in a Sled | Penguin in a sled template | penguin black for the head, back and eye; snow white for the face and chest; beak orange for the beak; cranberry red for the sled; silver gray for the runner; pine green for the scarf | Hard |
| No-Bake Penguin Cookies for Little Kids | Store-bought chocolate sandwich cookies | white frosting for the belly; orange candy for the beak and feet; candy eyes for the eyes | Easy |
Penguin black and snow white go on all seven baked designs, and beak orange on six of them, so mix the black and white in the biggest bowls. A tuxedo, scarf, chick and cocoa mug box needs 7 colors, while a tuxedo and chick box needs 6. The picker shows each design’s swatches, steps and difficulty, or picks one from who the cookie is for.
Which Penguin Cookie Should You Make?
Pick a design to see its icing colors, its three steps and how hard it is. Or say who the cookie is for, filter by skill, or let the button choose.
For ideas only: these palettes are original color choices and gel brands vary in shade, black most of all, so tint a little and test on a scrap cookie. Nothing you pick leaves your browser.
Difficulty follows one rule. Easy means the base colors go on wet-on-wet in one sitting, then the dots. Medium means one area has to crust before the next goes on top, like a scarf on a body. Hard means three or more flood areas plus fine lines on one cookie.
Ingredient Notes
The dough is a cut-out dough on purpose. It holds a sharp edge. A soft dough puffs, and the flippers melt into the body.
Black is the hard color. Black royal icing takes a lot of gel and often lands on dark gray. Stir a teaspoon of cocoa powder into the white icing before you add any black, the same trick as the deep black our Halloween cookies use. Black also darkens as it sits, so mix it a few hours ahead, or the night before.
Meringue powder, not raw egg whites. Royal icing is never cooked and a party tray sits out for hours, so use meringue powder, dried egg white sold as a pasteurized product. For flood consistency and the full cure table, see how runny to make flood icing for a penguin belly.
How to Make Penguin Cookies Step by Step
1.Make the dough
Whisk the flour, soda, salt and spices, cream the butter and brown sugar until lighter in color, then beat in the molasses, egg and vanilla. Mix in the dry ingredients on low and stop the moment no dry flour remains, so the dough stays tender.
2.Chill the dough
Chill the dough as two flat wrapped discs about an inch thick for 2 hours. It is ready when a pressed thumb leaves a clean dent rather than a smear.
3.Roll the dough
Roll each disc to 1/4 inch between two sheets of parchment. Keep it even: a thin spot at a flipper or on the skate bar is where a penguin cracks.
4.Cut the penguins
Lay the card stock shapes on the dough and cut round them with a small sharp knife held straight up. Cut the body first and the flippers and skate bar last, then pull the scraps away from the cookie rather than lifting the cookie out of the scraps.

5.Freeze the shapes
Slide the parchment onto a pan and freeze the cut penguins for 30 minutes. They are ready when the flippers and feet feel hard, which keeps those thin edges sharp in the oven.
6.Bake at 350F
Bake for 9 to 11 minutes straight from the freezer. Judge by the surface rather than the clock: matte all over, with edges that are set. Let everything cool completely on the pan, because a warm flipper bends and cracks.
7.Mix and color the icing
Beat the icing to stiff peaks. Tint the biggest bowl black with the cocoa trick, keep a big bowl white, and tint small bowls of orange and the accents. Thin each to flood consistency, keeping a little orange, black and white stiff for beaks, eyes and pom-poms.
8.Flood the penguins and pipe the details
Flood the black body, then flood the white belly and face right up against it while the black is still wet, so the two settle flat together. Let them crust for an hour, then flood the scarves, hats, mugs and sleds on top. Pipe the beaks and eyes last, leave the cookies flat overnight and give the small details about 2 hours before anything touches them.

Say you are decorating with a six-year-old who wants to do it all. Flood the black and white yourself the night before, then hand over a bag of orange for the beaks and feet. A crooked beak still reads as a penguin, and often makes it look curious.
7 Penguin Cookie Designs
Each design lists its colors, difficulty and three short steps, plus a no-bake penguin for the youngest helpers. Four designs share the standing penguin.
1.The Classic Tuxedo Penguin
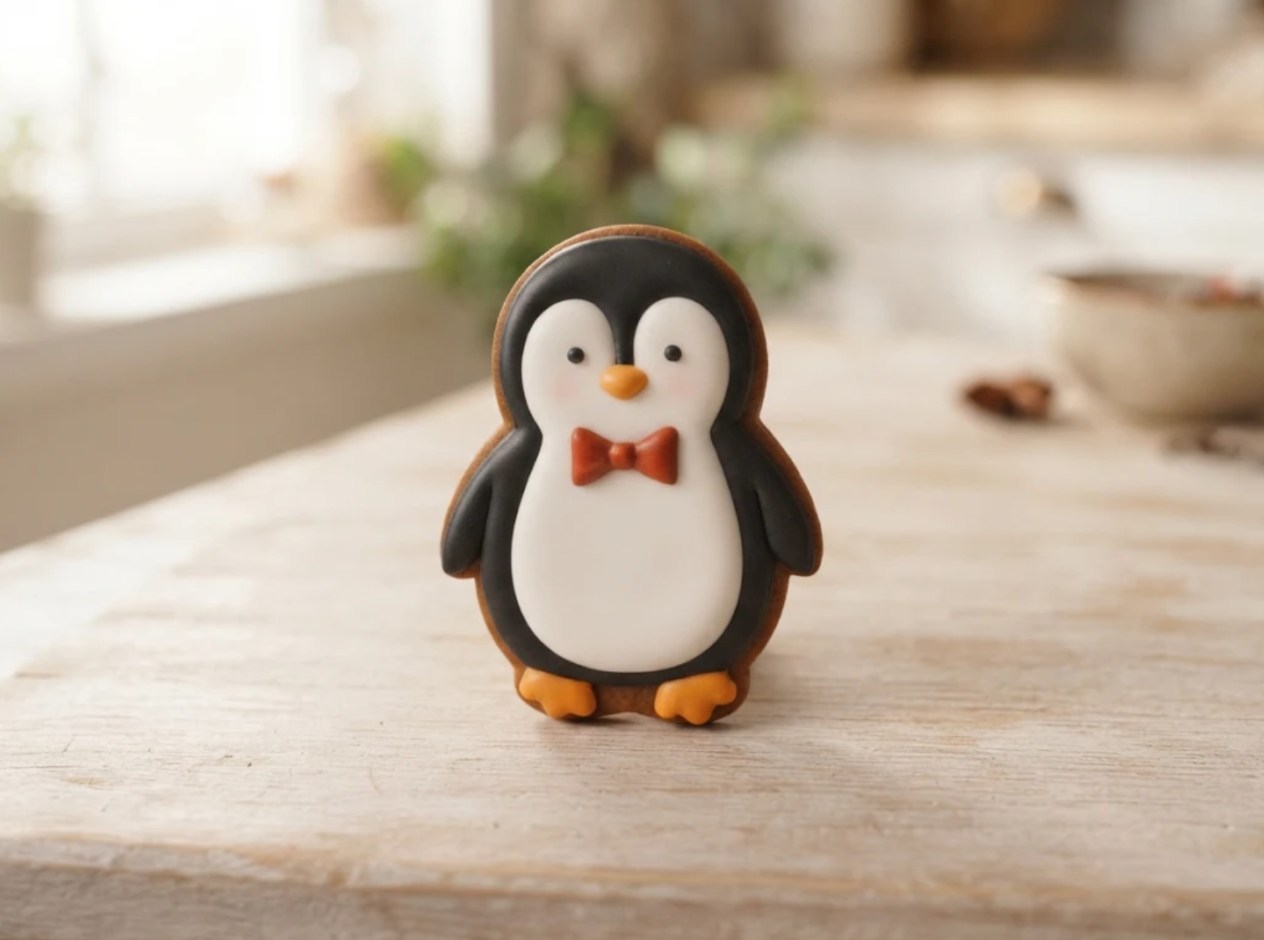
Colors: penguin black, snow white, beak orange, cranberry red. Difficulty: Easy.
The penguin everybody draws, with a red bow tie to earn the name. Three other designs start from it, so make this one first.
- Flood the body and flippers penguin black, and while it is wet, flood the belly oval and the face oval snow white right up against it so the two settle flat together.
- Let it crust for an hour, then pipe the orange beak in its triangle and flood the two feet orange.
- Pipe two black dot eyes and a small red bow tie where the belly meets the face, two triangles touching at a dot.
2.The Penguin in a Scarf

Colors: penguin black, snow white, beak orange, cranberry red. Difficulty: Medium.
The scarf is what turns a penguin into a holiday penguin. Let the tail hang down one side of the belly rather than the middle, so the white still shows.
- Flood the tuxedo base, black body with the white belly and face wet-on-wet, then let it crust for at least an hour so the scarf sits on top instead of sinking in.
- Flood the scarf cranberry red along the neck curve and down one side of the belly as a hanging tail, and pipe the beak and feet orange.
- Once the scarf crusts, pipe two thin white stripes across the tail and a short fringe at its end, then add the black dot eyes.
3.The Beanie Penguin
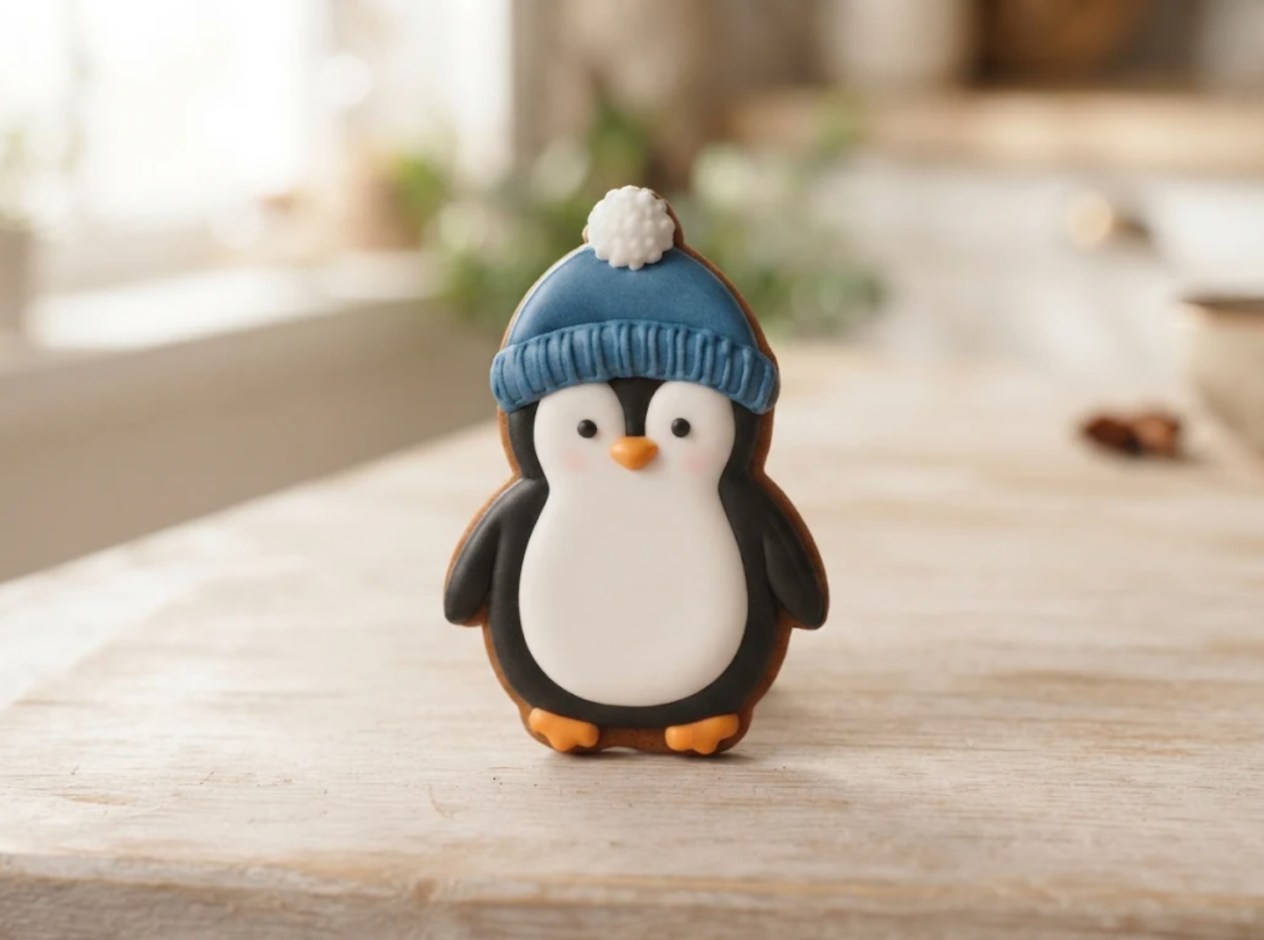
Colors: penguin black, snow white, beak orange, winter blue. Difficulty: Medium.
A snow day in one cookie. For more knit looks, borrow the stripes and zigzags from the knit patterns on our ugly sweater cookies and pipe them across the blue.
- Flood the tuxedo base but stop the black at the brim line, then flood the top of the head winter blue and let both crust for an hour.
- Pipe a thick white brim along the line, and drag a toothpick through a few short white lines on the blue for knit ribs.
- Pipe a round white pom-pom at the very top and pull little peaks out of it with the toothpick, then add the beak, feet and black dot eyes.
4.The Penguin on Skates

Colors: penguin black, snow white, beak orange, silver gray. Difficulty: Medium.
The flipper held out for balance makes it look like it is moving. Handle it by the body, never by that flipper.
- Flood the body and the out flipper penguin black with the belly and face snow white wet-on-wet, and stop the black just above the boots.
- Flood the skate bar silver gray below the blade line and let it crust for an hour.
- Flood the two boots white above the blade line, pipe two tiny gray laces on each, then add the orange beak and black dot eyes.
5.The Baby Penguin Chick
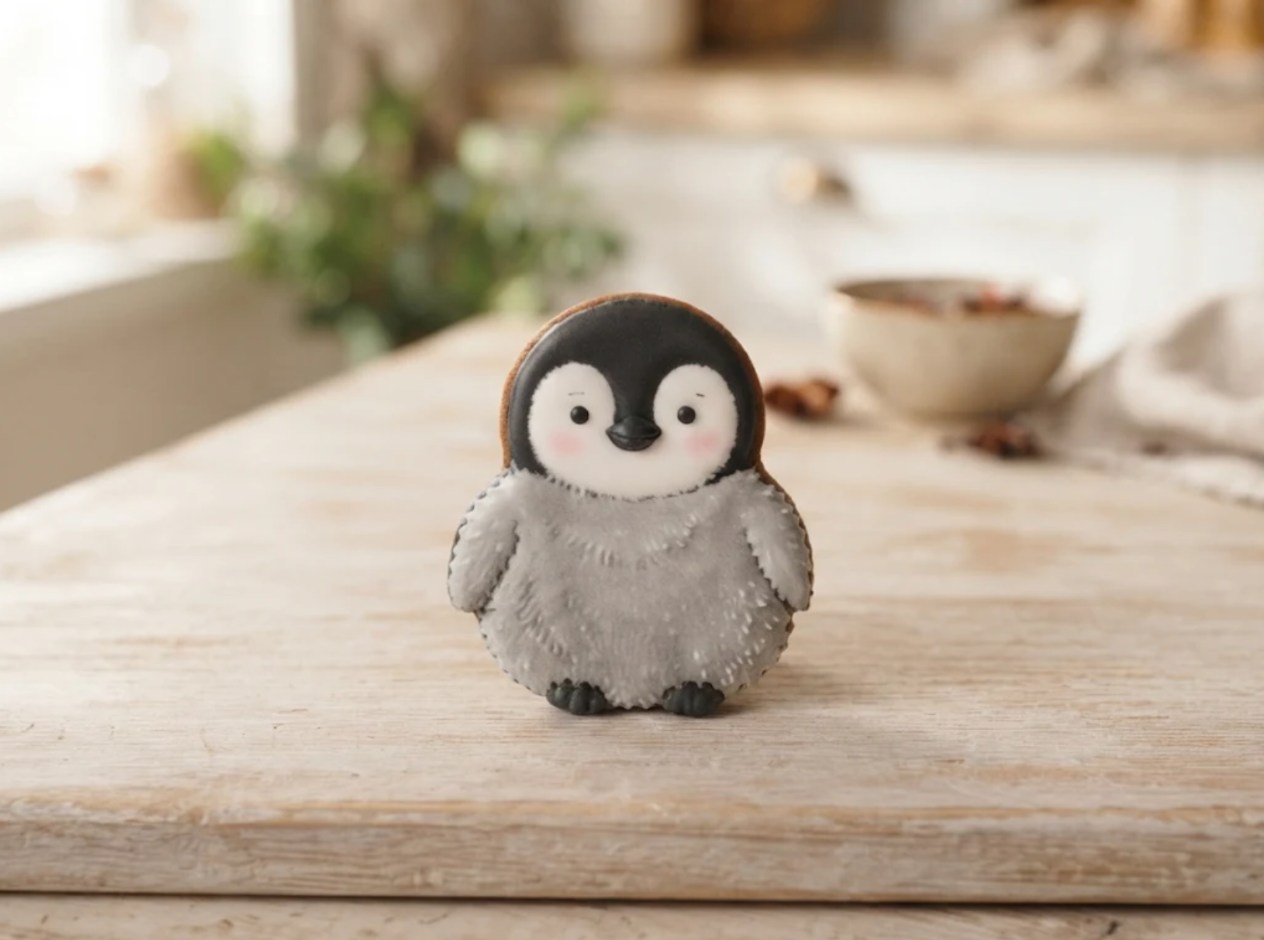
Colors: fluffy gray, penguin black, snow white, cheek pink. Difficulty: Easy.
The cutest cookie in the set and one of the easiest. The toothpick flicks round the gray edge are what make it look soft and new.
- Flood the body and flippers fluffy gray, then flood the head black and the face mask oval white wet-on-wet, all in one sitting.
- While the gray is still wet, drag a toothpick in short flicks round its edge so the down looks fuzzy.
- Once it crusts, pipe a tiny black beak, two black dot eyes on the white and a soft pink dot under each eye.
6.The Penguin Holding a Cocoa Mug

Colors: penguin black, snow white, beak orange, cranberry red, cocoa brown. Difficulty: Hard.
The slowest penguin to finish and the one people photograph. It pairs well with a whole tray of cocoa mug cookies on the same table.
- Flood the tuxedo base and let it crust for at least an hour, so the mug can sit on the belly without sinking.
- Flood a rounded mug shape mug red across the lower half of the belly oval with a small handle at one side, then a thin band of cocoa brown along its rim, and let it crust.
- Pipe three white marshmallows on the cocoa, then pipe two black flipper tips curling over the sides of the mug, and add the beak, feet and eyes.
7.The Penguin in a Sled

Colors: penguin black, snow white, beak orange, cranberry red, silver gray, pine green. Difficulty: Hard.
The only side view in the set, and the centerpiece of a tray. Make two or three, because the curl takes patience.
- Flood the head and back penguin black and the face and chest circle snow white wet-on-wet, then flood the runner silver gray, and let it all crust for an hour.
- Flood the sled red below the rim line, leaving the curl guide bare, then pipe the curl as one thick red spiral once the flood has crusted.
- Pipe a pine green scarf at the neck with one end flying back over the sled, then the orange beak and one black dot eye.
No-Bake Penguin Cookies for Little Kids

Colors: white frosting, orange candy, candy eyes. Difficulty: Easy, no oven.
For a table of four-year-olds, or a day the oven is busy. The dark cookie does the job of the black icing.
- Spread an oval of white frosting on the bottom two thirds of each cookie with the back of a spoon, so the dark top reads as the head.
- Press two candy eyes into the frosting at the top of the oval, or onto a dab of frosting on the dark part.
- Press one orange candy-coated chocolate between the eyes for the beak and two more at the bottom edge for the feet.
Penguin Cookies for a Party
How to set penguin cookies out depends on the crowd.
- If it is a winter cookie tray, lean on the scarf and beanie penguins and put one sled in the middle as the centerpiece.
- If it is a kid’s penguin party, flood the black and white ahead and let the guests pipe the beaks and feet, with the no-bake penguins for the youngest.
- If it is a classroom or a cookie swap, stick to the tuxedo and the chick, the two Easy baked designs, so a big batch gets done in one evening.
The planner does the math for cookies, batches, colors and days, working the dough out from each shape’s size: the standing penguin uses about a tenth more dough than the chick.
Penguin Party Cookie Planner
Enter the guests, the cookies each and the party date, then tick the designs. It works out the dough batches from how big each shape is, how many of each to cut, the icing colors and which day each job falls on.
For planning only: the dough per batch figure is an estimate and dough rolls out differently in every kitchen, so bake one test tray before you shop for a big party. The no-bake version is not counted because it uses store-bought cookies. Nothing you enter leaves your browser.
Picture a party for 12 on a Saturday, with the tuxedo, the scarf, the chick and the cocoa mug ticked. The planner calls for 14 cookies, one batch of dough and one double batch of icing in 7 colors, with 4 tuxedo penguins, 4 scarf penguins, 3 chicks and 3 cocoa mug penguins. Bake and flood on Wednesday, add the scarves and mugs on Thursday, and Friday stays free in case a flipper snaps.
Troubleshooting
| Symptom | Cause | Fix |
|---|---|---|
| Black bleeds into the white belly | Too much gel in thin icing, or a humid day | Use the cocoa trick, flood the white right away and dry the cookies in front of a fan |
| The black looks gray or green | Not enough time for the color to develop | Mix the black a few hours ahead, or the night before |
| A flipper snaps off | Warm dough, or lifting the cookie by the flipper | Freeze before baking, cool on the pan and lift with a spatula under the body |
| The skate bar cracks | Dough rolled thin at the bottom edge | Roll an even 1/4 inch and cut the bar last, when the dough is coldest |
| The scarf sinks into the body | The scarf went on before the body crusted | Give the black and white a full hour before any accent color goes on top |
| Eyes slide or spread | Eye icing too runny | Pipe eyes from toothpaste-stiff icing after the face crusts |
Make-Ahead and Timeline
Plan on three days: bake and flood on day one, accents and eyes on day two, bag on day three. For a big party, freeze the plain cookies flat and thaw them still sealed so condensation forms on the outside. For how long decorated cookies stay good to eat, see how long iced penguin cookies keep in a tin.
Storage Instructions
Once the icing has cured, store the cookies in an airtight tin at room temperature, with parchment between layers and away from sunlight, which fades reds and blues fast.
Keep the sleds and skaters flat, since the runner and skate bar are the thinnest parts. Hold to the overnight royal icing cure before you stack, or the black will print onto the cookie above.
Frequently Asked Questions
Do I need a penguin cookie cutter?
No. The free template does the job for all four shapes. If you own a penguin cutter, use it for the four standing designs and print the template for the chick, the skater and the sled.
How far ahead can I make penguin cookies?
Baked, undecorated shapes freeze for up to about 3 months. Decorated cookies keep about two weeks in an airtight tin once cured, so decorating three days ahead leaves plenty of margin.
More Gingerbread Cookie Recipes
- snow globe cookies with a tiny winter scene inside, for a second winter set
- 35 more themed cookie sets to bake and decorate, for the next party
Pair the Cookies with a Best Gingerbread Houses Kit Pick
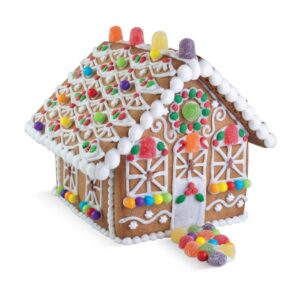
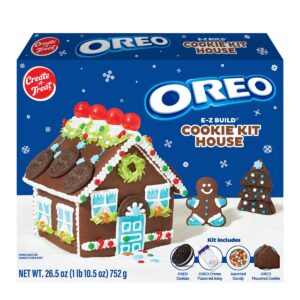
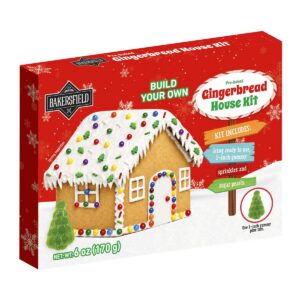
When the party wants something to build too, start from a gingerbread house kit for the penguins to stand beside.