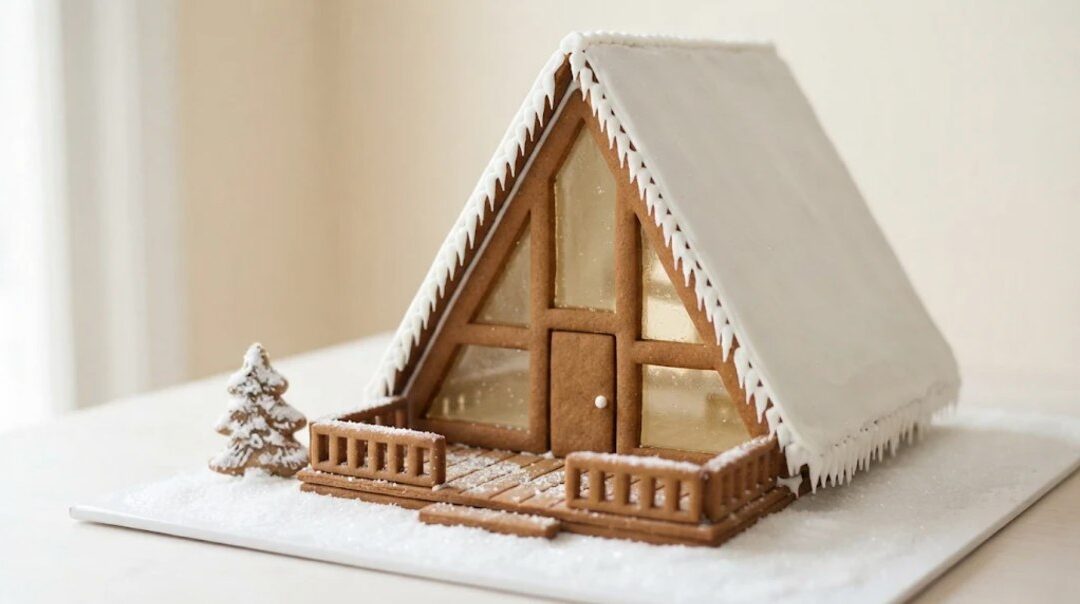
An A-frame gingerbread house has no walls. Two steep roof panels come all the way down to the board and lean on each other, with a triangle at each end. That makes it one of the easiest houses to stand up, and the glass front is what makes it look like a ski chalet.
The bake times and icing waits come from our house dough and royal icing recipes. Every piece on the free template was sized by a script, and at this roof angle one number, 4.5 inches, sets the whole house. It suits families with kids, ski village builders and anyone who loves mid century cabins.
You get a printable template, a candy glass method, three looks and a clock for the build. Start with the template.
A-Frame Gingerbread House: At a Glance
- Difficulty: Easy to moderate. Four structural pieces, plus candy glass and a deck.
- Total time: about 2 days in two sessions, most of it icing setting.
- Active time: about 3 hours.
- Makes: one chalet about 4.9 inches wide at the board, 5 inches long under the roof, 6 inches with the deck, and about 4 inches tall to the ridge. 9 baked pieces.
- Template: free 3-page PDF, US Letter, true size, with a 1 inch test bar on every page.
Tools: printer, ruler, scissors, rolling pin with 1/4 inch guides, parchment, 3 sheet pans, a small sharp knife, a piping bag with a small round tip, 4 cans for propping, and a board at least 7 by 8 inches.
Materials
- 1 batch of sturdy gingerbread house dough
- 1 batch of stiff royal icing
- A handful of clear or amber hard candies for the glass
- Candy for the look you pick: white icing and sanding sugar for snow, or a battery tea light for the glow
Steps
- Print the template at Actual Size and measure the test bar.
- Roll the dough 1/4 inch thick and cut the ten pieces.
- Cut the five window panes, the back window and the tea light hatch before baking.
- Bake at 300 degrees F and trim each piece against the template while it is warm.
- Fill the panes with crushed hard candy and bake again until it melts flat.
- Cool the glass triangle on its parchment until it is cold.
- Snow or pipe the roof panels while they lie flat.
- Stand the back triangle and lean the first roof panel on it.
- Stand the glass triangle against the same panel.
- Lean in the second panel, prop both, and wait 2 hours.
- Pipe the ridge bead, then add the deck and railings.
- Decorate after 4 hours, and leave the house overnight before moving it.
Notes: times are worked out from the set times on our icing page, not timed on a build. Ovens and doughs vary, so treat every bake time here as a starting point: check early, go by the matte surface and firm edge, and bake a test strip before you build.
Free Printable A-Frame Gingerbread House Template
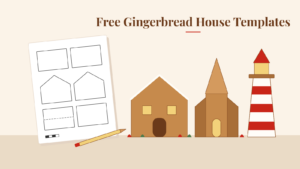
The template is three US Letter pages. Download the PDF, print it at Actual Size or 100 percent, never Fit to Page, and put a ruler on the red 1 inch bar before you cut anything. If the bar measures an inch, every piece is the size printed on it.
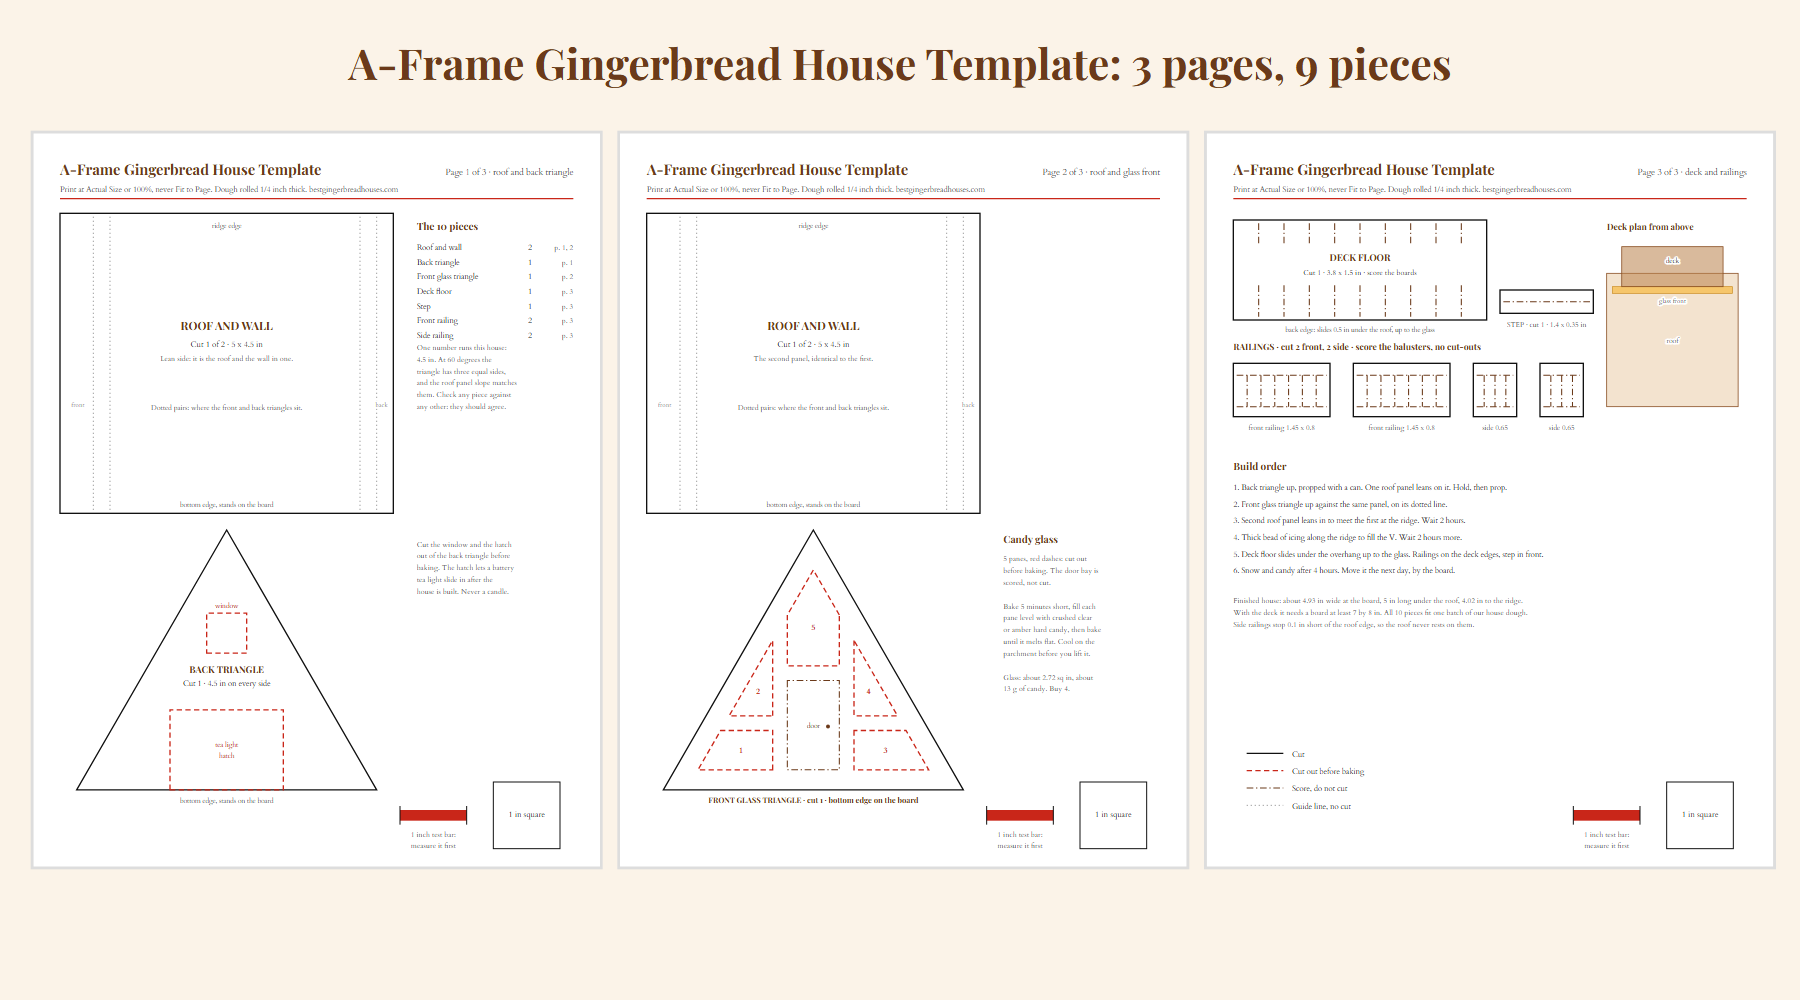
| Piece | Cut | Size | What it does |
|---|---|---|---|
| Roof and wall | 2 | 5 by 4.5 in | The roof and the side walls in one. Dotted lines show where each triangle sits. |
| Back triangle | 1 | 4.5 in on every side | Solid, with a small window and a hatch at the board for a tea light. |
| Front glass triangle | 1 | 4.5 in on every side | A gingerbread frame around 5 candy glass panes, with the door in the middle bay. |
| Deck floor | 1 | 3.8 by 1.5 in | Slides under the roof overhang up to the glass. Score the boards. |
| Step | 1 | 1.4 by 0.35 in | A plank on the snow in front of the deck, under the gap in the front railing. |
| Front railing | 2 | 1.45 by 0.8 in | Solid, with six balusters scored in, and a gap between the two pieces for the step. |
| Side railing | 2 | 0.65 by 0.8 in | Three scored balusters. Stops short of the roof edge on purpose. |
Rolled out before the cutouts, the ten pieces cover about 72 square inches of dough. One batch of our sturdy gingerbread house recipe covers roughly 225, so a single batch makes the chalet with plenty to spare for trees. If you want the plainest possible version, our easy gingerbread house template is a four-piece A-frame with no glass and no deck. This page is the chalet version of the same idea.
Why the A-Frame Stands So Easily
A box house needs four walls to stand square before the roof goes on, and every corner is a chance to lean. An A-frame skips that. The two panels lean on each other like a tent, and the triangles stop them from spreading. Every joint is a long edge, so the icing has a lot to grip. That is why the A-frame on our gingerbread house layouts page is called the fastest to assemble.
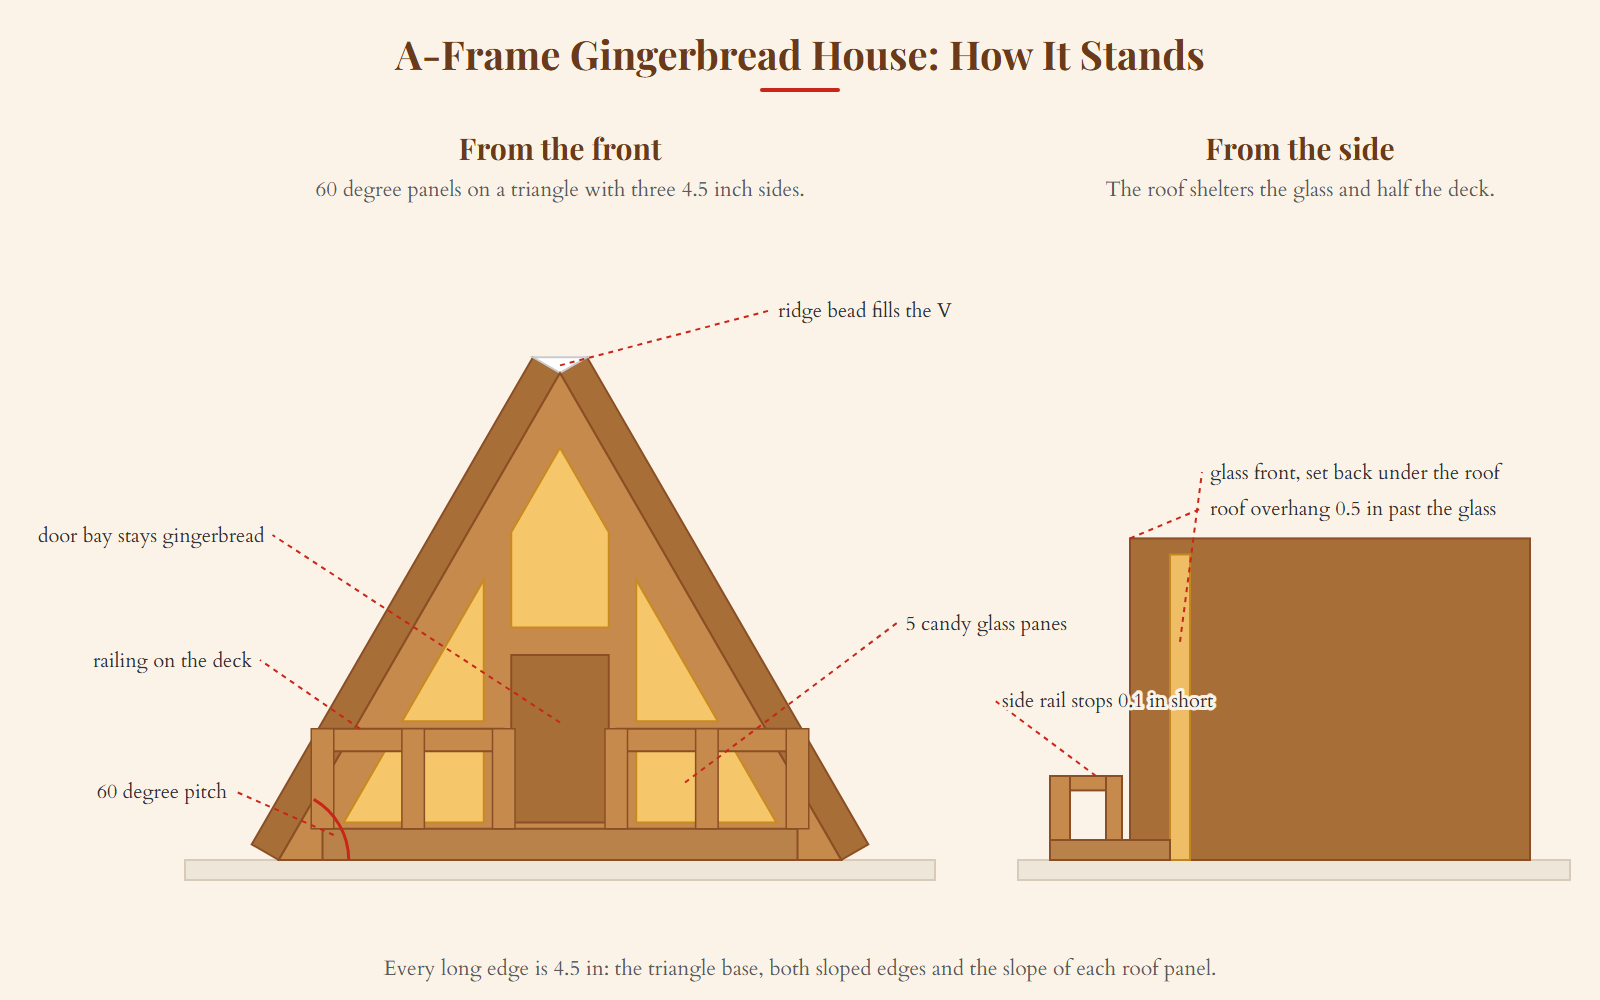
The 4.5 Inch Rule: at a 60 degree roof, the end triangle has three equal sides, and the slope of each roof panel matches them. The base of the triangle is 4.5 inches. Both sloped edges are 4.5 inches. Each roof panel is 4.5 inches from the board to the ridge. So any piece checks any other. Hold a baked roof panel against a triangle edge, and if they disagree, one of them spread in the oven and needs a trim. On most templates you need a protractor to know if your roof will close. Here you need one ruler measurement.
The steep angle is also what makes it look right. Real A-frame houses have roofs that start at or near the ground, and the style boomed from the mid 1950s through the 1970s as vacation and ski homes, Park City ski houses among them. Lower the pitch and you get a cottage with short walls. Keep it at 60 degrees and the roof is the wall, which is the whole look.
Square-cut panels leave a small V at the ridge, about 0.43 inch wide. No beveling needed: one thick bead of icing fills it.
The Glass Front: Candy Glass in a Gingerbread Frame
The glass front is what turns a plain A-frame into a chalet. It is also the one piece that needs care, because candy glass is pretty but weak. It cannot hold anything up. So the front triangle is a gingerbread frame first and a window second: a 0.3 inch border all the way round, two upright bars and two crossbars, each at least 0.2 inch wide, and the middle bay at the bottom left solid as the door.
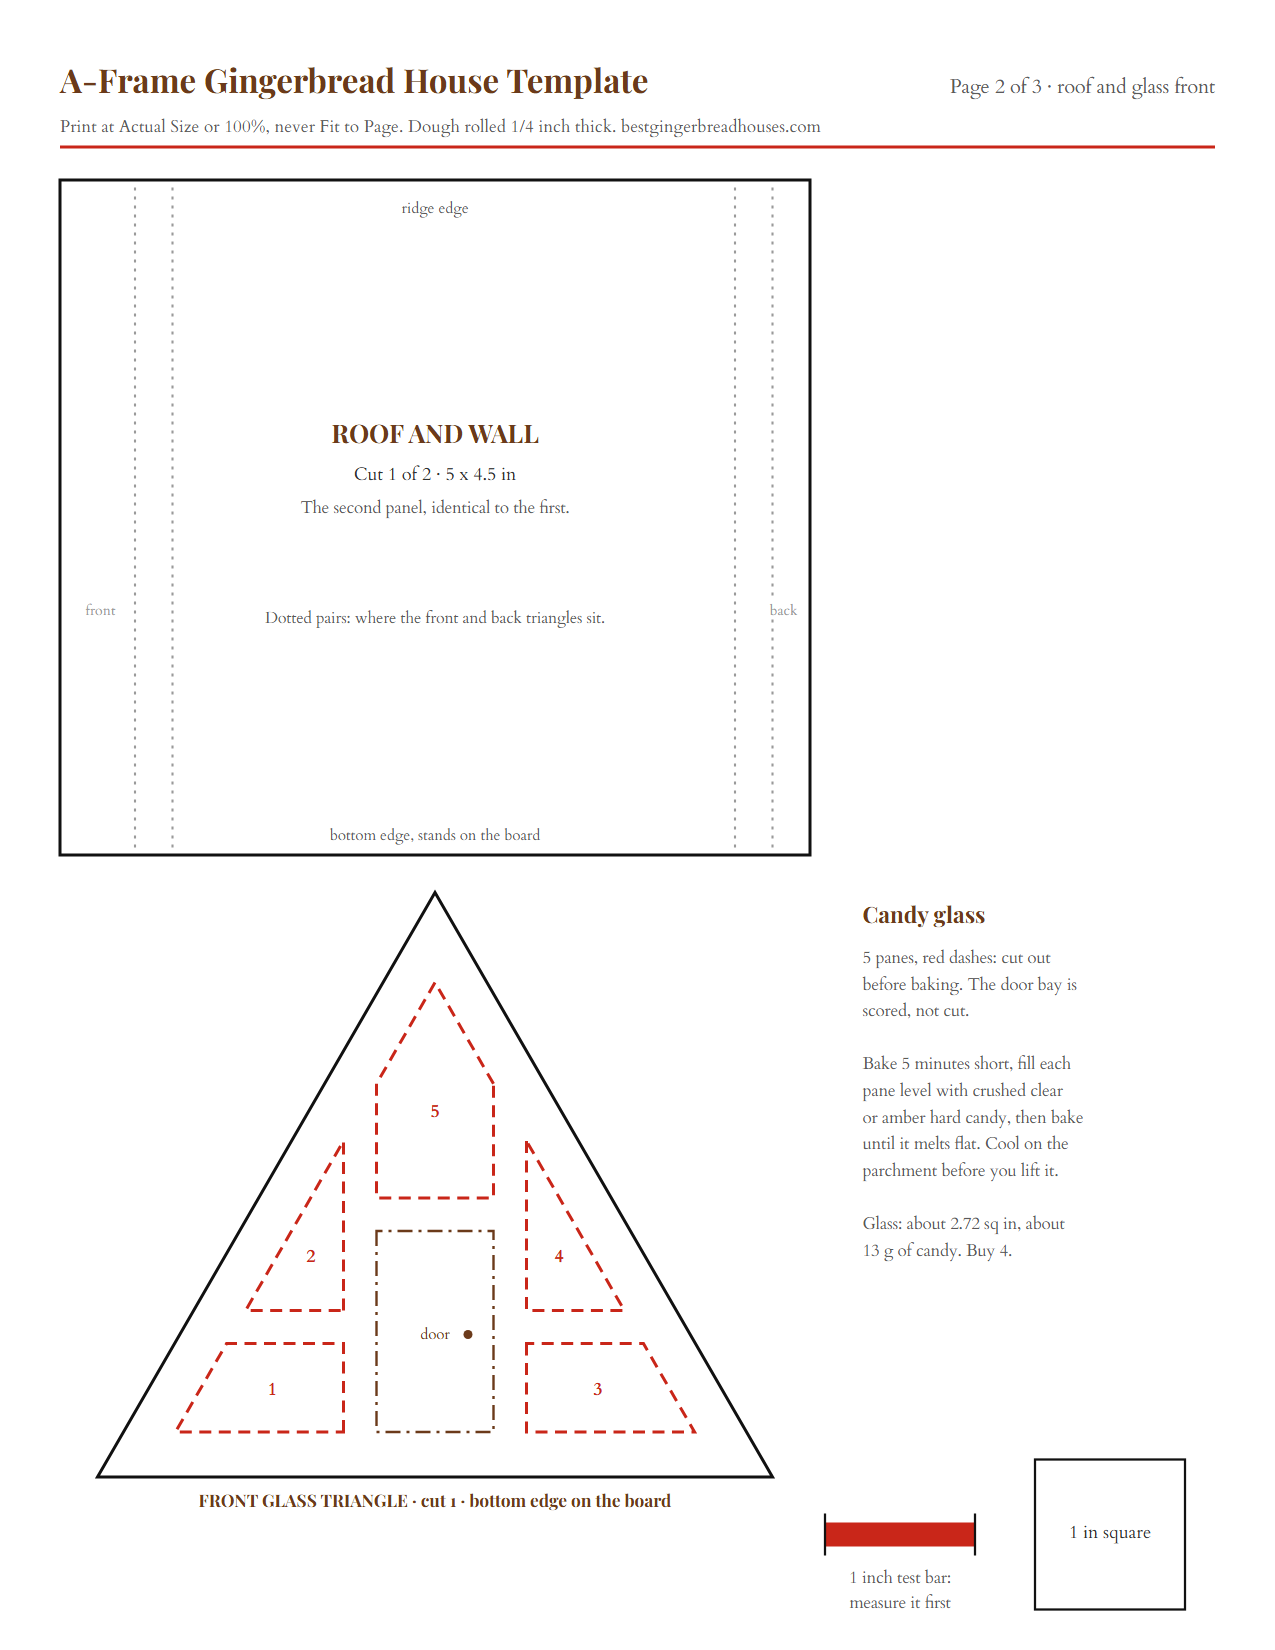
The script that drew the template also checked every pane. Any bay narrower than 0.3 inch stays gingerbread, because a sliver of candy that thin cracks as it cools. The five panes that pass run from about 0.6 by 1.1 inches to 0.8 by 1.4, and together they cover about 31 percent of the triangle. That is enough glass to read as a window wall from across a room, with enough frame left to carry the roof.
The candy is a second bake. Pull the glass triangle about 5 minutes before the other pieces, while it is nearly done, and fill each pane with crushed hard candy. Betty Crocker’s candy window method gives two rules worth keeping: make sure the candy touches the edges of the dough, and do not mound it. Then let the piece cool before you peel off the parchment. Our gingerbread house candy guide sorts which translucent candies work as window glass.
You need less candy than you think. The five panes add up to about 2.7 square inches, roughly 13 grams, so four ordinary hard candies cover it with a little spare. Pick the color for the look. Clear reads as daylight on a ski slope, and amber or yellow reads as lamplight, which is what you want for the cozy glowing cabin.
Picture two builders with the same template. The first cuts the panes, bakes, fills and lifts the triangle off the tray while it is still warm, because she wants to see it standing. A crossbar bends, the pane above it cracks, and she spends the next hour patching. The second leaves the triangle on its parchment until the tray is cold, then slides a spatula under the whole sheet. Same candy, same oven, and an hour saved.
The Deck and Railings
Plenty of A-frame cabins step out onto a deck below the glass, and this one does too. The deck floor is a plain slab, 3.8 by 1.5 inches, scored into boards. It slides 0.5 inch under the roof overhang, right up to the glass, and sits just below the door sill, so the door looks like it opens onto it.
The Short Rail Rule: the side railings stop 0.1 inch before the roof edge, on purpose. At the railing line, the underside of the roof is only about 0.82 inch above the board, and the top of a railing stands 1.05 inches up. A railing that ran under the roof would hit it, and a roof resting on a railing pushes the railing over as the icing sets. Stopping short means the roof only ever bears on the triangles and the board.
The railings are solid pieces with the balusters scored in rather than cut out, because slats as thin as the ones in the photos snap before they ever reach the deck. Score them deep while the dough is raw and they read as slats once the icing goes on. Glue the railings on after the house has set. The gap in the front railing is the way up from the snow, and the step board sits on the snow right in front of it.
How Long It Takes
Plan two sessions. Bake, melt the glass and decorate the roof panels flat on day one, when nothing is glued and an interruption costs nothing. Raise the house on day two. After that the icing page sets every wait: two hours before a joint takes weight, four before candy, overnight before you move the house. Because an A-frame has no separate walls, there is one less wait than on a box house.
Building with kids? Give them the deck and the snow. The deck sits on the board and cannot fall, and snow can be fixed with a knife. Keep the raising for an adult with steady hands.
A-Frame Build Clock
Enter when you start baking and get a clock time for every stage, from the first tray to the moment the house can be moved.
Cure times are the royal icing guidance from our gingerbread house icing page: two hours before a joint takes weight, four before candy, overnight before the house is moved. Bake times come from our house dough recipe; the other stage lengths are estimates, not timed on a build. Warm or humid kitchens run longer, so check each joint by hand before you load it. Nothing you enter leaves this page.
How to Make an A-Frame Gingerbread House Step by Step
The dough and icing recipes are on their own pages. Use our house dough for the pieces and the royal icing mortar that holds them. This walkthrough is only the A-frame’s build order.
1.Print the template and measure the test bar
Print all three pages at Actual Size and measure the 1 inch bar on each. If it reads anything else, change the print setting and print again before you touch flour.
Why this matters: the roof only closes at the ridge when panels and triangles print at the same scale, so print all three pages with one setting.
2.Roll the dough and cut the ten pieces
Roll the dough to an even 1/4 inch on parchment, lay the paper pieces on it a finger’s width apart, and cut around them with a sharp knife. Keep the two roof panels on one tray so they bake to the same size. Give the glass triangle a tray of its own.
Why this matters: the glass triangle comes out early for its candy. On its own tray, it can leave the oven without disturbing anything else.
3.Cut the openings before baking
Cut the five panes out of the front triangle along the red dashes, and lift each piece out with the knife tip. Leave the door bay in place and score its outline and a knob dot. On the back triangle, cut the small window and the hatch at the bottom edge.
Why this matters: baked gingerbread cracks when you saw an opening into it. Soft dough cuts clean, and the thin bars between panes survive.
4.Bake and trim the pieces while warm
Bake at 300 degrees for 22 to 30 minutes, depending on panel size, as our house recipe says. As soon as a tray comes out, lay each paper piece back on its panel and trim the edges straight. King Arthur’s construction gingerbread recipe also trims while warm, because warm gingerbread cuts clean and cold gingerbread snaps.
Check as you go: the railings and deck are small and bake faster than the roof panels, so pull them early when the surface turns matte and the edges feel firm. Ovens vary, so watch the first tray rather than the clock.
Why this matters: this is where the 4.5 Inch Rule pays off. Hold each roof panel against a triangle edge and trim whichever one grew.
5.Melt the candy glass
Take the glass triangle out about 5 minutes early. Crush the hard candies in a zip bag with a rolling pin, and spoon the pieces into each pane until they touch every edge and sit level with the dough. Return the tray to the oven and watch through the door until the candy melts flat, then take it out.
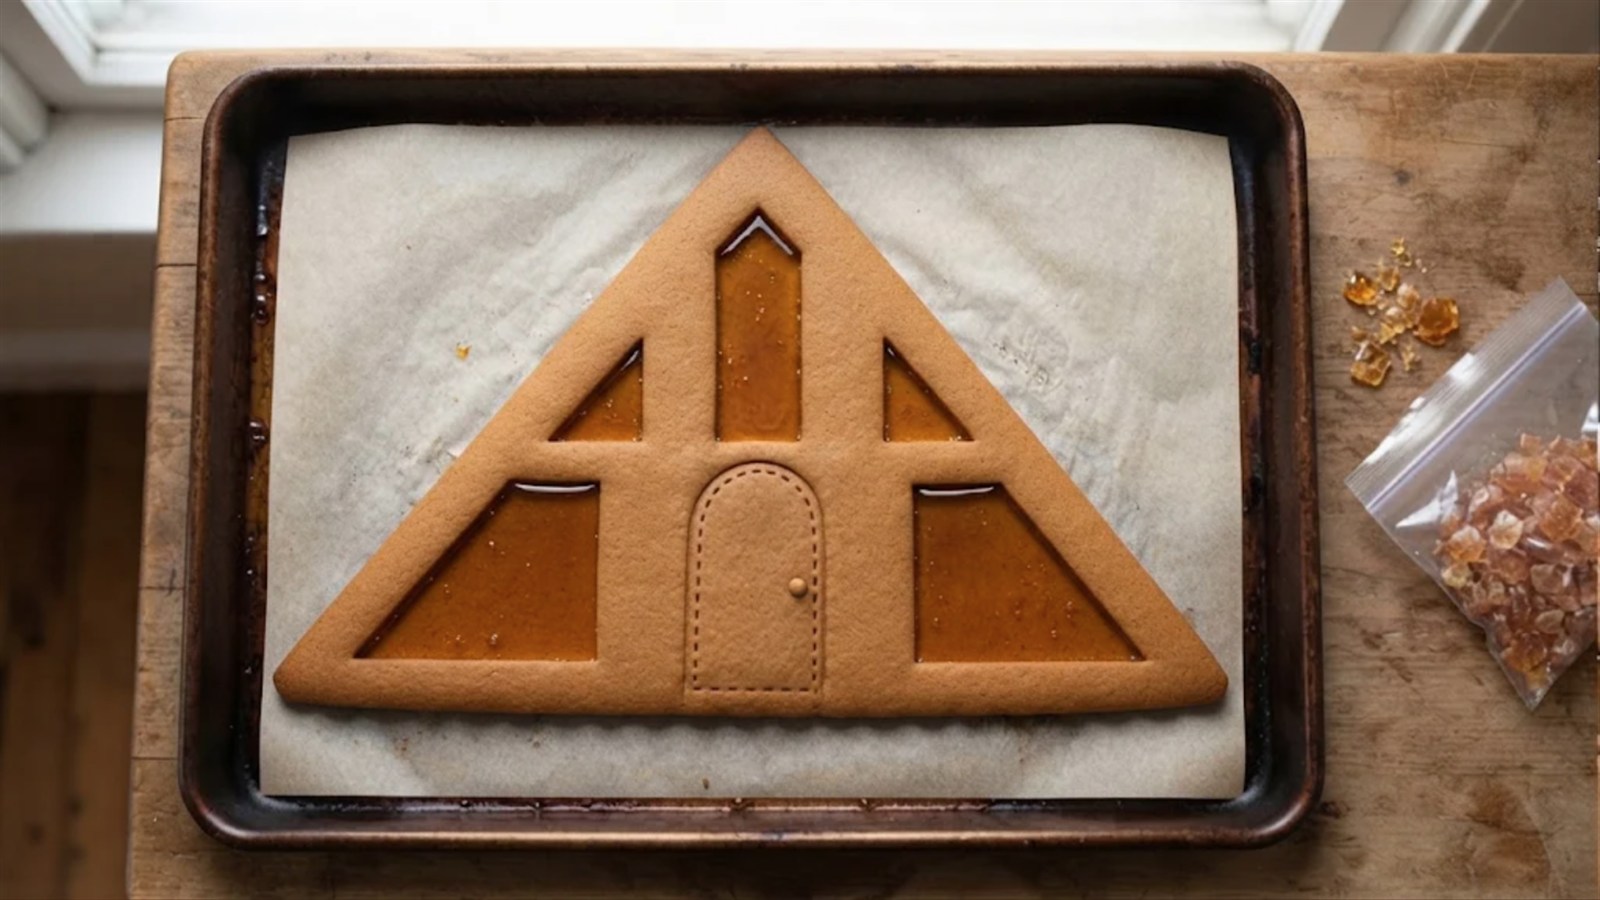
Why this matters: mounded candy melts into a lens that sits proud of the frame, and the roof edge will not sit flush against it.
6.Cool the glass triangle flat
Leave it on the parchment until the tray is completely cold. Then slide a spatula under the parchment, not the piece, and peel the paper away from the back.
Why this matters: warm candy is still soft, and the thin bars flex. A triangle lifted warm bends at a crossbar.
7.Decorate the roof panels while they lie flat
For the snowy chalet, spread thick white icing over the outside of both roof panels now, stopping a finger short of the ridge edge, and let it crust. For the mid century look, pipe straight lines down each panel. For the cozy cabin, pipe rows of small scallops from the eave up.
Why this matters: on a roof this steep, soft icing can creep downhill before it sets. Flat, it stays where you put it, and by building day it has a dry crust.
8.Stand the back triangle and the first roof panel
Pipe a bead along the board where the first panel’s bottom edge will sit and along both sloped edges of the back triangle. Stand the triangle on the board, propped with a can, and lean the first panel against it with the back triangle on its dotted line. Hold it until it stops sliding, then prop the panel with a second can.
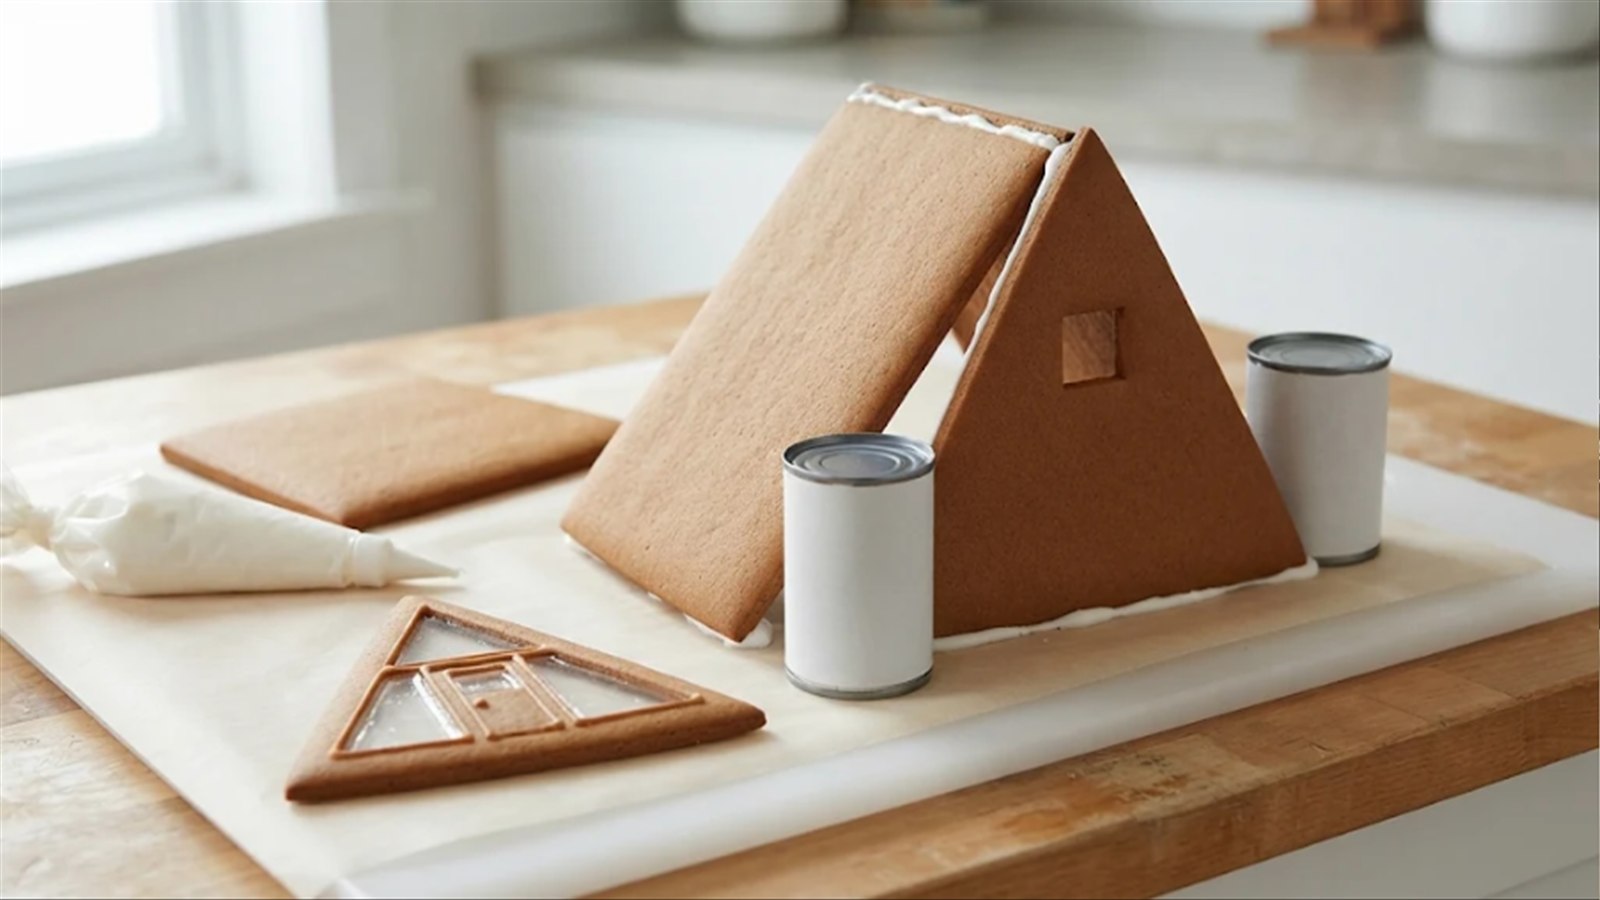
Why this matters: the solid back triangle is the strong one, so it goes up first and carries the first panel while you handle the glass.
9.Stand the glass triangle
Pipe its sloped edges and bottom edge, stand it against the same panel on the front dotted line, 0.5 inch in from the panel’s front edge, and check it stands upright.
Why this matters: the setback is the roof overhang that shelters the glass and the deck. A triangle set flush leaves the deck out in the weather.
10.Lean in the second panel and wait
Pipe the board line on the open side, then lean the second panel against both triangles until its top edge meets the first panel at the ridge. Prop it with cans and leave everything for two hours.
Why this matters: the panels hold each other up only once the icing has set. Until then, the cans do the work.
11.Pipe the ridge bead, then the deck and railings
Fill the V along the ridge with one thick bead. Pipe a line along the bottom of the deck floor, slide it under the overhang up to the glass, and stand the railings on its edges: the two front pieces with a gap between them, the side pieces stopping short of the roof. Set the step on a dab of icing in front of the gap.
Why this matters: the deck sits on the board and adds no weight to the house, so it can go on as soon as the panels have set.
12.Decorate, then leave it overnight
Wait four hours after the last joint, then finish the look you picked. Leave it overnight before moving it, and lift it by the board.
Why this matters: fresh icing under a candy load sags. Overnight, it sets hard enough to carry.
Three A-Frame Looks From One Template
The same ten pieces make three different houses. The build stays the same; the roof, the glass color and the trim change. Pick the look before you bake, because two of them decorate the roof flat.
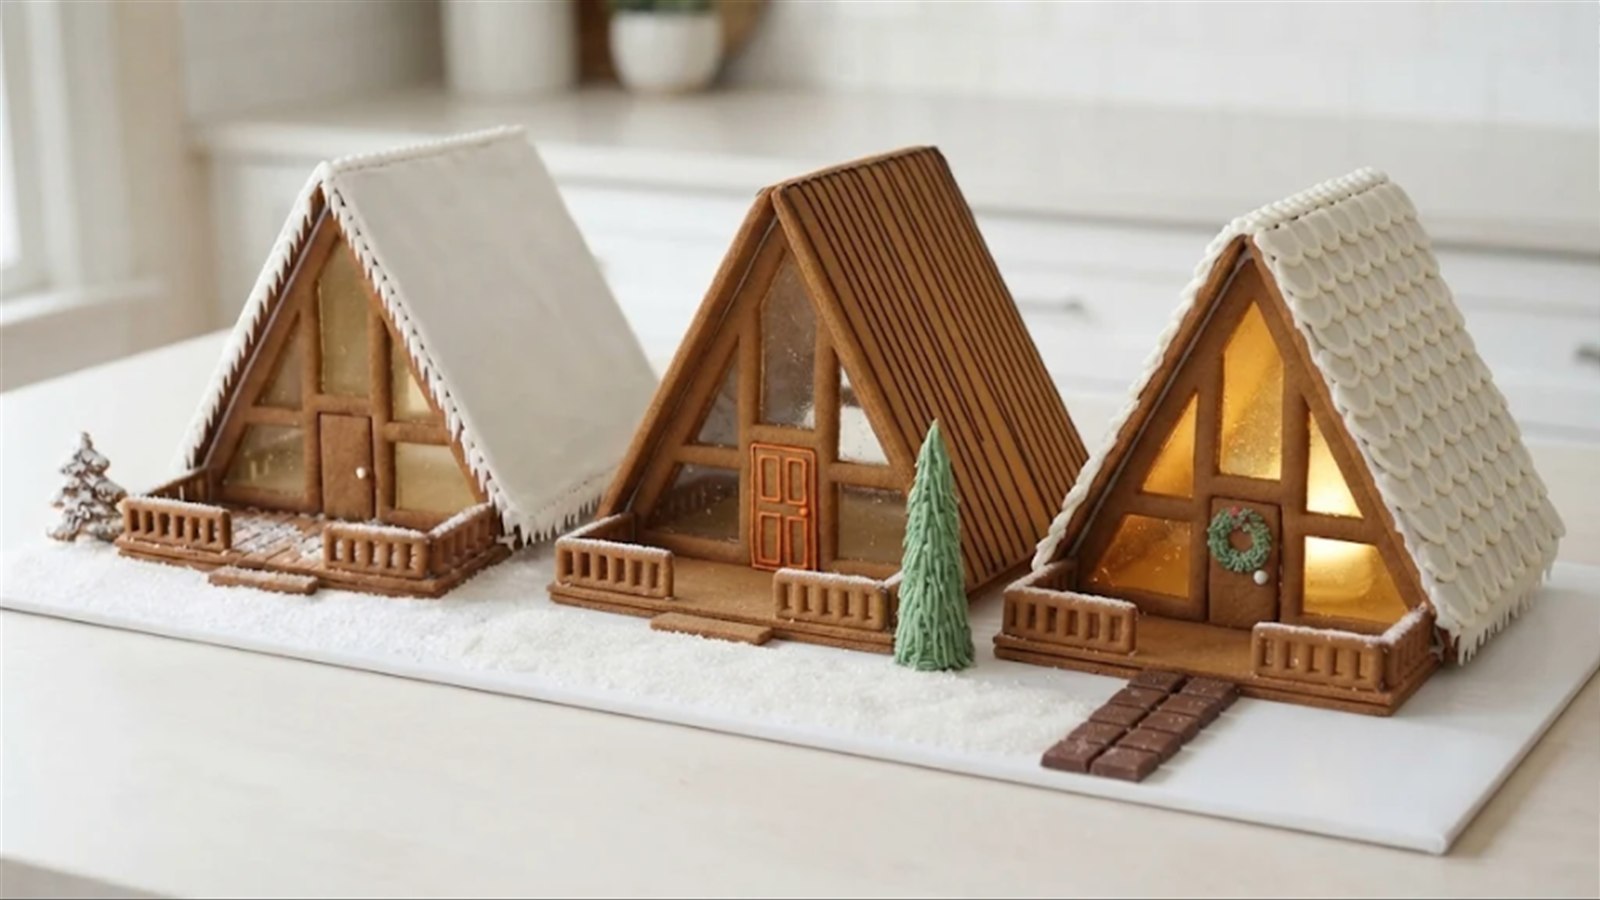
| Look | Roof | Glass | Trim |
|---|---|---|---|
| Snowy ski chalet | Thick white icing snow, spread flat | Clear or pale amber | Icicles, snow on the deck, a snowy fir tree |
| Mid century modern A-frame | Bare gingerbread with straight piped lines | Clear | One bright door, one tall tree, a strip of gravel |
| Cozy cabin with LED glow | Piped scallop shingles | Amber or yellow | A wreath, a path, a battery tea light inside |
Snowy ski chalet
Spread the snow thick on the flat panels, push it just over the bottom edge so it hangs, and let it crust overnight. After raising, pipe icicles along both eaves, add snow to the deck and the ridge, and dust everything with powdered sugar. A snowy gingerbread fir tree beside the deck finishes it.
Mid century modern A-frame
Leave the roof bare and pipe thin straight lines from ridge to eave in dark brown icing, so the panels read as wood siding. Keep the glass clear, pipe the door in one bright color such as orange or teal, and stop there. The look is sparse on purpose: one tall tree, a strip of white sugar gravel, no candy clutter.
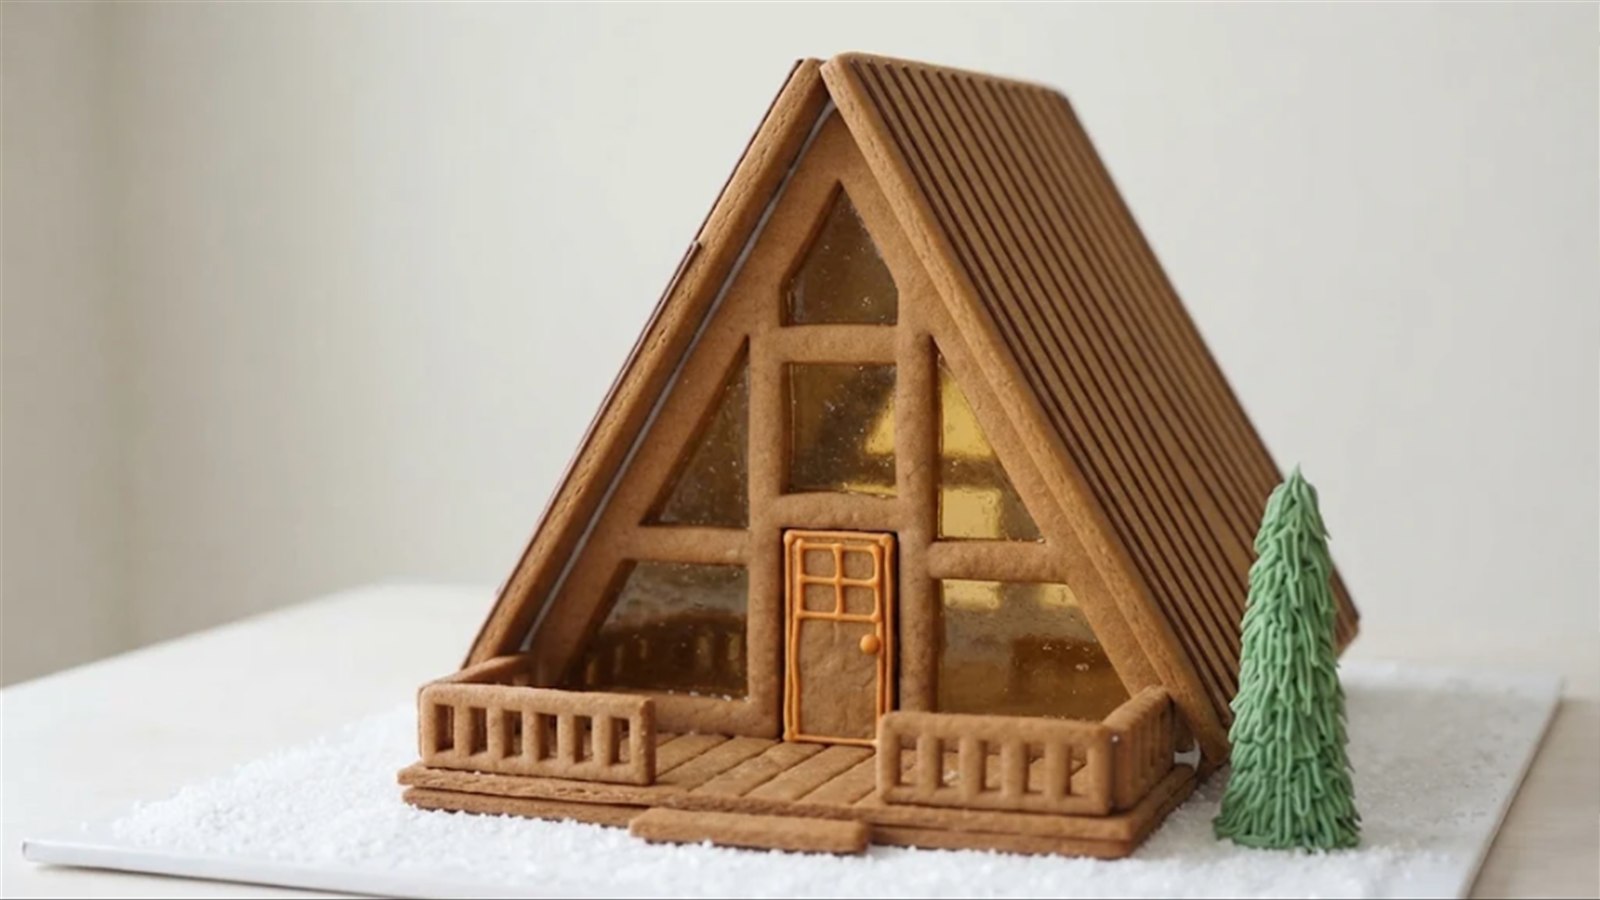
A-frames were a mid century favorite, but they are not the only mid century house. Our mid century modern gingerbread house builds the other kind: low, flat-roofed, with a wall of glass and a carport.
Cozy cabin with LED glow
Use amber or yellow candy for the glass, pipe scallop shingles on the flat panels, and add a green wreath to the door. When the house has set, slide a battery tea light in through the hatch in the back triangle. The hatch is 1.7 inches wide and 1.2 tall, so measure your tea light first. Our light up gingerbread house guide covers the lights that work. Never a real candle.
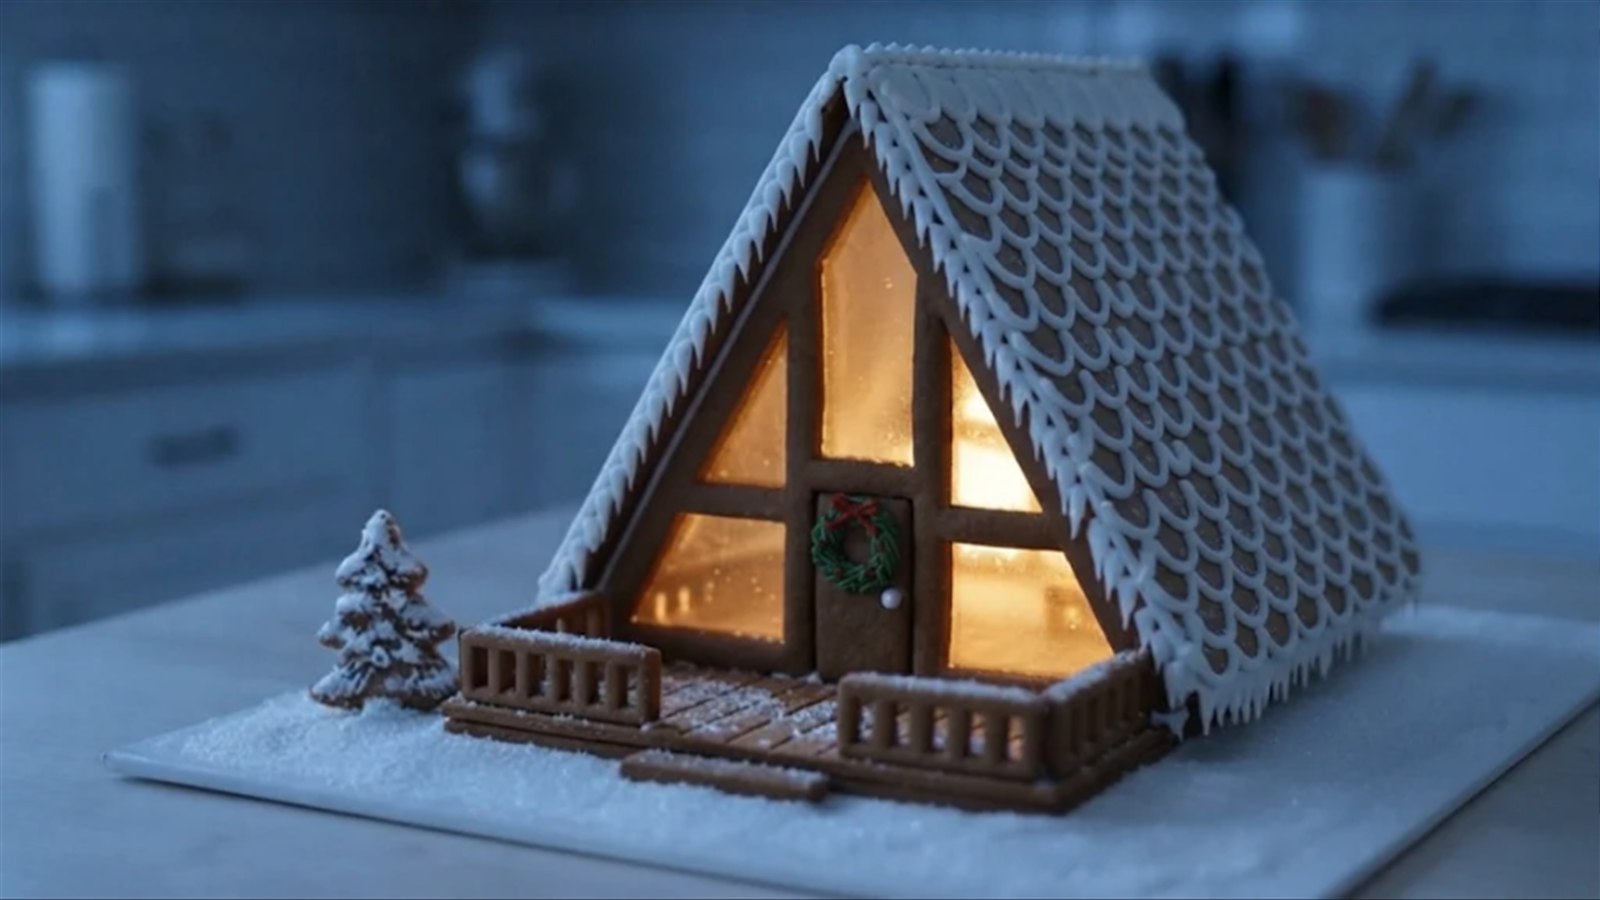
One chalet looks good. A row of them looks like a ski village. The planner below turns a house count and a look into a shopping list, a dough batch count and a board size.
A-Frame Chalet Planner
Building one chalet or a whole ski village? Pick the count and the look for a shopping list, the dough batches and the board you need.
Dough and candy figures come from the template’s own geometry, worked out by script. Candy counts assume hard candies of about 4.5 grams and include a quarter extra for spills; weigh yours if they are bigger. Batch counts use our house dough recipe, which covers about 225 square inches rolled 1/4 inch thick. Nothing you enter leaves this page.
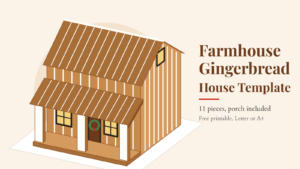
For a mixed village, an A-frame sits well beside our farmhouse gingerbread house template, another small house with its own printable. Our gingerbread village guide covers laying out the board.
Troubleshooting
| What you see | Why | What to do |
|---|---|---|
| The panels will not meet at the ridge | A roof panel or triangle spread in the oven | Hold each panel against a triangle edge; both should be 4.5 inches. Trim the long one, or fill a small gap with the ridge bead |
| The panels slide out at the board | Icing still soft at the bottom edge | Pipe a line of icing on the board in front of each panel as a stop, and prop with cans until it sets |
| A candy pane cracked | Lifted warm, or the frame flexed | Lay the triangle flat, set a few crushed candies on the crack and give it a few minutes in a 300 degree oven |
| Candy glass sits proud of the frame | The candy was mounded | Fill level next time; for now, set that side against the panel with extra icing |
| A pane came out cloudy or sticky | Humid air on cooled candy | Build in a dry room and store the house away from steam |
| Snow slid down the roof | Spread on the raised roof, or not crusted before raising | Scrape it off, let the panels set, and pipe icicles instead |
| The deck will not slide under | Deck spread in the oven | Trim the back edge of the deck until it fits between the panels |
| The whole sheet printed small | Fit to Page was on | Measure the bar, switch to Actual Size, and reprint |
Easier Versions: No-Bake and Kit Shortcuts
A No-Bake Graham Cracker A-Frame
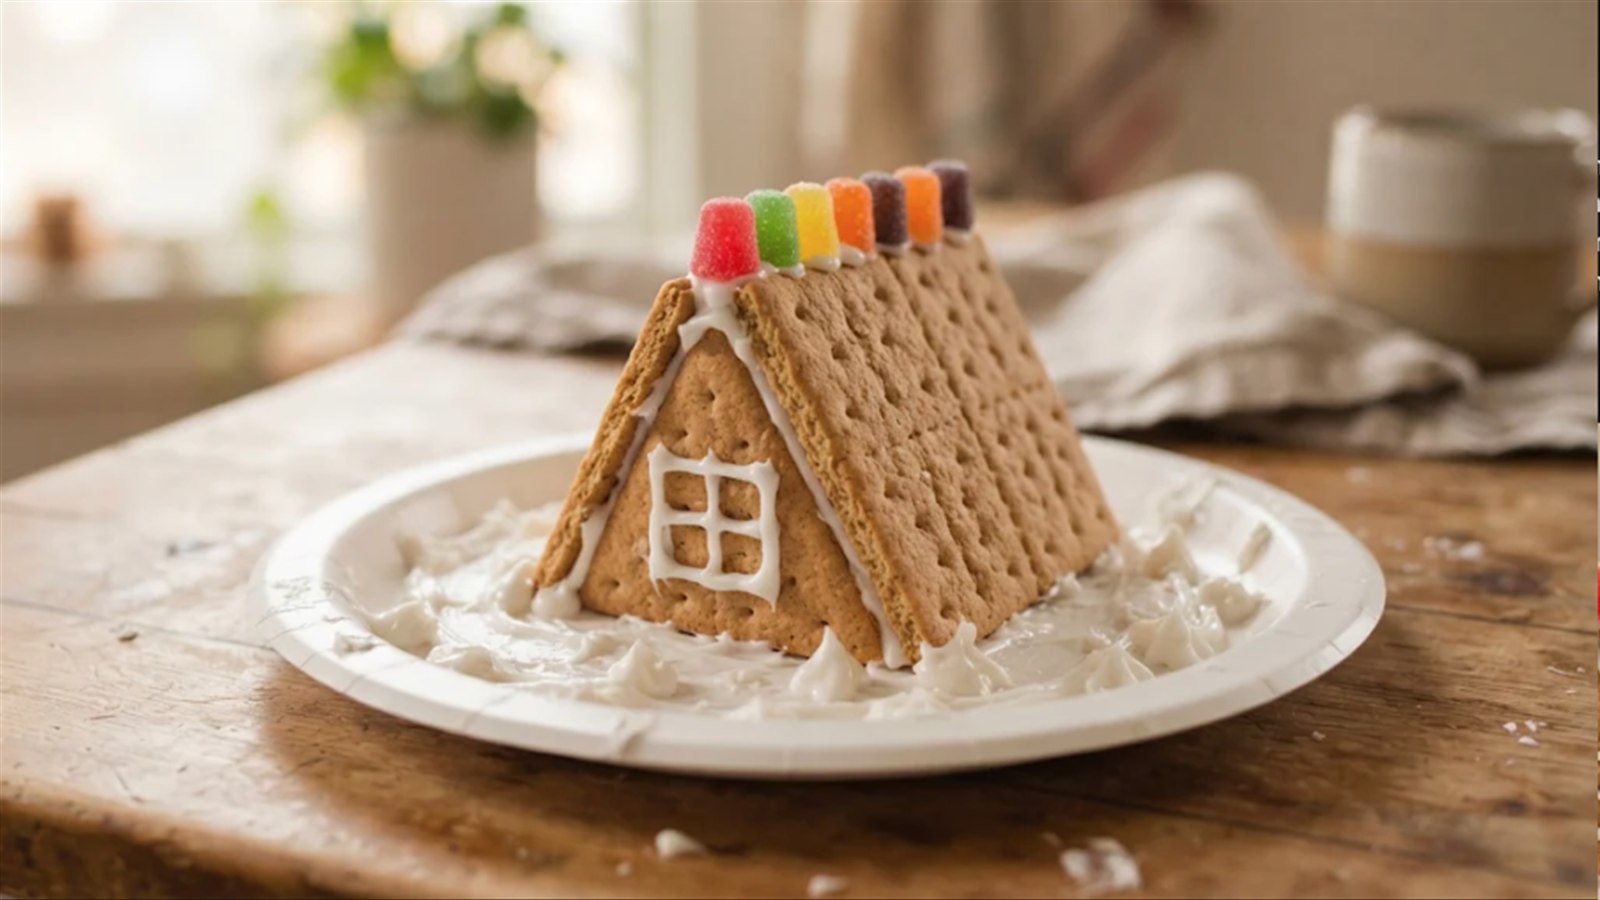
For small kids, skip the oven. Lean two whole graham crackers together on a paper plate and close each end with a cracker snapped into a rough triangle, using our graham cracker gingerbread house method and stiff icing. Pipe a window grid on the front in white icing instead of glass. It will not be a true 60 degrees, and nobody under eight will mind.
The Kit Shortcut
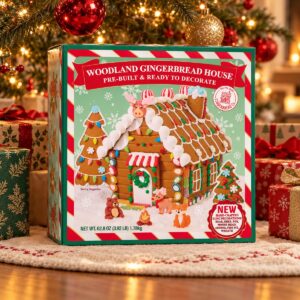
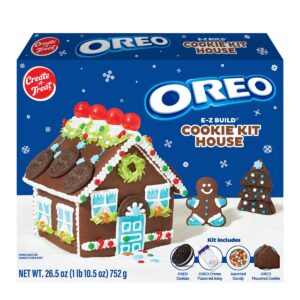
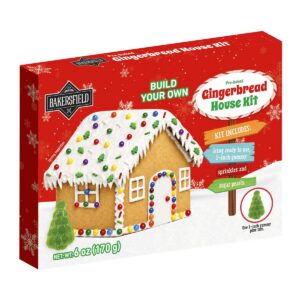
Some store kits are A-frames already. The Trader Joe’s gingerbread house kit comes as pre-baked panels for an A-frame. Build it, let it set overnight, then pipe a window grid on the front gable and add a deck of graham cracker on the board. Our gingerbread house kits guide grades every kit on its icing.
Storage Instructions
Baked pieces keep flat in a dry, airtight tin for a few days before the build; keep the glass triangle on its own layer of parchment. Store the finished house uncovered in a dry room, away from steam and sunny windows. Candy glass draws moisture from the air, so in a humid room the panes can turn sticky before the gingerbread softens. For how long the house stays edible versus how long it stays standing, see how long a gingerbread house lasts.
FAQ
Can I make it without the glass?
Yes. Skip cutting the panes, score the window grid into the front triangle instead, and pipe it in white. Everything else on the template stays the same.
Is it safe to eat?
The gingerbread and the candy are. Traditional royal icing uses raw egg white, so use the meringue powder version on our icing page if the house will be eaten.
More Gingerbread House Templates and Recipes
Every other printable shape is on the templates page. Before your first build, read our gingerbread house tips, and for more themes, browse the gingerbread house ideas.
Build Your A-Frame With Best Gingerbread Houses
An A-frame is the house that stands up fastest, and the glass front is what makes people stop and look. Print the sheet, check every piece against 4.5 inches, and let the glass cool flat. If you would rather start from a box, our guide to the best gingerbread house kits grades every kit on the icing it ships with, which is the part that decides whether the roof stays up.