A gingerbread house is fun. A gingerbread stable with a manger inside and a star above it tells a story, and it is the one the whole family gathers around on Christmas Eve.
Most versions you find are a kit bent into shape, a graham cracker craft or a set of cutters with no sizes given. This one gives you every measurement. Our house dough and royal icing recipes set the bake and every wait, and a script checked the template so the figures fit under the roof and the star clears the ridge.
You will end up with an open stable about 9 inches tall to the star, from one batch of dough over two days. Start with the template, then the story behind the manger, the figures, three looks, a day by day plan and 16 steps.
Nativity Gingerbread House: At a Glance
- Difficulty: Beginner to intermediate. Three walls and two roof panels, no front wall to fit, and no windows to fill.
- Total time: about 2 days, in six sessions. Most of it is icing drying.
- Active time: about 6 1/4 hours, counting the dough chill and the bake.
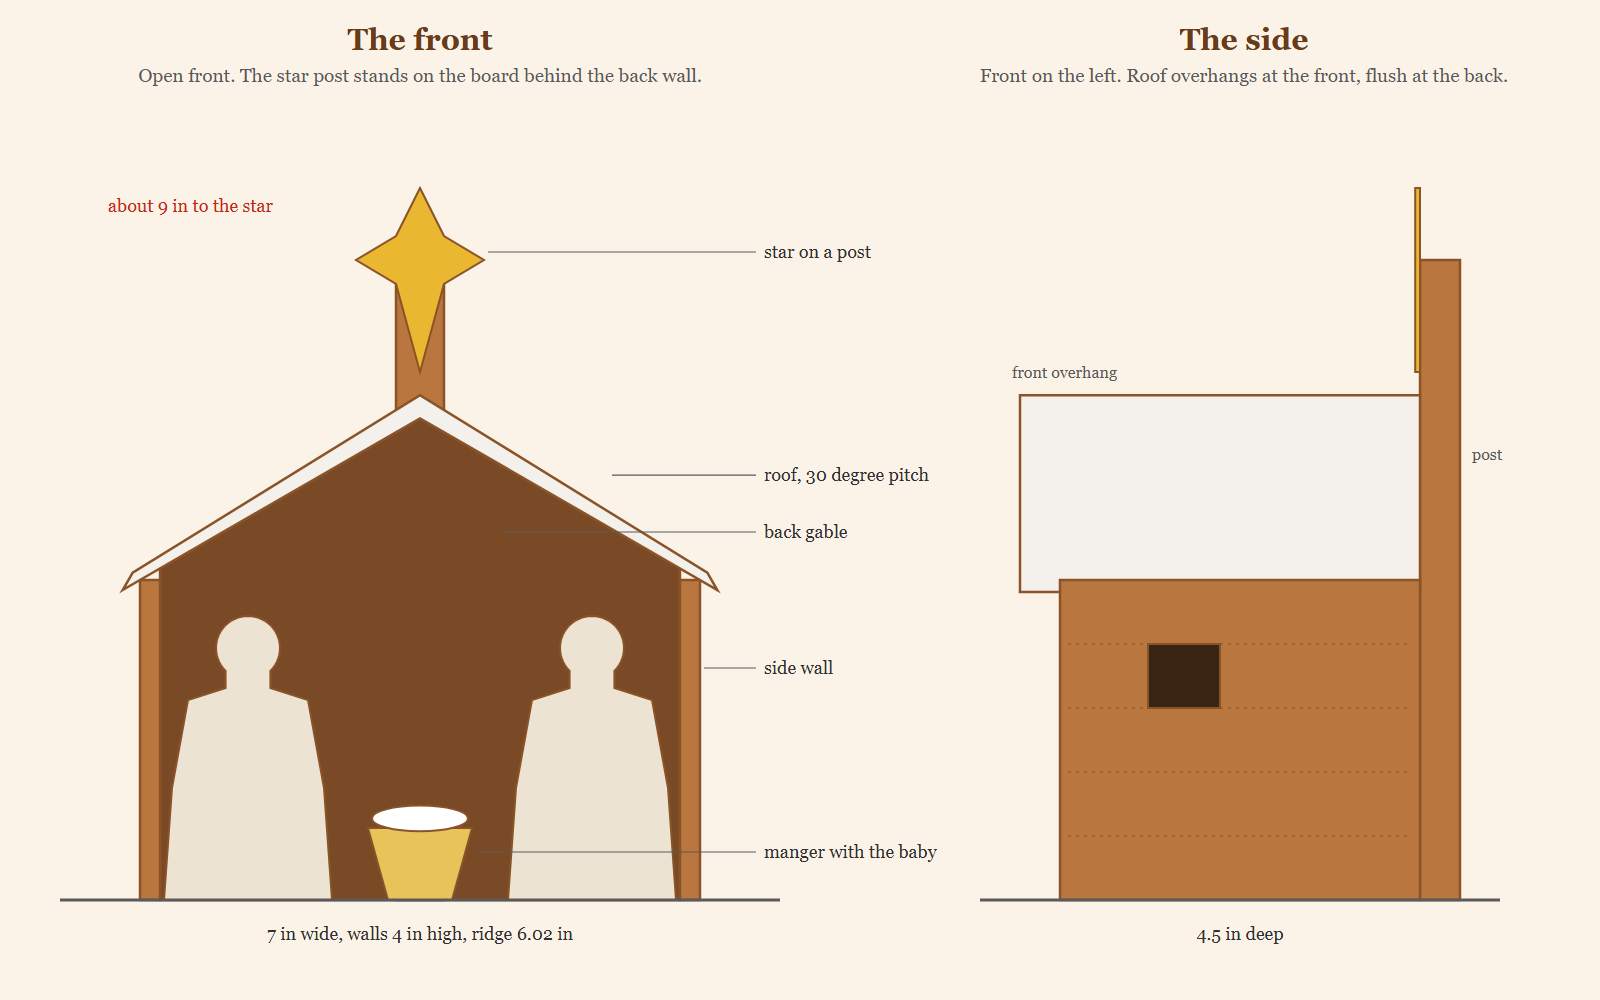
- Makes: one open-front stable about 7 inches wide, 5 inches deep with its roof and about 9 inches to the top of the star. 19 baked pieces, including a manger, a baby, Mary and Joseph.
- Template: free 4-page PDF, US Letter, true size with a 1 inch test bar on every page.
Tools: printer, ruler, scissors, a small sharp knife, rolling pin with 1/4 inch guides, parchment, 2 half sheet pans, piping bags with a small round tip, a small paintbrush, cans for propping, a board at least 10 by 12 inches.
Materials
- 1 batch of our gingerbread house dough, which bakes flat enough for plank walls
- 2 batches of royal icing stiff enough to hold an open stable square
- Gel food coloring: brown for the wood, blue for Mary’s veil, gold or yellow for the star and the straw
- Crushed shredded wheat cereal for straw
- For the night look, a warm white battery micro LED string with a small battery box
Steps
- Print the template at Actual Size and measure the test bar.
- Make the dough and chill it for at least an hour.
- Roll the dough 1/4 inch thick and cut the side walls and back gable.
- Score the planks and cut out the hay windows.
- Cut the roof panels and the two post strips.
- Cut the small pieces: manger, baby, Mary, Joseph, star and stands.
- Bake at 300 degrees F, small pieces on their own pan.
- Trim every piece against the template while it is warm.
- Rub color into the plank lines for wood grain.
- Flood the figures, baby and star, with no faces.
- Glue the post strips, build the manger and fix the stands, then leave everything overnight.
- Stand the back gable and side walls on the board, then wait 2 hours.
- Add the lights and set the roof, then wait 2 hours.
- Raise the star post behind the stable, then wait 2 hours.
- Finish the look and set the scene.
- Let it stand overnight before you move it.
Notes: times are worked out from the set times on our icing page, not timed on a build. Ovens and doughs vary, so treat every bake time here as a starting point: check early, go by the matte surface and firm edge, and bake a scrap strip with the pieces to test before you build.
Free Printable Nativity Gingerbread House Template
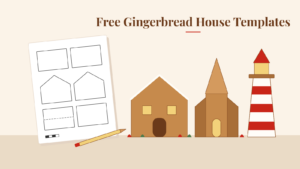
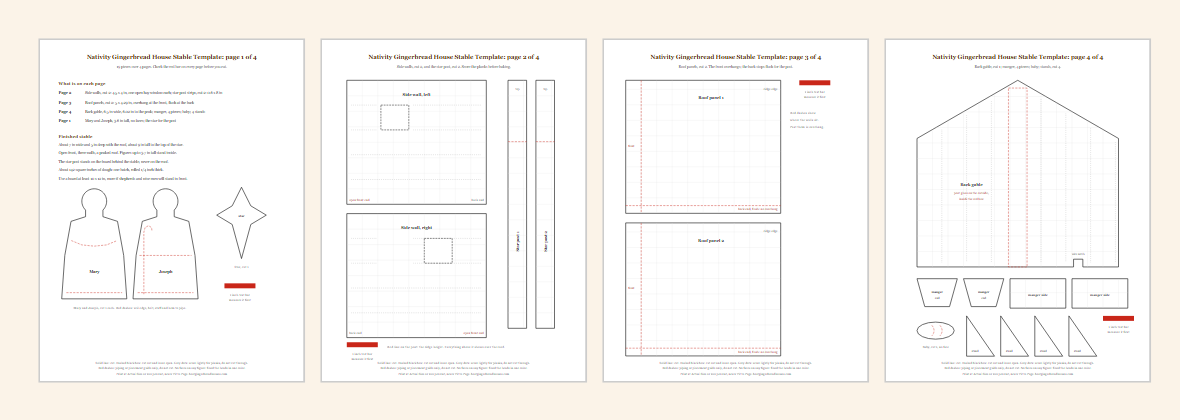
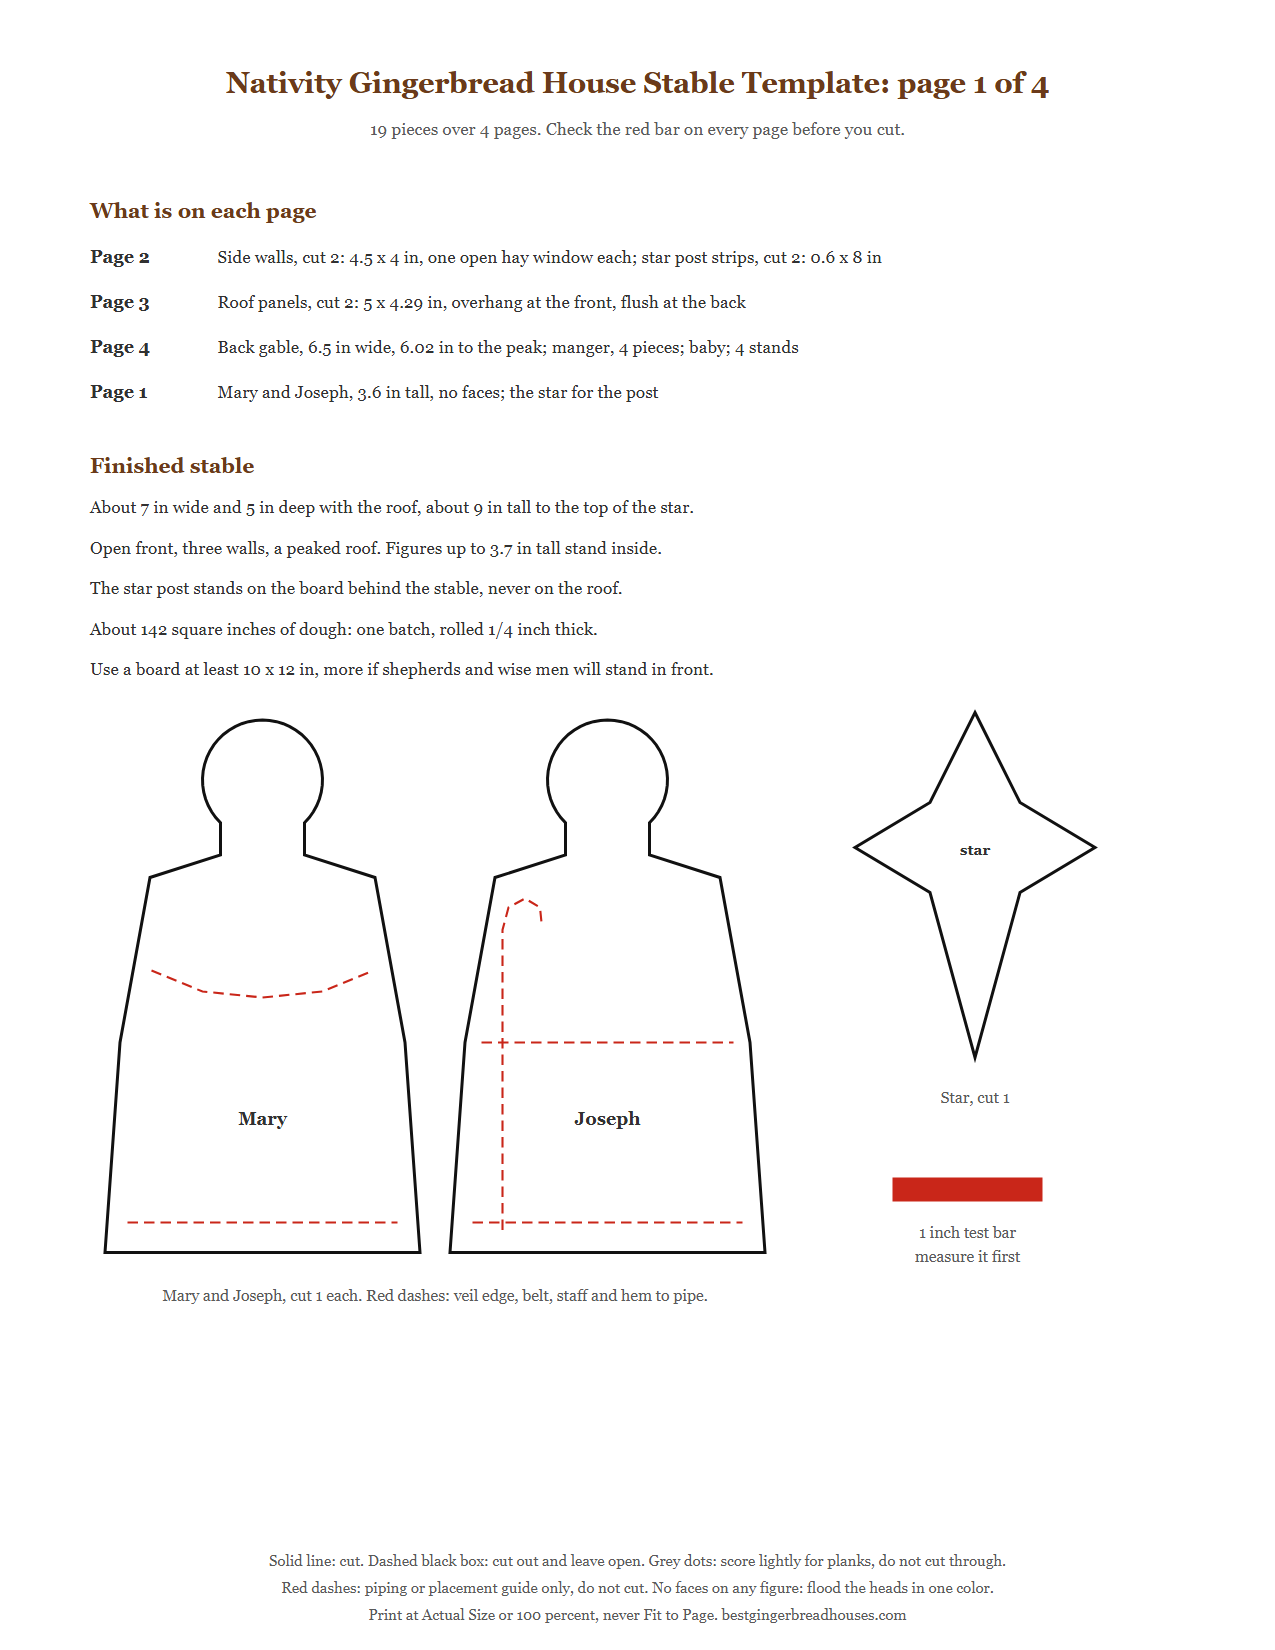
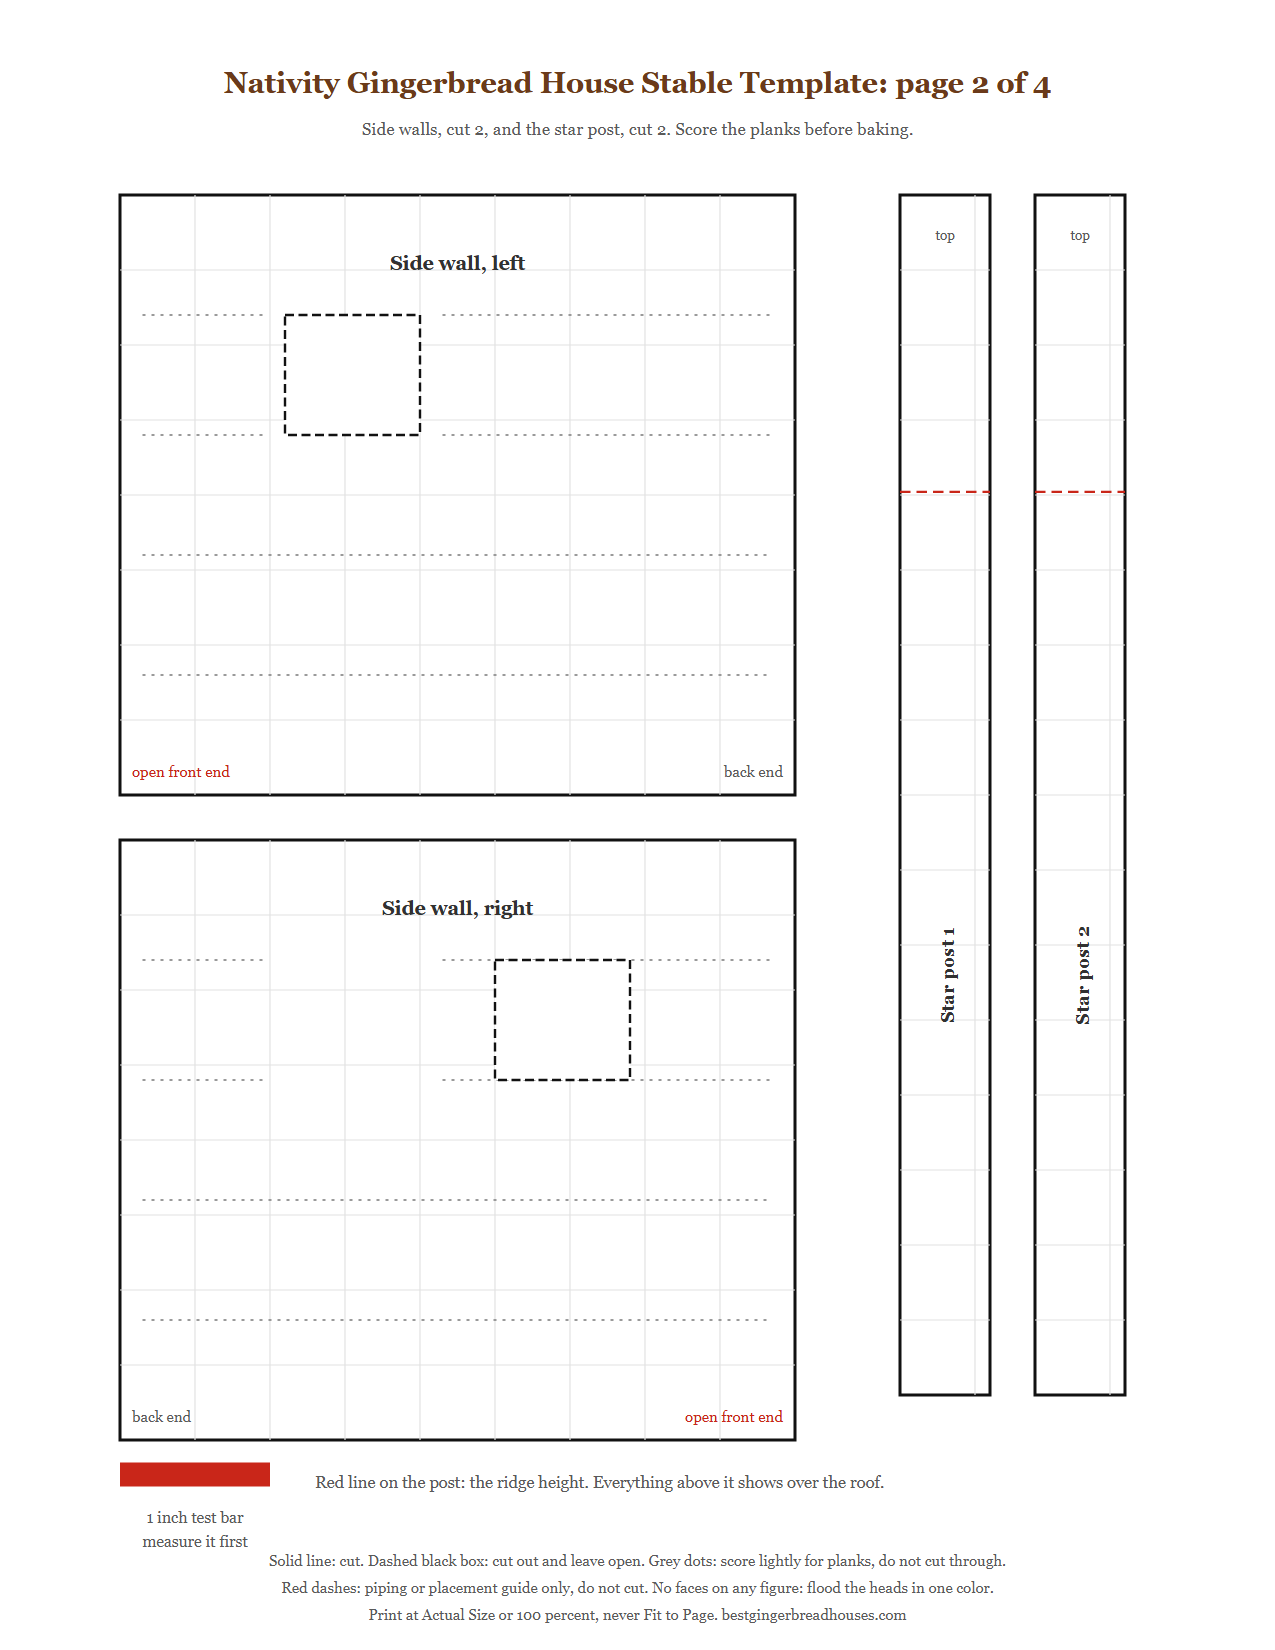
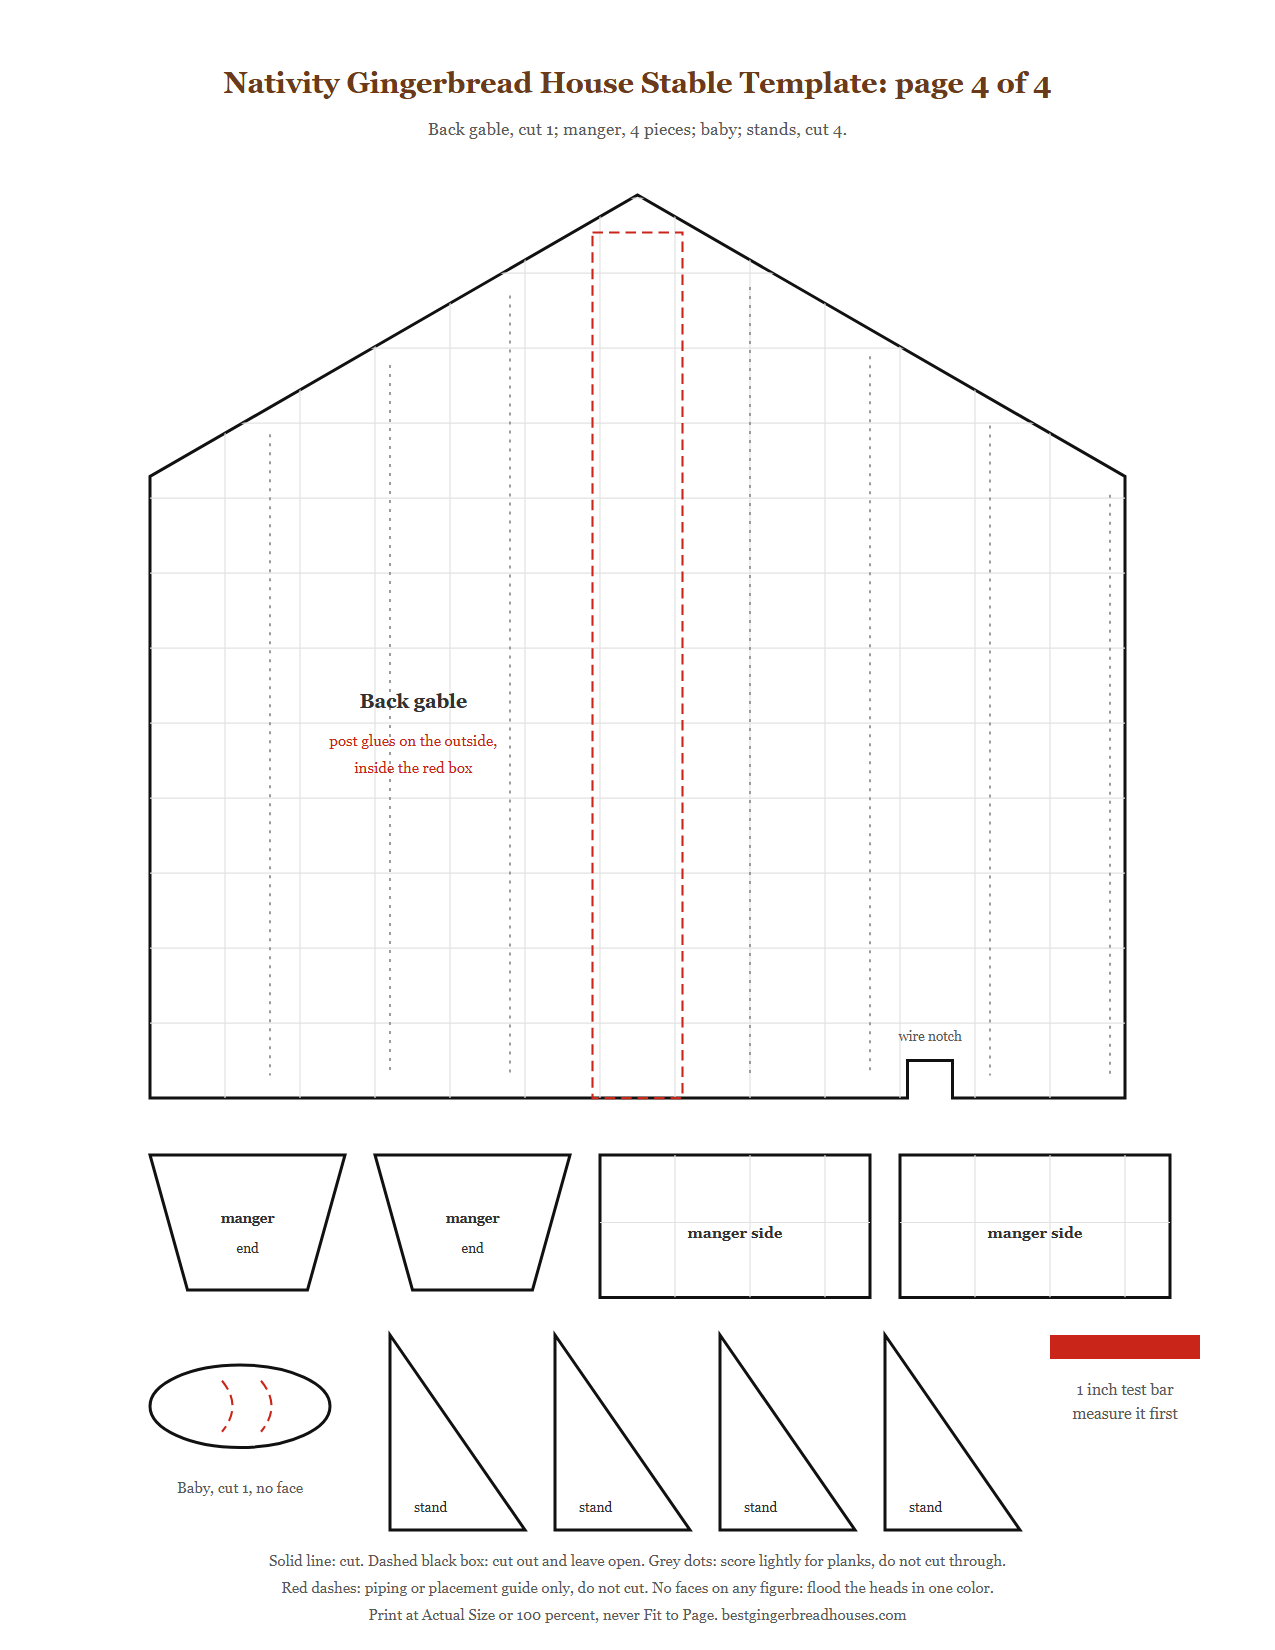
The template is four US Letter pages with every piece at true size over a faint 1/2 inch grid. Download the PDF, print it at Actual Size, and check that the red bar measures 1 inch before you cut anything. Solid lines are cuts. Dashed black boxes are hay windows you cut out and leave open. Grey dots are plank lines you score but never cut through, and red dashes are guides for piping and placing.
| Piece | Cut | Size |
|---|---|---|
| Side walls | 2 | 4.5 x 4 in, plank lines and one open hay window each |
| Back gable | 1 | 6.5 in wide, 6 in to the peak, a wire notch and a box marking where the post glues |
| Roof panels | 2 | 5 x 4.3 in, overhang at the front, flush at the back |
| Star post strips | 2 | 0.6 x 8 in, glued face to face |
| Star | 1 | Four rays, 2.3 in tall |
| Manger | 4 | Two sloped ends and two sides, 1.8 in long |
| Baby | 1 | A 1.2 in oval with swaddling lines, no face |
| Mary and Joseph | 2 | 3.6 in tall robed figures, no faces |
| Stands | 4 | Small triangles that prop each figure upright |
The pieces come to about 142 square inches. One batch of our house dough covers about 225, so there is room for a test strip and the extra figures in the planner below. The roof is pitched at a gentle 30 degrees. A low roof reads as a humble shelter for animals, where a steep one reads as a church.
Why the Star Stands on a Post Behind the Stable
An open-front stable is the classic nativity shape, and it is a strange building in gingerbread. Every house you have built has four walls that hold each other square. This one has three, and the open side is the one everyone looks at.
The free nativity template from Tikkido solves the open front with a frame of gingerbread beams across it, and its author calls those beams the trickiest bit to assemble. This stable takes a simpler route.
The roof ties the walls together. The two side walls stand on the board and lean on the back gable. Once the roof panels sit on top and meet at the ridge, they lock the side walls in place, so no front beam is needed.
The roof hangs over the front, not the back. At the open front the roof runs 1/2 inch past the walls, like a porch over the manger. At the back it stops flush with the gable, because that is where the post stands.
The star never sits on the roof. A star stuck on the ridge presses on the weakest joint of the stable and tips as the icing softens. Here the post stands on the board, glued against the back gable, and rises almost 2 inches above the ridge. The star sits on top, and its lowest point still clears the roof.
The walls are tall enough for the figures. The side walls are 4 inches high, so a 3.6 inch figure stands inside with room to spare.
What the Christmas Story Says About the Manger
It helps to know what you are building, especially if children will ask. The birth story comes from two Gospels, and they tell it a little differently.
Luke tells of the manger. In Luke 2, Mary “wrapped him in cloths and placed him in a manger, because there was no guest room available for them.” The manger comes up three times in that chapter, and the angel gives it to the shepherds as the sign they should look for. A manger is a feeding trough for animals.
The stable comes from tradition. Luke never uses the word stable. Because a manger is where animals eat, families and artists have long pictured a shelter for animals around it. That is the scene this template builds: a loving picture of the story, not words from it.
Matthew tells of the star. In Matthew 2, the star the wise men followed “stopped over the place where the child was.” Matthew says they came to “the house.” That is why many families let the wise men stand a little way off, as visitors on the road, while the shepherds stand close to the manger.
Figures for Your Gingerbread Nativity
The template includes Mary, Joseph and the baby, so the stable is complete the day you bake it. Mary and Joseph share one robed outline. Mary gets a blue veil over her head and shoulders, and Joseph gets a staff and a belt.
No faces, on purpose. Every head is flooded in one color, the way a stained glass window or a paper silhouette shows a figure. A piped face is the hardest detail on any cookie, and on a nativity it is the one mistake people notice. A plain head looks peaceful from across the room, and a child can decorate Mary without worrying about getting her face wrong.
Each figure gets a stand. A flat cookie will not stand by itself. Glue one of the small triangle stands upright to the back of each figure on day 1, so it stands like a picture frame by morning.
The rest of the cast. For an angel, shepherds and wise men, our companion set of faceless nativity cookies uses the same scale, so its figures stand beside Mary and Joseph without looking too big. Shepherds stand close by. Wise men stand on the board out front.
Pick a look and your cast, and the planner works out the dough, the board and the shopping list.
Nativity Scene Planner
Pick your look and who stands in the scene. The planner tells you how much dough, which board and what to buy.
Dough areas are worked out from the template outlines, not weighed on a build, and re-rolled scraps never give back the full amount. Treat the dough line as a guide and keep a little spare. Nothing you enter leaves your browser.
Three Nativity Gingerbread House Looks
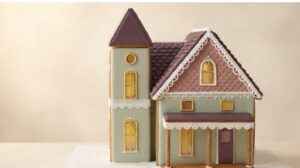
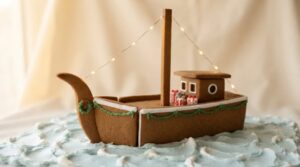
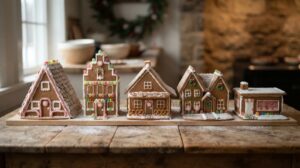
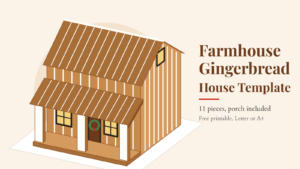
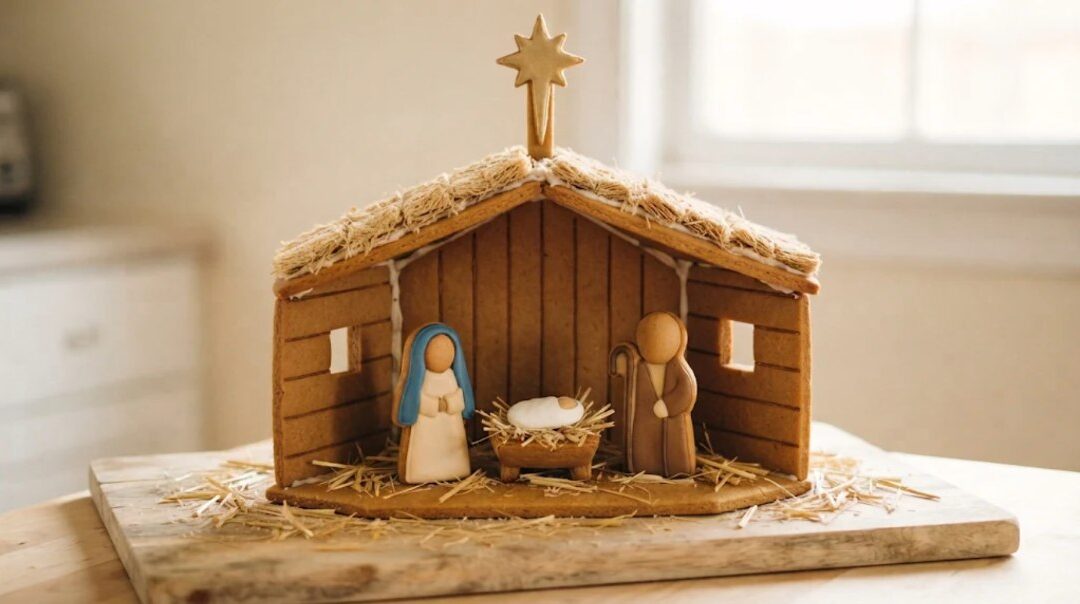
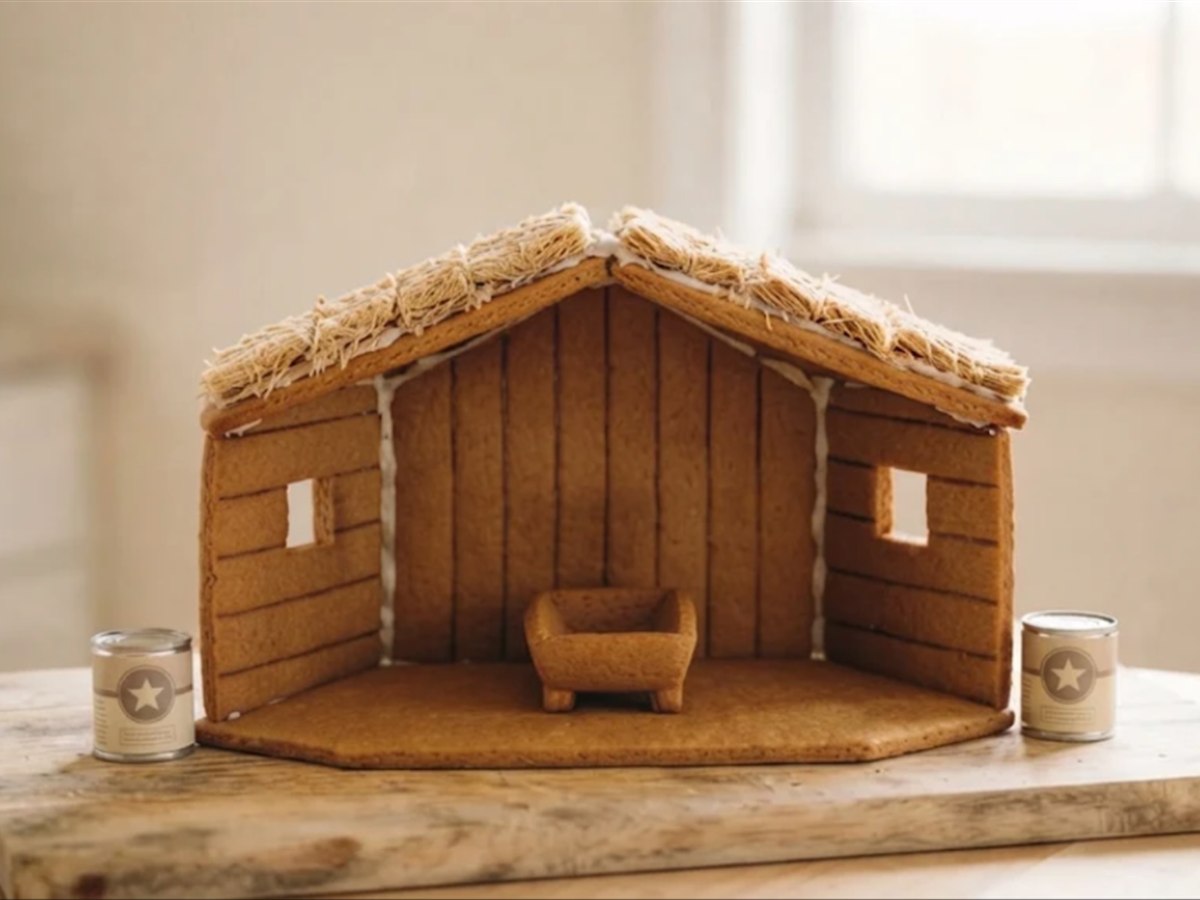
Rustic wood grain. Score the plank lines before baking. Once the pieces cool, brush brown gel color thinned with a few drops of water into the grooves, then wipe the flat faces with a damp paper towel so the color stays in the lines. Press crushed shredded wheat into icing on the roof for thatch, and lay a pretzel rod across the front just under the roof as a beam. This is the look in the photo at the top. If you love bare wood looks, our farmhouse gingerbread house template with a barn red option uses the same plank idea on a closed house.
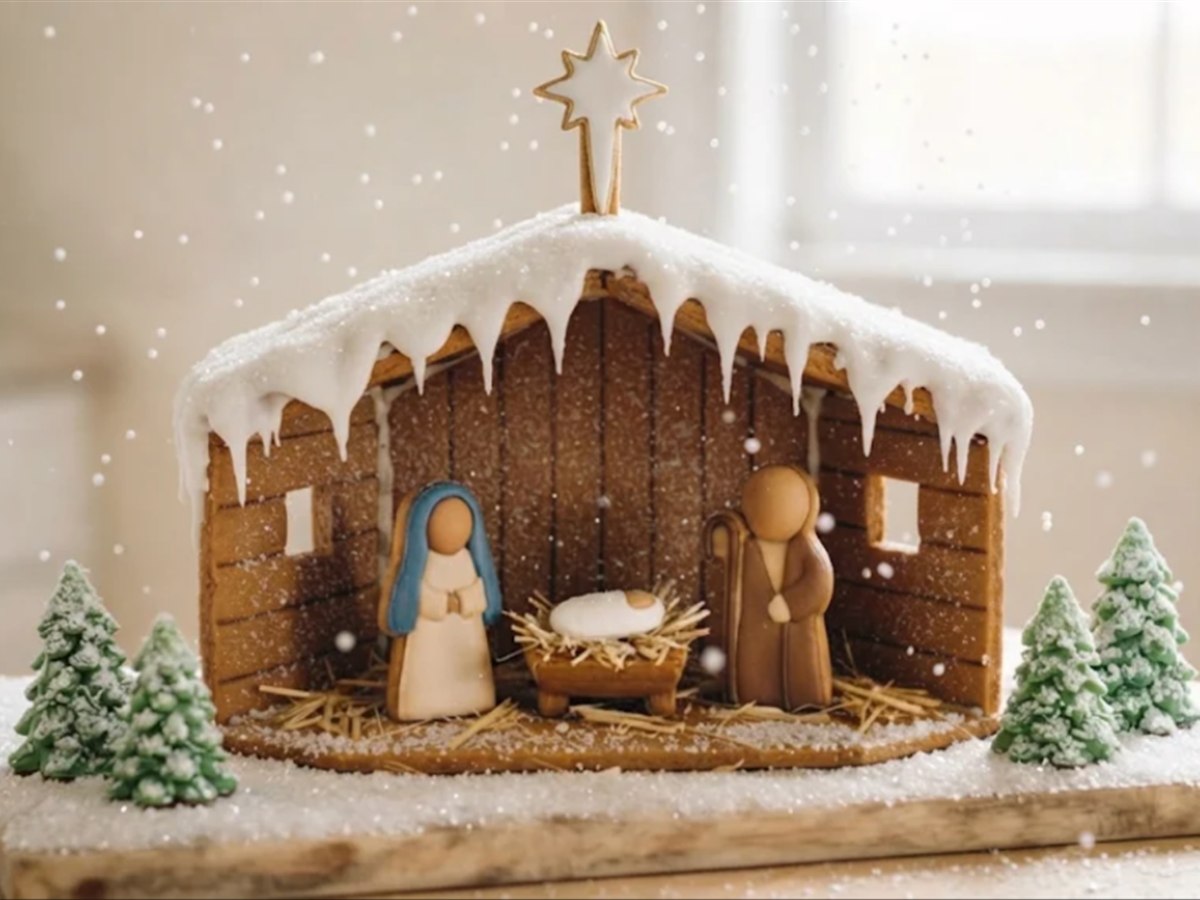
Snowy. Leave the walls bare gingerbread and spoon stiff white icing over the roof, letting it drip over the front edge. Pipe short icicles once the roof has had its full wait. Spread icing over the board, scatter sanding sugar on it and dot white nonpareils on the roof for falling snow. Flood the star white with a gold edge, so it looks frosted.
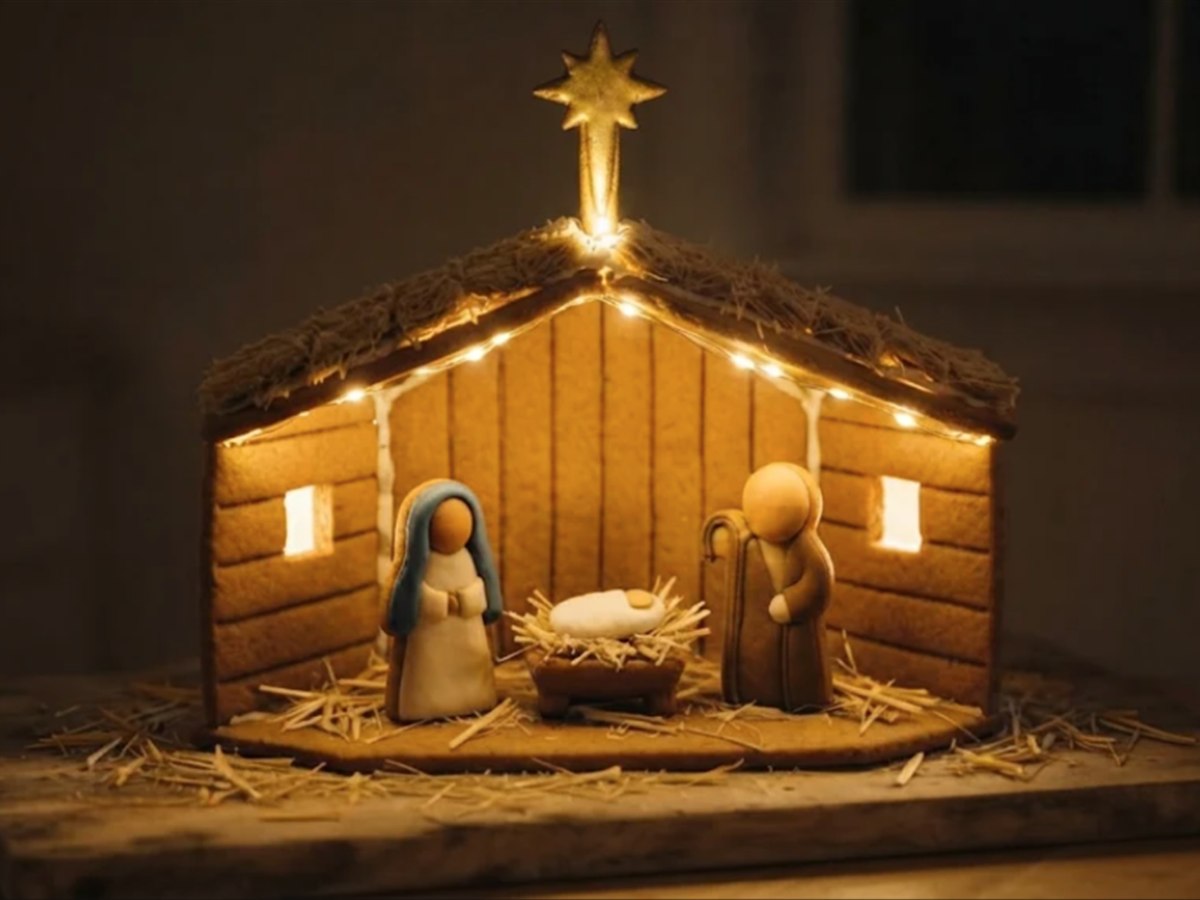
Lit with LED. Before the roof goes on, lay a warm white battery micro LED string along the inside of the ridge and run the wire out through the notch in the back gable. With the front open, the light falls straight onto the manger, and the hay windows glow from the sides. Battery lights only. Our guide to safe battery lights for a gingerbread house explains why a real candle is never the answer.
The Build Clock, Day by Day
Plan on six sessions over two days, about 6 1/4 hours of hands-on work. All the decorating happens while the pieces lie flat on day 1, so the figures and star have all night to dry. Pick your finish time and the planner counts back for you.
| When | What you do | Hands-on | Then wait |
|---|---|---|---|
| Day 1, afternoon | Print, make and chill the dough, cut, score, bake and trim. | About 3 1/4 hours | About 30 minutes |
| Day 1, evening | Color the wood, flood the figures and star, glue the post, build the manger, fix the stands. | About 1 1/4 hours | Overnight, pieces flat |
| Day 2, early morning | Stand the back gable and side walls. | 25 minutes | 2 hours |
| Day 2, mid morning | Add the lights and set the roof. | 25 minutes | 2 hours |
| Day 2, early afternoon | Raise the star post. | 15 minutes | 2 hours |
| Day 2, afternoon | Finish the look and set the scene. | 45 minutes | Overnight before you move it |
Nativity Stable Build Day Planner
Pick when you want the stable finished, say before a Christmas Eve service or an Advent party. The planner counts back through every drying time and tells you when to start baking.
For planning only: icing sets faster or slower with the weather, so treat each wait as a minimum and check that joints feel firm before moving on. Not professional baking advice. Nothing you enter leaves your browser.
How to Make a Nativity Gingerbread House Step by Step
1.Print the template and measure the test bar
Print all four pages at Actual Size or 100 percent, never Fit to Page, and check that the red bar reads exactly 1 inch.
Why this matters: a template printed small gives side walls too low for the figures and a post that no longer clears the ridge.
2.Make the dough and chill it
Make one batch of house dough, split it in two, flatten each half into a thick disc, wrap and chill for at least an hour.
Why this matters: cold dough holds the sharp corners of the hay windows and the thin rays of the star.
3.Roll and cut the walls and back gable
Roll a disc on parchment to an even 1/4 inch between guide strips. Lay the paper pieces on top and cut the two side walls and the back gable right on the parchment, so you never lift a raw piece.
Why this matters: the back gable is the biggest piece and the easiest to stretch. Slide the whole sheet of parchment onto the pan instead of moving it.
4.Score the planks and cut the hay windows
Lay a ruler along each grey dotted line and press the back of a knife into the dough about a third of the way through. Run the lines across the side walls and up and down the back gable. Then cut out the two square hay windows and lift the squares away.
Why this matters: scored raw, the planks bake in. Score too deep and the wall can snap along the line, so stop at a third.
5.Cut the roof panels and post strips
From the second disc, cut the two roof panels and the two long post strips. Cut each long edge of the posts in one clean stroke.
Why this matters: the post strips are thin and 8 inches long. A wavy edge leaves a gap when you glue them together.
6.Cut the small pieces
Cut the four manger pieces, the baby, Mary, Joseph, the star and the four stands. Put them all on one pan of their own.
Why this matters: small pieces bake faster than walls. On a shared pan they brown before the walls are done.
7.Bake the pieces
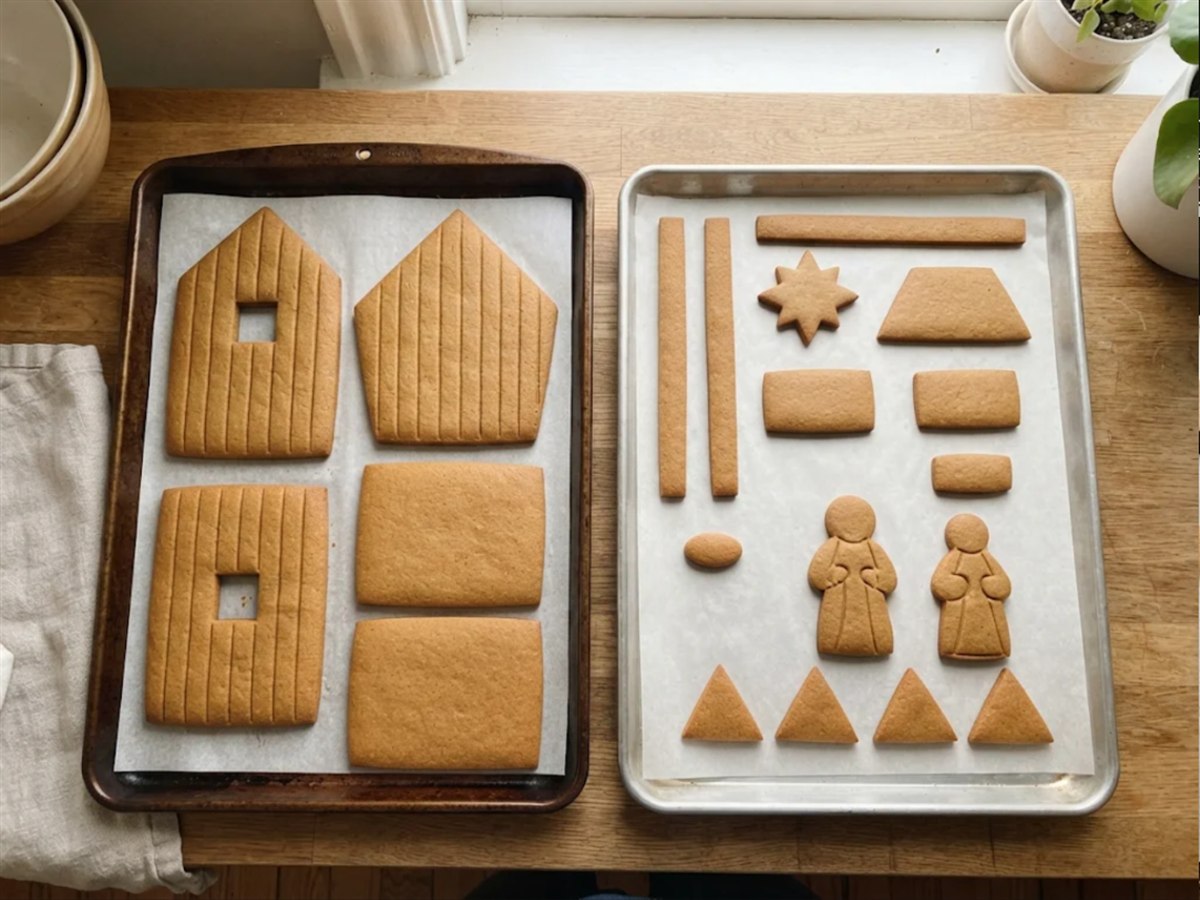
Bake at 300 degrees F. Large pieces take 22 to 30 minutes, until the surface is matte and the edge is firm under a fingertip.
Check as you go: start checking the pan of small pieces at about 12 minutes and pull it as soon as the star rays look matte. Once a scrap strip baked with them has cooled, press its middle: a little bend and then a clean snap means the pieces are ready to build with.
8.Trim every piece while it is warm
Within two minutes of each pan coming out, lay the paper piece back on the baked one and trim any edge that spread. Leave every piece on its pan until fully cool.
Why this matters: the roof only locks the walls if the edges are straight. A wall that spread 1/8 inch leaves the roof rocking.
9.Rub color into the planks
For the rustic look, brush thinned brown gel color into the scored lines on the walls and gable, then wipe the flat faces with a barely damp paper towel. For the snowy look, skip this step.
Why this matters: the grooves hold the color and the flat faces lose it, which is what turns a scored line into wood grain.
10.Flood the figures, baby and star
Outline and flood Joseph’s robe brown and his head cream. Flood Mary’s robe cream below the veil line and her veil blue over her head and shoulders. Flood the baby white and the star gold. Do not pipe faces.
Why this matters: one color on each head keeps the scene calm and makes the figures read clearly from across the table.
11.Glue the post, build the manger and fix the stands
Spread icing on one post strip and press the second on top, edges matched. Stand the two manger ends on parchment with their outer faces 1.5 inches apart, pipe icing on their sloped edges and lean a side piece against each slope, 0.15 inch past the ends. Glue a stand upright to the back of each figure. Leave everything flat overnight.
Why this matters: one strip of gingerbread bends under a star. Two glued together dry into a post twice as thick and far stiffer.
12.Stand the back gable and side walls
Pipe a U of icing on the board, open side to the front. Stand the back gable on it with the notch at the bottom and the post box facing the back. Stand a side wall at each end, open front ends forward, so the gable sits between them. Prop with cans and wait 2 hours.
Why this matters: the gable fits between the side walls. Set it outside them and the roof will not sit flat.
13.Add the lights and set the roof
For the lit look, switch the LED string on to test it, tape it along where the ridge will be and feed the wire out through the notch. Pipe icing along the gable slopes and the wall tops. Set both roof panels flush with the back of the gable, with the overhang at the open front, and pipe a line along the ridge where they meet. Prop the eaves and wait 2 hours.
Why this matters: a roof that hangs over the back would block the post, and the ridge line is what holds the open front square.
14.Raise the star post behind the stable
Glue the star to the top of the post with its long bottom ray down the front face. Pipe a thick line of icing inside the red box on the back of the gable and a dot on the board, then press the post against it and hold for a minute. Prop it and wait 2 hours.
Why this matters: standing on the board and leaning on the gable, the post carries the star by itself and puts no weight on the roof.
15.Finish the look and set the scene
Add roof snow or thatch, then a layer of straw on the floor. Fill the manger with crushed shredded wheat and lay the baby on top. Stand Mary and Joseph on either side of the manger and any other figures in front.
Why this matters: straw on the floor hides the icing line at the base, so the stable looks lived in rather than glued.
16.Let it stand overnight
Leave the stable where it is overnight before you move it, then lift it by the board, never by the post or the roof.
Troubleshooting
| What you see | Why it happens | What to do |
|---|---|---|
| The side walls splay out at the open front | The roof went on before the wall joints set, or the ridge line is thin | Push them back, pipe a thick seam down each inside back corner and prop for 2 hours. A pretzel rod beam across the front also holds them. |
| The roof slides off the front | Icing too soft, or the roof was not flush at the back | Lift it, scrape, and reset on stiff icing with the back edges flush. Prop the eaves. |
| The post leans backward | Too little icing in the post box, or no prop while it set | Press it back, pipe a seam down both sides of the post and prop it with a can for 2 hours. |
| A star ray snapped | The rays were moved warm, or the star baked too long | Glue it back with icing from behind and flood over the crack. Bake small pieces on their own pan next time. |
| A wall cracked along a plank line | The lines were scored too deep | Glue it from behind and pipe a board edge over the crack. Score a third of the way through next time. |
| The figures fall over | The stand was glued on before the flood dried, or it is not square to the base | Lift it off, trim the stand bottom flat and glue it again with a dot of icing on the board. |
| The manger sides slide down | The ends were not upright when the sides went on | Hold the ends straight with a toothpick each side until the icing sets. |
| The stable looks dark inside | The roof and back wall block the light | Add a battery LED string along the ridge, or shine a flashlight in from the front for photos. |
Smaller and Quicker Versions
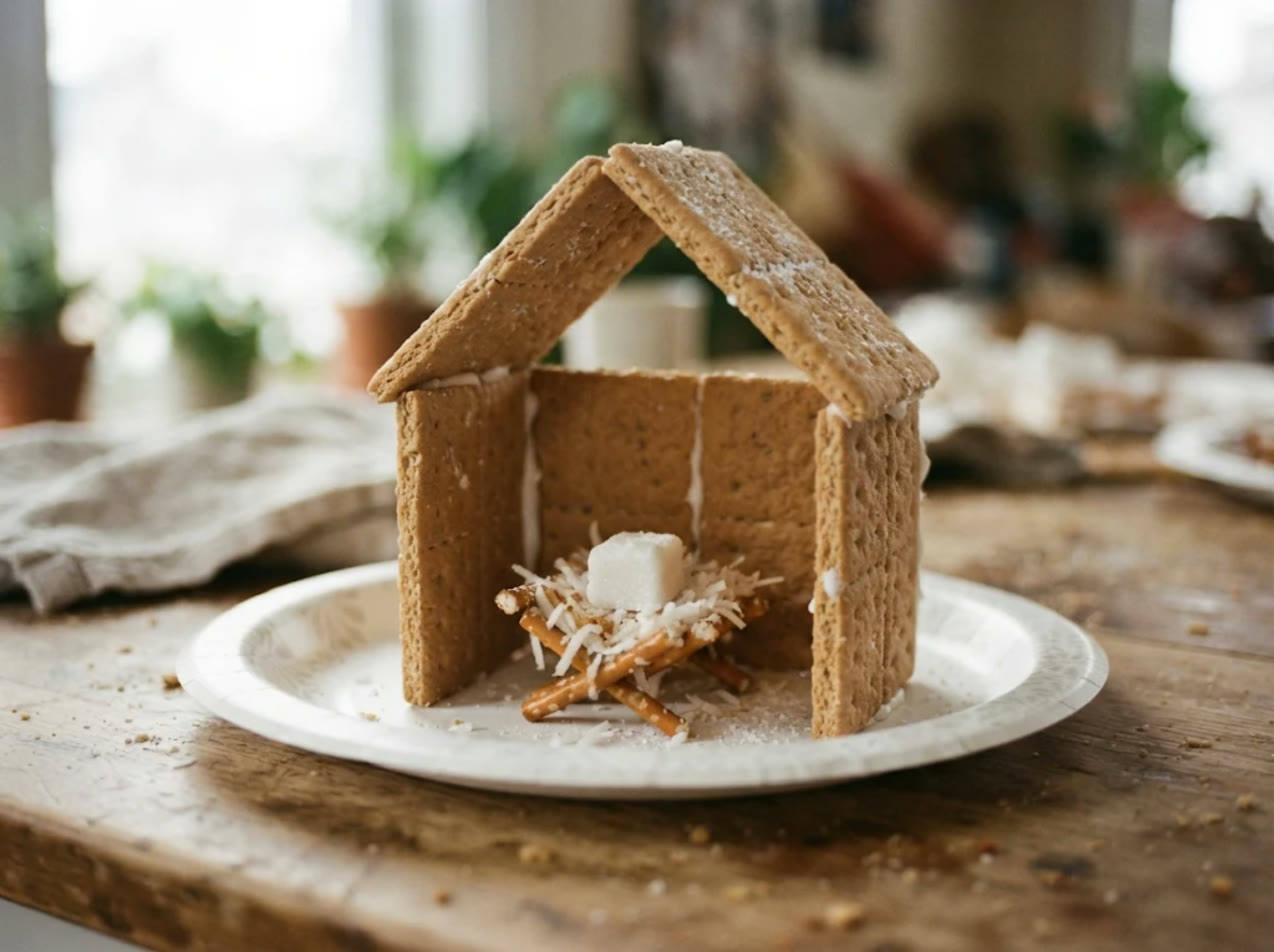
No-bake graham stable. Stand three graham cracker squares on a paper plate as a back and two sides, and lean two more on top for a roof. A few pretzel sticks glued into a little box make a manger, and a sugar cube covered in white icing makes the baby. Children’s Ministry runs a graham cracker nativity like this as a 45 minute Sunday school activity. See our graham cracker houses for little hands for the icing that holds crackers.
A chapel beside the stable. For a village scene, our small gingerbread chapel template is a 14 piece church under 4 inches tall that sits well beside the stable.
Print it bigger. At 120 percent the stable stands about 10 3/4 inches to the star and needs about 205 square inches of dough, still inside one batch. The pages will no longer fit on Letter paper, so print them on 11 by 17 paper at a copy shop.
Storage Instructions
Keep the stable in a cool, dry room, away from the stove, a steamy kitchen and sunny windows. Damp air softens icing joints, and the post is the first thing to lean. Kept dry, it holds its shape through Advent and Christmas, and our guide to how long a gingerbread house lasts on display covers when to stop eating it and keep it for looking at.
FAQ
Did the Bible say Jesus was born in a stable?
No. Luke 2 says Mary laid the baby in a manger, a feeding trough, because there was no guest room. The stable is a long tradition built around that manger.
Can I build the stable without the post and star?
Yes. The stable stands on its own. Lay the star flat on the board in front, or glue it to the back gable just under the peak.
Can kids help?
Yes. Flooding the figures and the star is a good job for children, since no faces are needed. Adults should handle the cutting and the hot pans.
Will store-bought cookie figures fit?
Figures up to about 3.7 inches tall fit under the 4 inch walls. Anything taller can stand on the board in front.
More Gingerbread House Builds and Recipes
For more sizes and shapes, browse our free gingerbread house templates or more gingerbread house ideas. Building a whole Christmas scene? Our gingerbread village of matching little houses sets out a street to go with it. When a wall will not stand straight, our tips for walls that stay upright work on any build. When you want a head start, our ranked list of gingerbread house kits sorts the boxes that stay standing from the wobbly ones.