An igloo looks like the easiest gingerbread house there is, until you try to make the dome. A flat sheet of dough will not bend into half a ball without folding, and stacking tiny blocks into a curve leaves gaps that never quite close.
This build gets past both. It borrows from the two real gingerbread igloos we could find, and our house dough and royal icing recipes set every bake temperature and wait. A script checked the free template so the doorway, the tunnel and the cap all fit the dome.
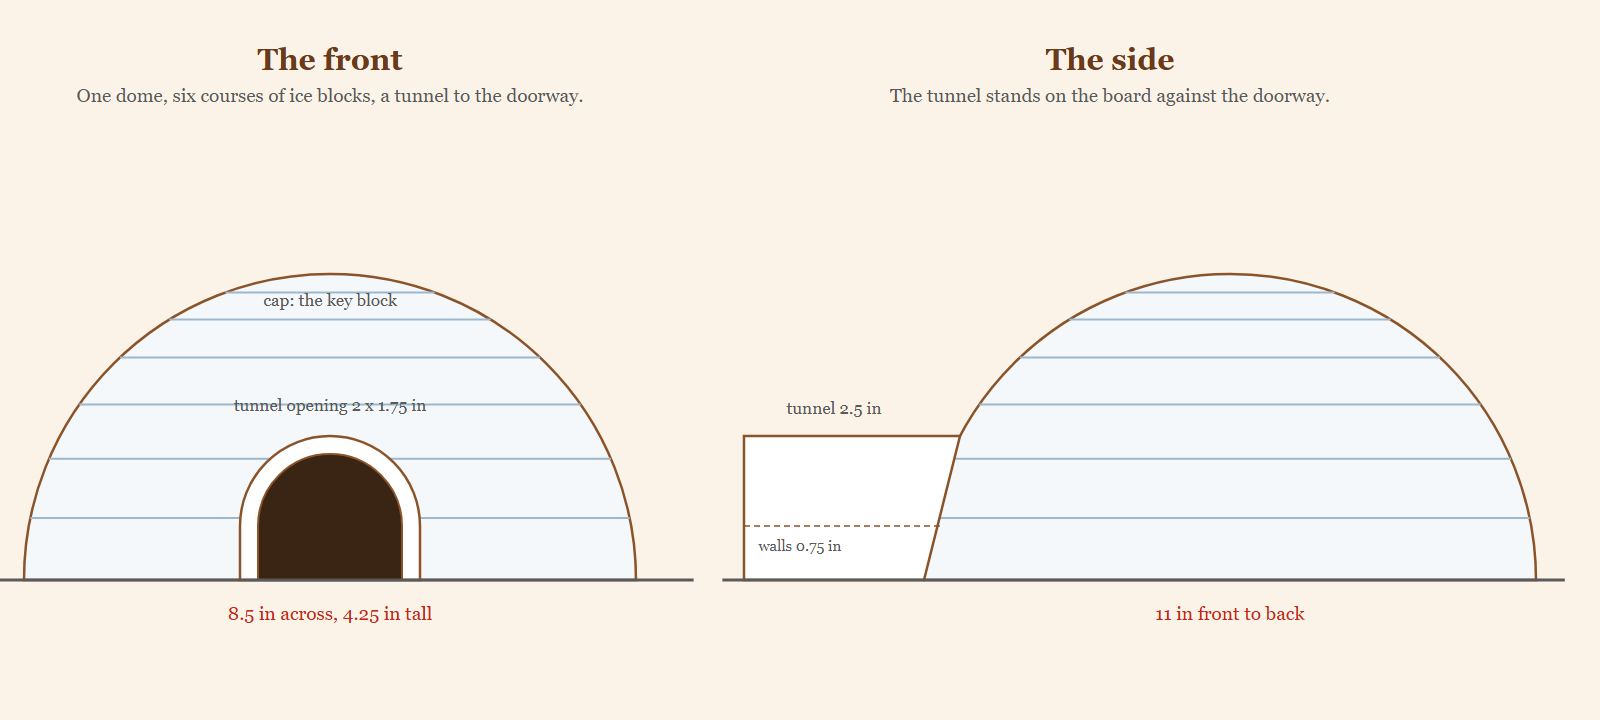
You get a true dome about 4 1/4 inches tall with ice block lines baked right in, in about a day. Start with the template, then the bowl.
Gingerbread Igloo: At a Glance
- Difficulty: Easy to intermediate. The dome is one piece baked on a bowl, and the tunnel is three small pieces.
- Total time: about 1 day in five sessions, plus overnight before you move it. Most of it is cooling and icing drying.
- Active time: about 4 1/2 hours, counting the dough chill and the bake.
- Makes: one igloo about 8 1/2 inches across, 4 1/4 inches tall and 11 inches front to back with its tunnel. 10 baked pieces, plus an optional candy ice window.
- Template: free 4-page PDF, US Letter, drawn for an 8 inch bowl, with a 1 inch test bar on every page and print sizes for smaller bowls.
Tools: printer, ruler, scissors, a small sharp knife, rolling pin with 1/4 inch guides, parchment, aluminum foil, an oven-safe glass or metal mixing bowl about 8 inches across, 2 half sheet pans, a toothpick, piping bags with a small round tip, a board at least 12 by 14 inches.
Materials
- 1 batch of our gingerbread house dough
- 1 to 2 batches of stiff royal icing
- A little vegetable oil for the foil
- For the ice window, 2 or 3 clear blue or white hard candies such as Jolly Ranchers
- Coconut, sanding sugar or extra icing for snow
- A battery tea light, never a real candle
Steps
- Measure your bowl, print the template and check the test bar.
- Make the dough and chill it for at least an hour.
- Roll the dough 1/4 inch thick and cut the six gores and the cap.
- Cut the tunnel roof and the two tunnel walls, then lightly score their ice block lines.
- Cover the upturned bowl with foil and oil it lightly.
- Lay the gores on the bowl edge to edge, then add the cap.
- Score the ice blocks and cut the doorway.
- Chill the covered bowl for 15 minutes.
- Bake the dome and the tunnel pieces at 300 degrees F.
- Cool the dome on the bowl, then lift it off with the foil.
- Trim the rim so the dome sits flat.
- Set the dome on the board over a battery light, then wait 2 hours.
- Stand the tunnel walls against the doorway, then wait 2 hours.
- Set the tunnel roof on the walls, then wait 2 hours.
- Pipe the ice blocks and add the snow.
- Let it stand overnight before you move it.
Notes: times are worked out from the set times on our icing page, not timed on a build. The dome bake is our estimate: a bowl soaks up heat, so dough on a bowl takes longer than a flat panel. Ovens and doughs vary, so check early, go by the matte surface and firm edge, and bake a test strip first.
Free Printable Gingerbread Igloo Template
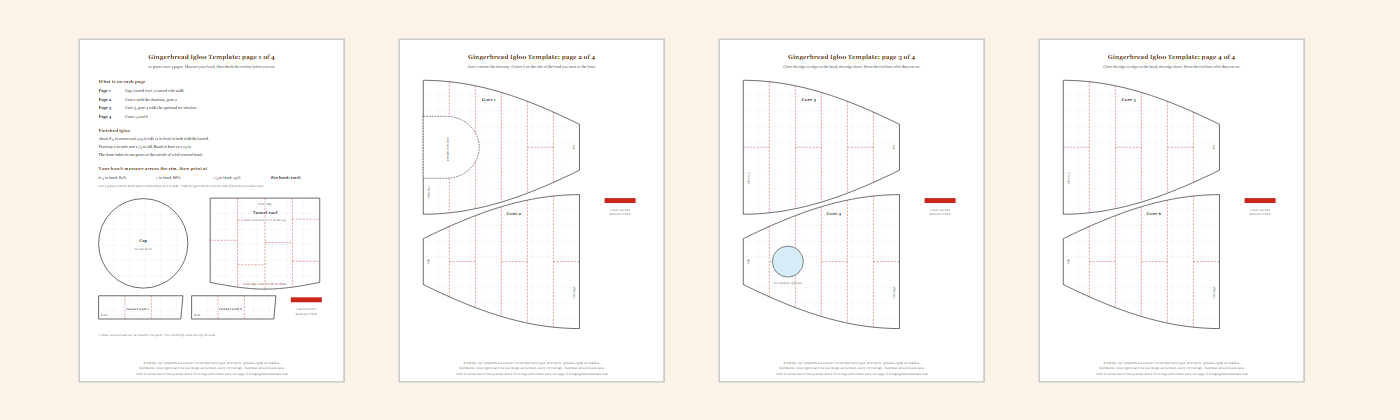
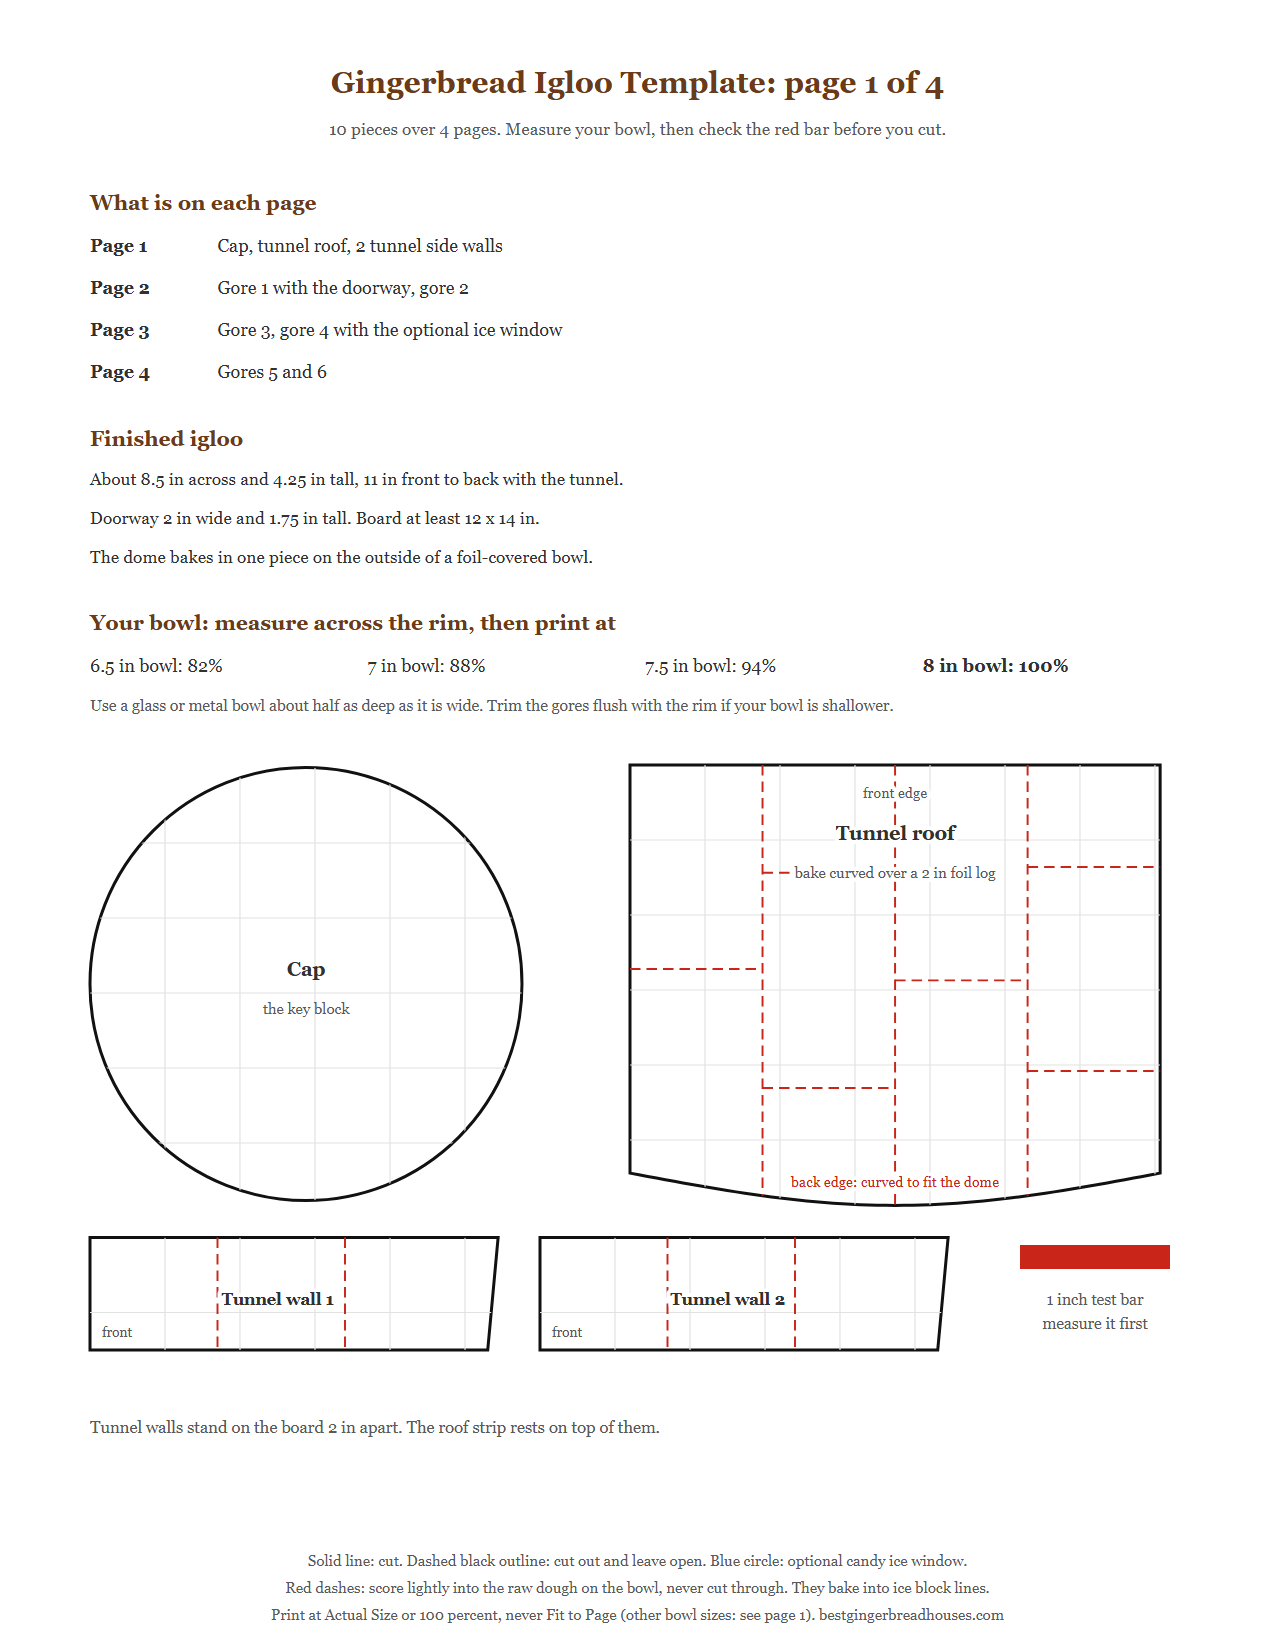
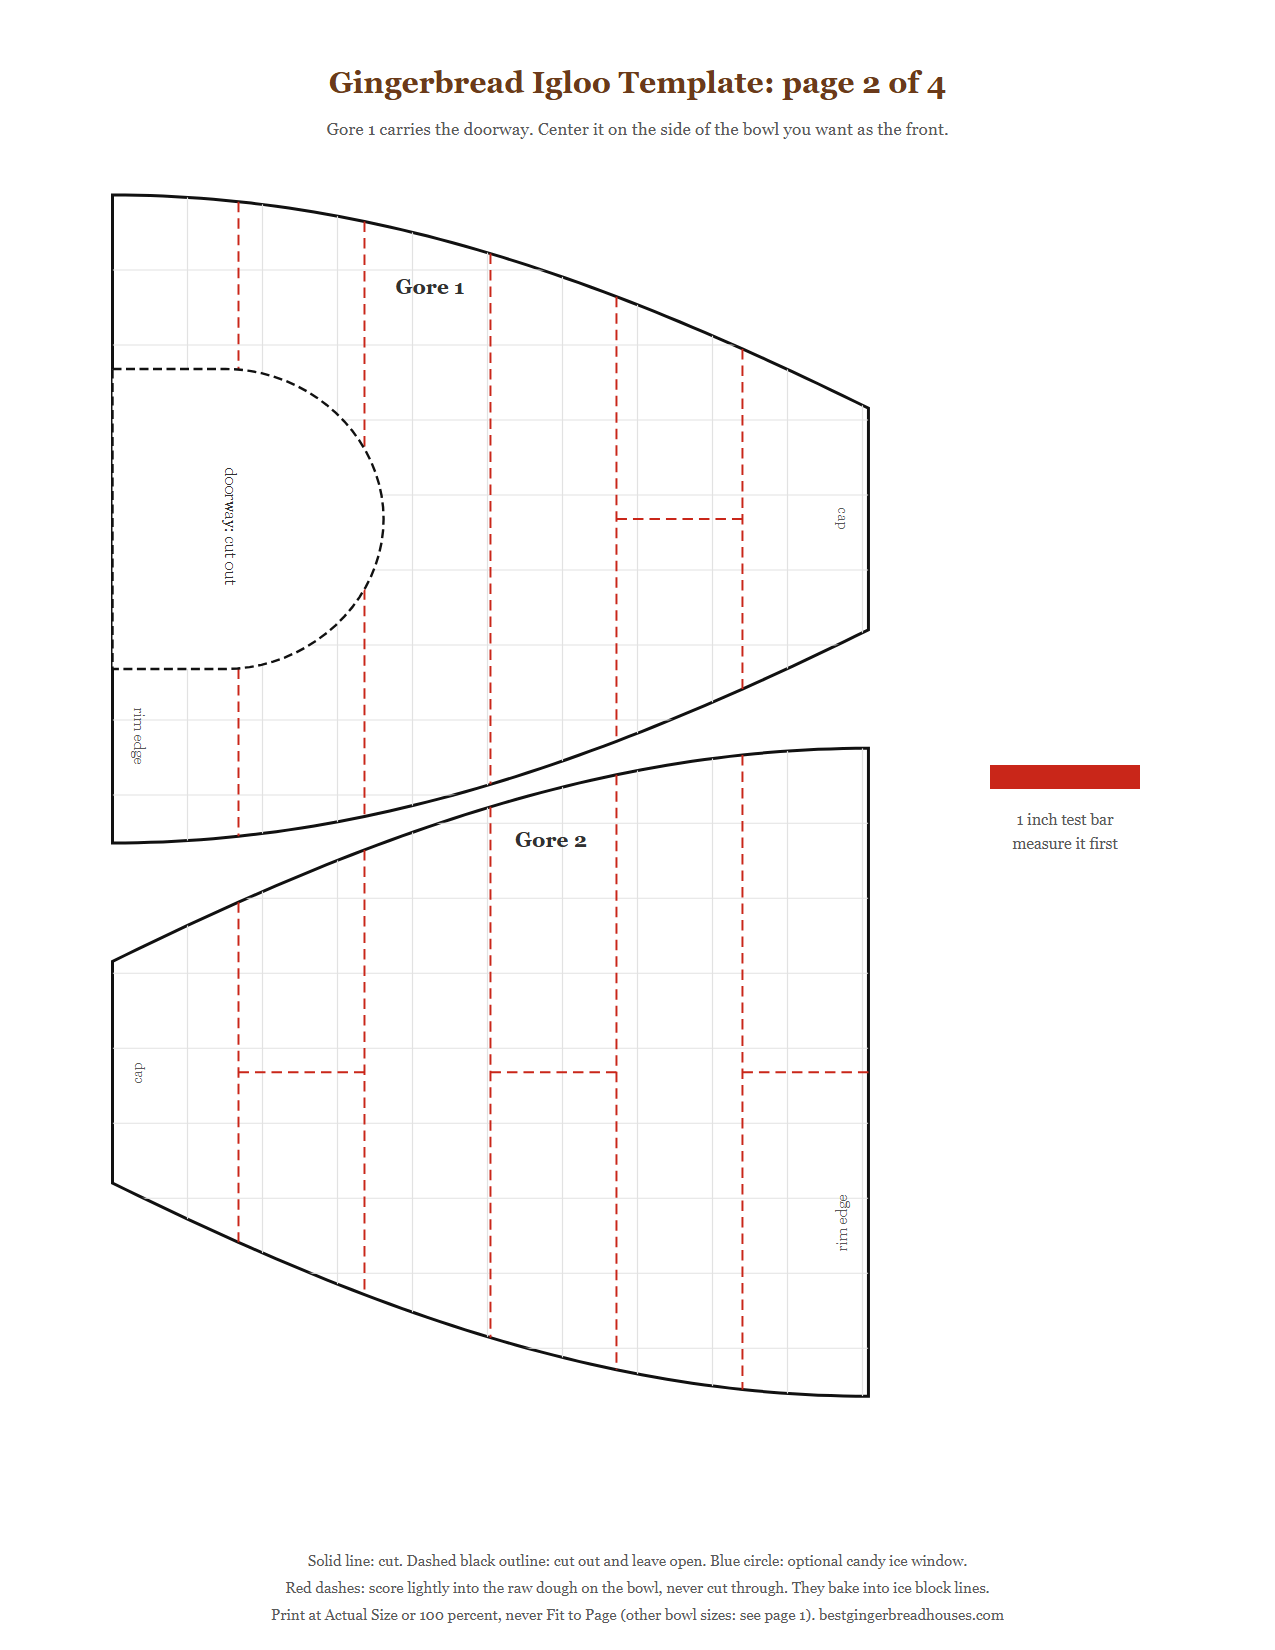
The template is four US Letter pages with every piece at true size over a faint 1/2 inch grid. Download the PDF, print it at the size the bowl table on page 1 gives you, and check that the red bar measures 1 inch at 100 percent before you cut anything. Red dashes are ice block lines you score into the dough, never cut. The dashed black arch is the doorway. The blue circle is the optional ice window.
| Piece | Cut | Size |
|---|---|---|
| Dome gores | 6 | 4.32 in wide at the rim, 1.48 in at the top, 5.04 in long; gore 1 has the doorway, gore 4 the ice window |
| Cap | 1 | 2.88 in circle, the key block |
| Tunnel roof | 1 | 3.53 in wide, 2.72 to 2.94 in long, back edge curved |
| Tunnel walls | 2 | 0.75 in high, 2.65 to 2.72 in long |
The pieces come to about 121 square inches. One batch of our gingerbread house dough, which bakes hard and flat covers about 225, so you have room for a test strip and a small tray of winter cookies.
Why the Dome Bakes Over a Bowl, Not Block by Block
There are two ways people make a gingerbread igloo, and the real builds show what each one costs.
Block by block. A 2009 Daring Bakers igloo from Raspberri Cupcakes was built from small baked tiles, each ring tipped further inward as it rose. It looks wonderful, and the builder was candid about the cost. The rings needed a wooden skewer to hold them until the icing set. The top was a flat baked circle, because the walls got too steep for another ring. A base brick had to come out for the door, and the front was left with gaps above the tunnel.
Over a bowl. Kim Shupe, an Allrecipes Allstar, said in an Allrecipes interview that her favorite build was an igloo, and that the round shape was the hard part. Her answer was to bake the gingerbread over an oven-safe glass bowl, then fill the dome with caramel to make it sturdier, according to the interview as reprinted by Yahoo. A bowl gives you a true curve with no gaps to fill.
The catch with the bowl. Drape one sheet of dough over a bowl and it pleats at the bottom, because a flat circle has more edge than half a ball does. So this template cuts the dome the way you would peel an orange: six curved wedges called gores, which lie edge to edge on the bowl with no folds, closed at the top by a round cap. The cap is the key block: in a real igloo, the last block set at the top locks the dome together.
The ice blocks still show. Before baking, you score shallow lines into the raw dough: six rings of blocks with staggered joints. Real igloo builders lay their blocks so each row tilts a little further in, as Popular Science explains. Here the bowl does the tilting and the score lines carry the look.
Picture a family making this on a Saturday with two kids under ten. The block method has the kids holding tiles in place for twenty minutes a ring. The bowl method has them pressing six big wedges onto a bowl like a puzzle, then drawing blocks with a toothpick. That is the version they will want to make again.
Pick Your Bowl and Print to Fit
Any oven-safe glass or metal mixing bowl works if it is close to half a ball: about half as deep as it is wide. The template is drawn for a bowl 8 inches across the rim, which gives an igloo 8 1/2 inches across once the dough is on. Measure across the outside of the rim and print at the size that matches.
| Bowl across the rim | Print at | Igloo across |
|---|---|---|
| 6 1/2 inches | 82 percent | about 7 inches |
| 7 inches | 88 percent | about 7 1/2 inches |
| 7 1/2 inches | 94 percent | about 8 inches |
| 8 inches | 100 percent | about 8 1/2 inches |
If your bowl is shallow, the gores reach past the rim. Trim them flush with the rim before baking and expect a lower dome. If it is deep, the gores stop above the rim, and their bottom edge becomes the base, so keep it level all the way round. If it is wider than 8 inches, the gores will not fit Letter paper; print pages 2 to 4 on 11 by 17 paper, or use a smaller bowl. Skip plastic and anything with a nonstick coating that is not rated for the oven. Put in your own bowl below to check.
Igloo Bowl Fit Planner
Measure your bowl across the top of the rim and from the counter to the base, then see how to print the template and what you will end up with.
Sizes come from the script that drew the template. The depth advice is a planning rule from the dome shape, not a timed bake. Nothing you enter leaves your browser.
Three Igloo Looks
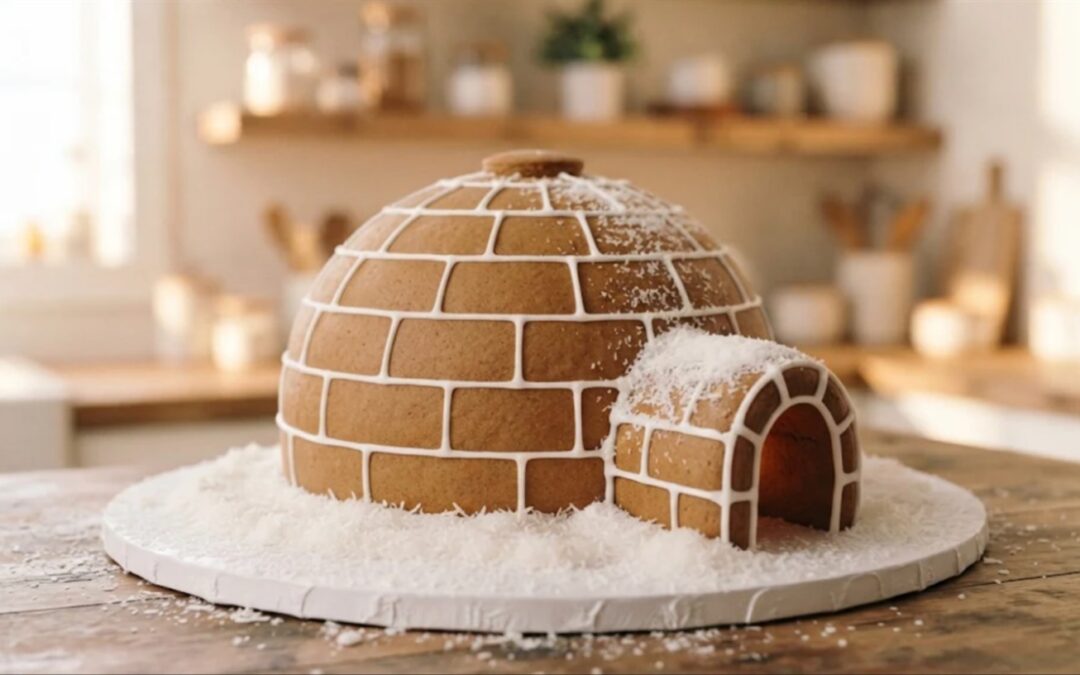
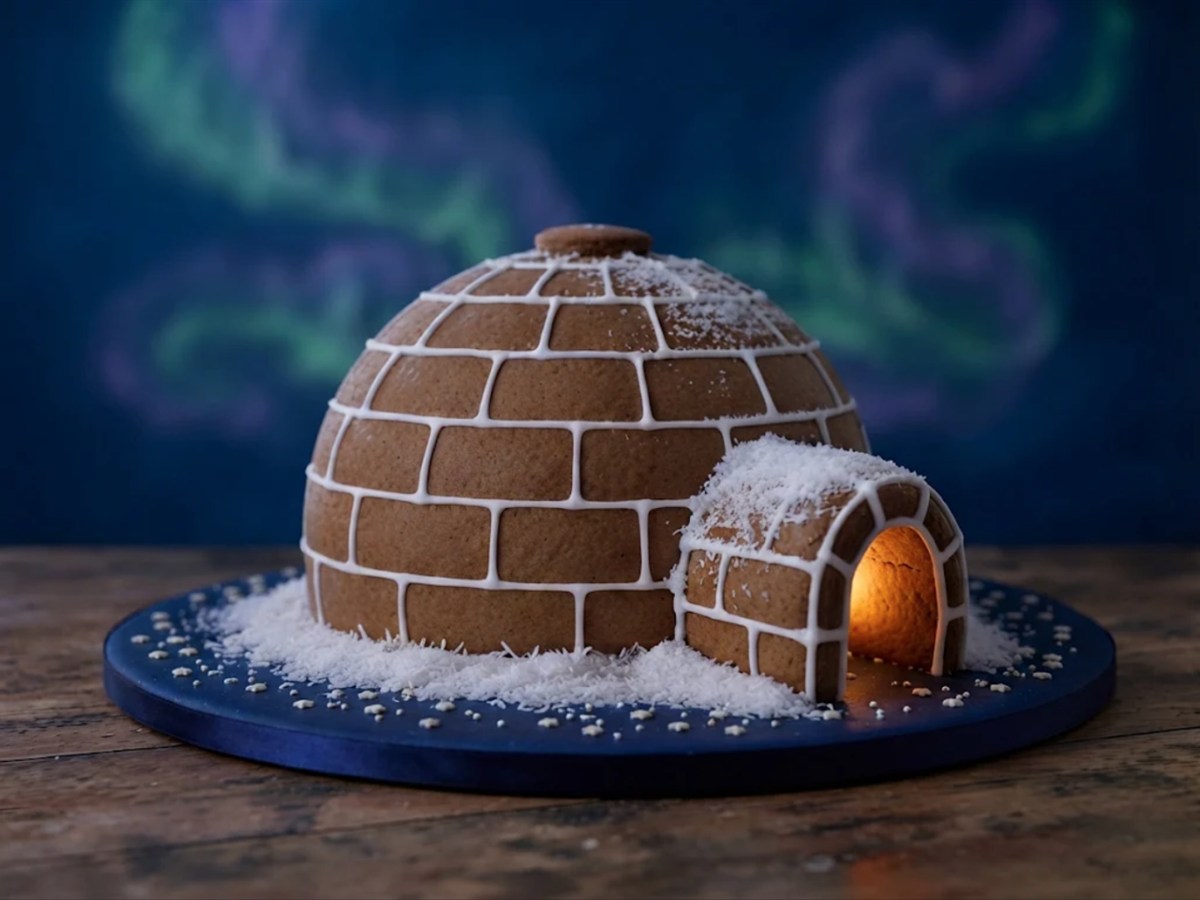
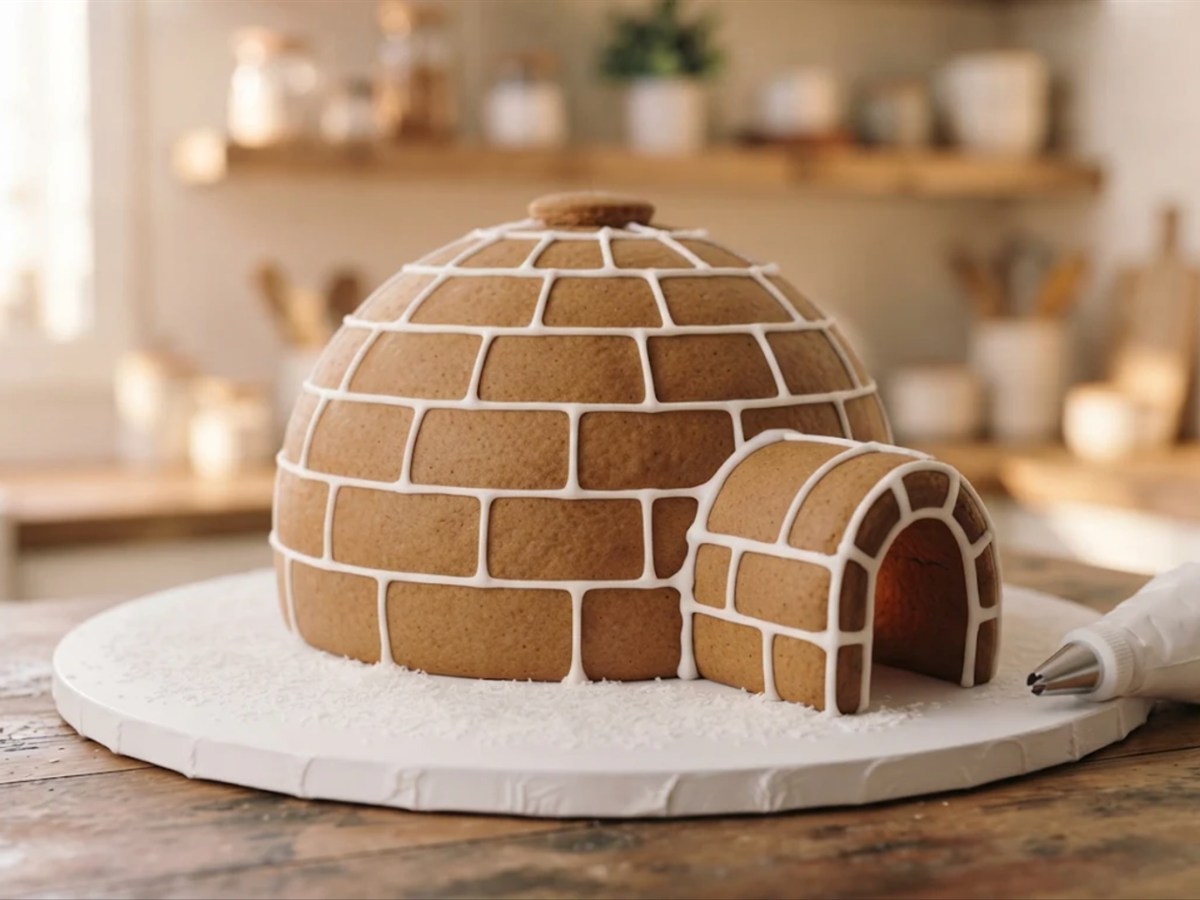
Classic snow igloo. Pipe thin white lines over every scored joint and leave the gingerbread between them bare, so the blocks read warm brown against white mortar. Or flood the blocks white and pipe the joints in pale blue for an icier look. Pile snow round the base and the tunnel. This is the look in the photo at the top.
Northern lights night. Set the igloo on a board iced dark blue, scatter white sprinkle stars, and put a battery tea light inside. The doorway glows, and so does the ice window if you made one. Pipe a few green and violet swirls of thinned icing across the board behind it for the sky.
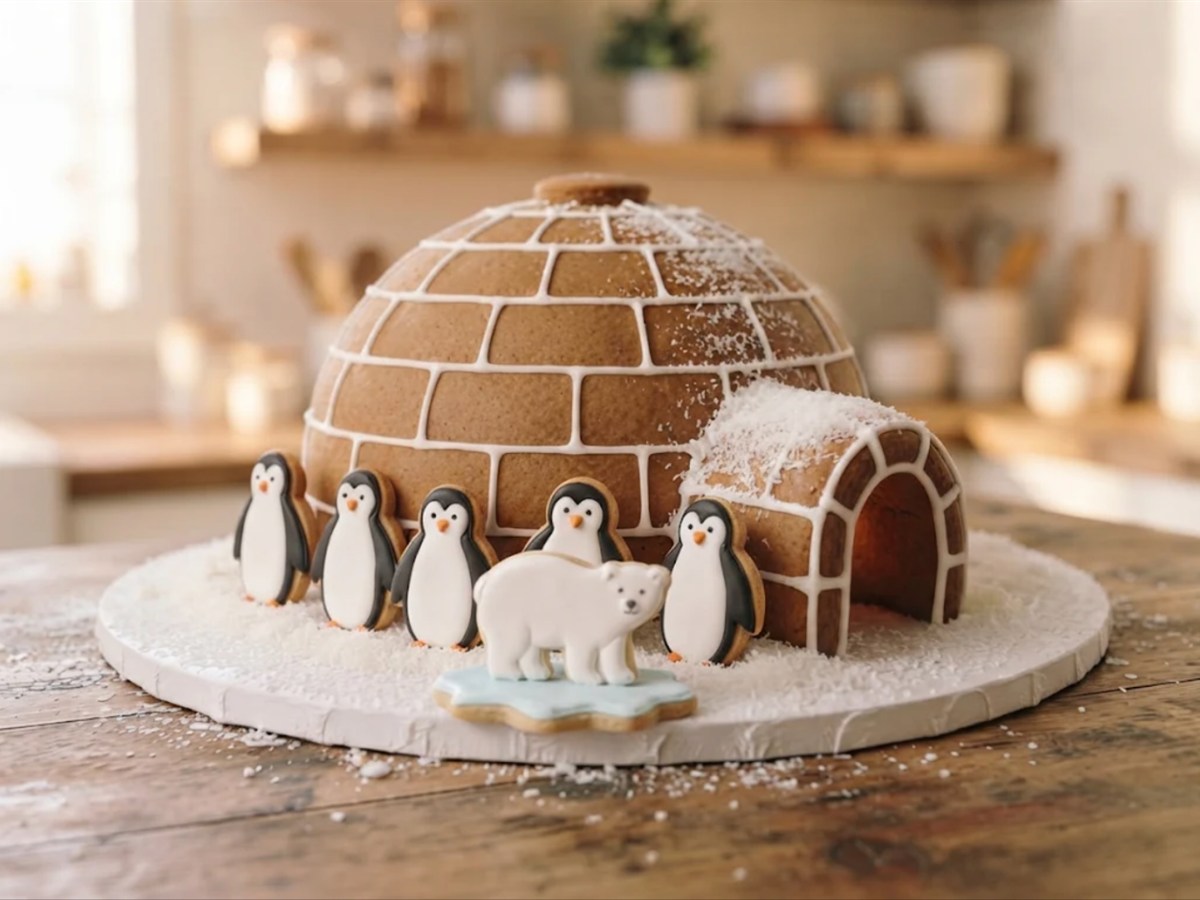
Penguin colony. Bake penguin gingerbread cookies from their own free template with the spare dough and stand them in the snow round the tunnel. Add a few polar bear cookies on an icing ice floe. Kim Shupe set polar bear truffles in a little ice pool in front of her igloo, and it is the detail people remember.
Gingerbread Igloos Real Bakers Have Built
The block igloo. The Raspberri Cupcakes builder rolled her dough about 1 centimeter thick, cut rows of 2 by 3 centimeter blocks, trimmed them straight after baking and built rings with royal icing. Her build notes are the best guide to what goes wrong: scraps cracked when they were re-rolled, gaps at the front were hard to hide, and the tunnel only reached so high, so the dome above it looked uneven. This template answers each one. The doorway is cut in the raw dough at the right size, and the tunnel is drawn to match it.
The bowl igloo. Kim Shupe baked hers over a glass bowl and strengthened it with caramel. She also warns that one of her houses collapsed on a humid day, even though it was baked crisp. Gingerbread pulls water out of damp air, and a dome is no exception.
The coloring page. If a dome is more than you want to take on this year, our gingerbread igloo coloring page has the same snow block igloo, a waving gingerbread man and a penguin in a scarf, ready to print.
How Long It Takes, Day by Day
Plan on five sessions in one day, about 4 1/2 hours of hands-on work, then leave it overnight. The bake session is the long one. After that it is short jobs with 2 hour waits between them. Pick your finish time and the planner counts back for you.
| When | What you do | Hands-on | Then wait |
|---|---|---|---|
| Morning | Print, make and chill the dough, cut, dress the bowl, score, chill and bake. | About 2 3/4 hours | 1 hour, cooling on the bowl |
| Midday | Lift the dome off, trim the rim and ice it to the board over a tea light. | 30 minutes | 2 hours |
| Afternoon | Stand the tunnel walls. | 15 minutes | 2 hours |
| Late afternoon | Set the tunnel roof. | 15 minutes | 2 hours |
| Evening | Pipe the ice blocks, add the snow and the animals. | 45 minutes | Overnight before you move it |
Gingerbread Igloo Build Day Planner
Pick when you want the igloo finished. The planner counts back through every drying time and tells you when to start baking.
For planning only: icing sets faster or slower with the weather, so treat each wait as a minimum and check that joints feel firm before moving on. Not professional baking advice. Nothing you enter leaves your browser.
How to Make a Gingerbread Igloo Step by Step
1.Measure your bowl, print the template and check the test bar
Measure across the outside of your bowl’s rim and print at the size the table gives you, never Fit to Page. At 100 percent the red bar reads exactly 1 inch.
Why this matters: gores printed for the wrong bowl leave gaps between them or overlap, and either one shows in the finished dome.
2.Make the dough and chill it
Make one batch of house dough, split it in two, flatten each half into a disc about an inch thick, wrap and chill for at least an hour.
Why this matters: cold dough lifts onto a curve without stretching. Warm dough tears where it bends.
3.Roll the dough and cut the gores and cap
Roll a disc on parchment to an even 1/4 inch between guide strips. Lay the paper gores on it and cut all six, plus the cap. Keep the gores on the parchment in the fridge while you cut the rest.
Why this matters: an even thickness keeps the seams level, so the dome reads as one smooth shell.
4.Cut the tunnel roof and walls
From the second disc, cut the tunnel roof and the two tunnel walls, then lightly score their red dashed lines so the tunnel bakes with ice blocks like the dome. Roll the scraps once more for a test strip and a few snowman cookies or penguins.
Why this matters: the roof’s back edge is curved on purpose. It is what lets the tunnel sit tight on the dome with no gap at the top.
5.Cover the upturned bowl with foil and oil it
Turn the bowl upside down on a sheet pan. Smooth a sheet of foil over it, tuck the edges under the rim, and wipe on a thin film of oil, nearly dry.
Why this matters: the foil is how the dome comes off. Too much oil, though, and the dough slides down the bowl as it warms.
6.Lay the gores on the bowl, then add the cap
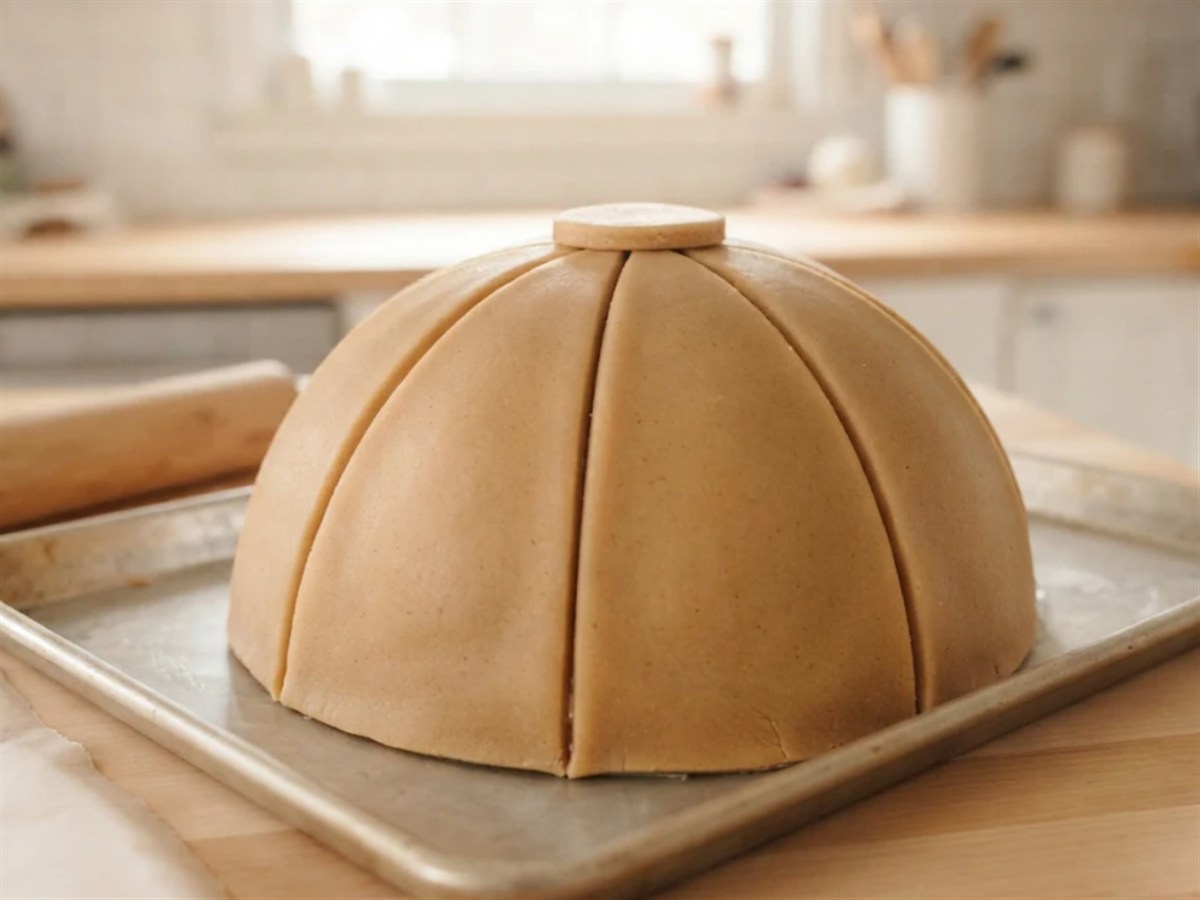
Set gore 1 on the side you want as the front, its wide end at the rim. Lay the others edge to edge round the bowl and press each seam gently with a fingertip. Their narrow ends leave a round hole at the top. Press the cap into it.
Why this matters: raw dough pressed together bakes into one piece. A seam left open stays open.
7.Score the ice blocks and cut the doorway
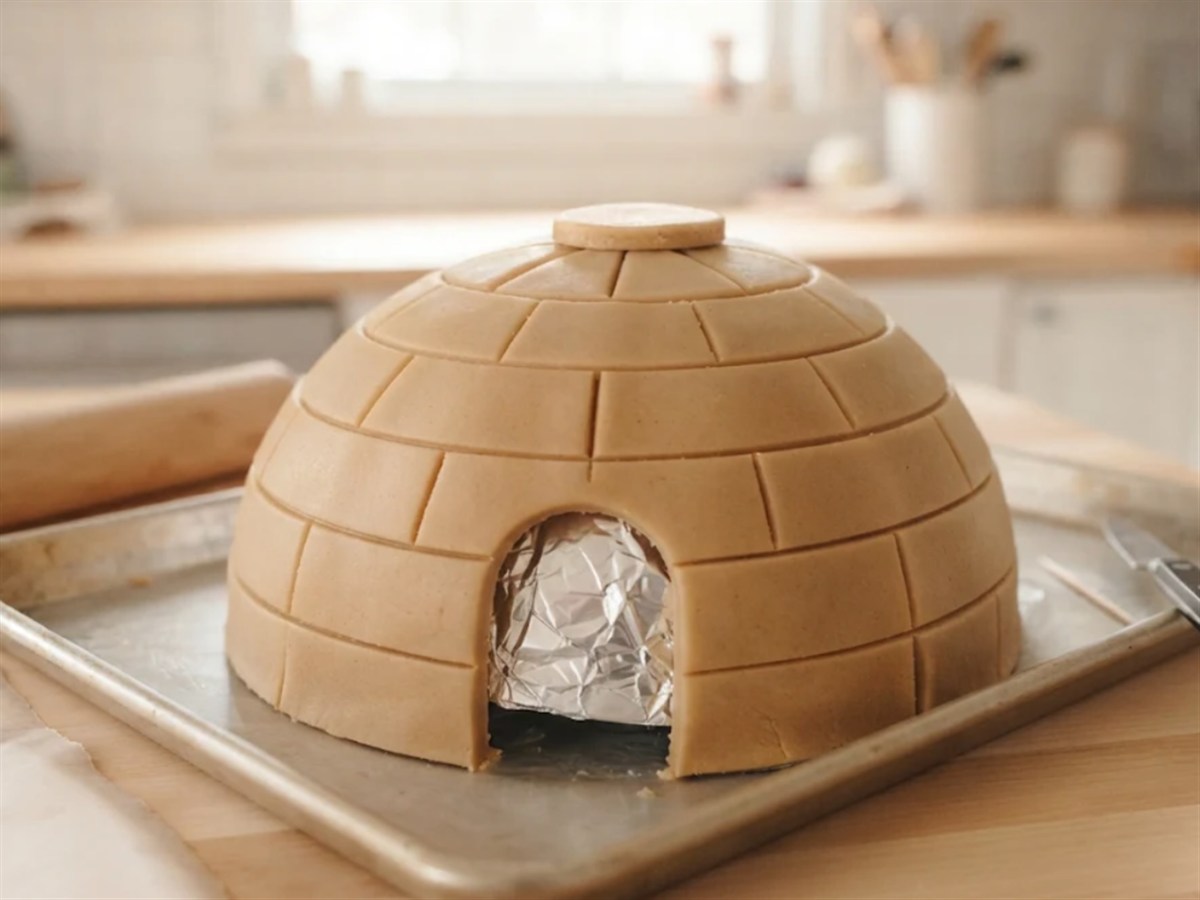
Lay each paper gore back on its dough and prick along the red lines with a toothpick, then join the dots with the back of a knife, pressing about halfway into the dough. Cut out the doorway at the base of gore 1, and the ice window in gore 4 if you want one.
Why this matters: scored lines bake in as soft grooves, so the blocks show even before any icing.
8.Chill the covered bowl
Put the whole pan, bowl and dough, in the fridge for 15 minutes. Put the tunnel pieces in too: the roof draped over a 2 inch log of crumpled foil, the walls flat.
Why this matters: chilled dough keeps its score lines sharp and holds on the slope while the oven heats.
9.Bake the dome and the tunnel pieces
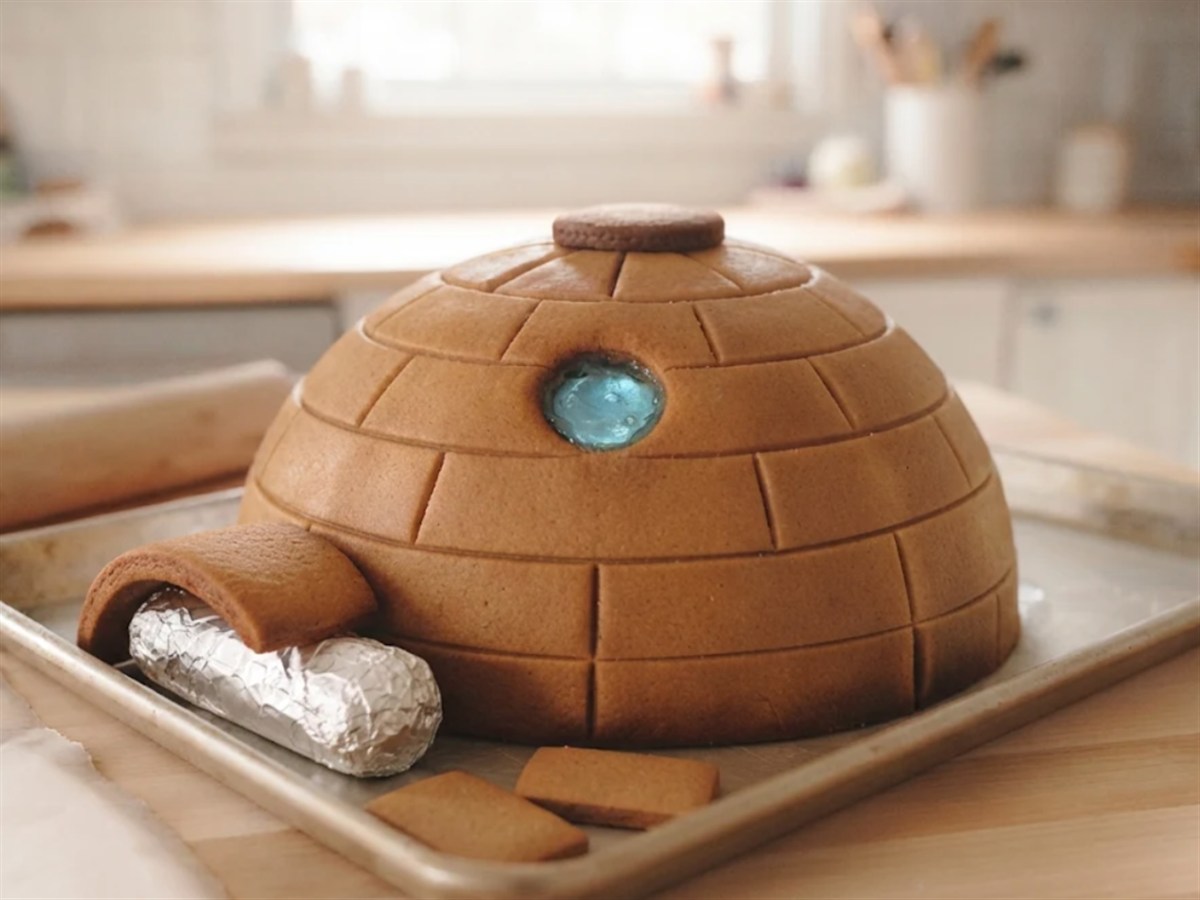
Bake at 300 degrees F. The tunnel pieces are small, so start checking them at about 18 minutes. Plan on about 30 to 40 minutes for the dome, until it is matte all over with a firm edge at the rim. For an ice window, take the dome out about 10 minutes before it is done, fill the window with crushed candy about two pieces deep, and bake again until the candy has melted flat.
Check as you go: the bowl soaks up heat, so the dome bakes slower than the flat panels on our dough page. Press the rim gently at 30 minutes; if it gives, keep going in 5 minute steps. Hard crack, where candy flows, is 300 to 308 degrees F at sea level per Colorado State University Extension, so candy melts slowly at 300. At altitude that drops by about 2 degrees F for every 1,000 feet.
10.Cool the dome on the bowl, then lift it off
Leave the dome on the bowl until it is completely cool, about an hour. Lift the foil and dome together off the bowl, set the dome rim down, and peel the foil out of the inside a little at a time.
Why this matters: warm gingerbread bends. A dome lifted hot can sag or crack along a seam.
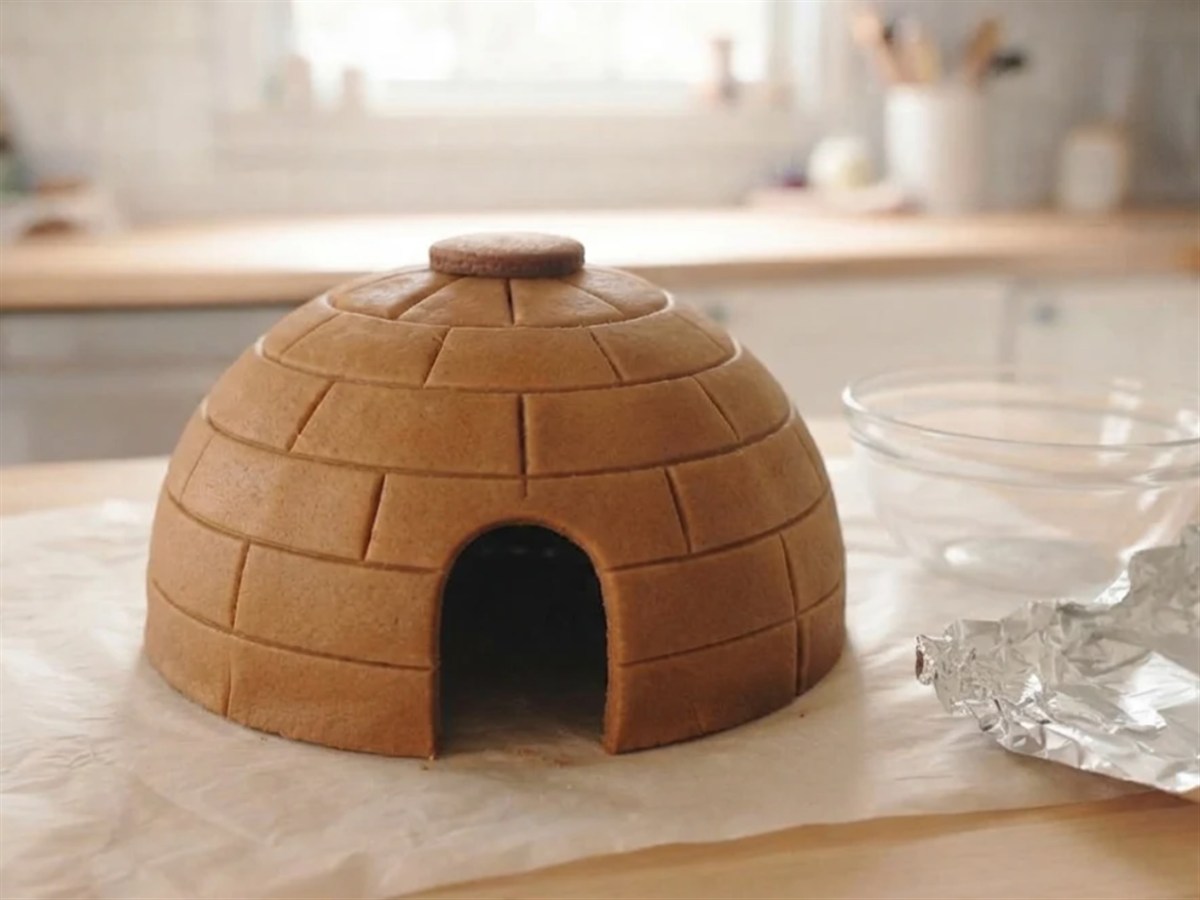
11.Trim the rim so the dome sits flat
Set the dome on the board. If it rocks, rub the high spots of the rim gently on the fine side of a box grater until it sits flat.
Why this matters: a rocking dome puts all its weight on two points, and that is where it cracks.
12.Set the dome on the board over a battery light
Switch on a battery tea light and set it on the board where the middle of the igloo will go. Pipe a ring of stiff icing round it, set the dome on the ring, doorway at the front, and wait 2 hours.
Why this matters: once the dome is down you can only reach the light through the doorway, so test it first. Use battery lights only: our guide to lights that are safe under a gingerbread dome explains why candles are out.
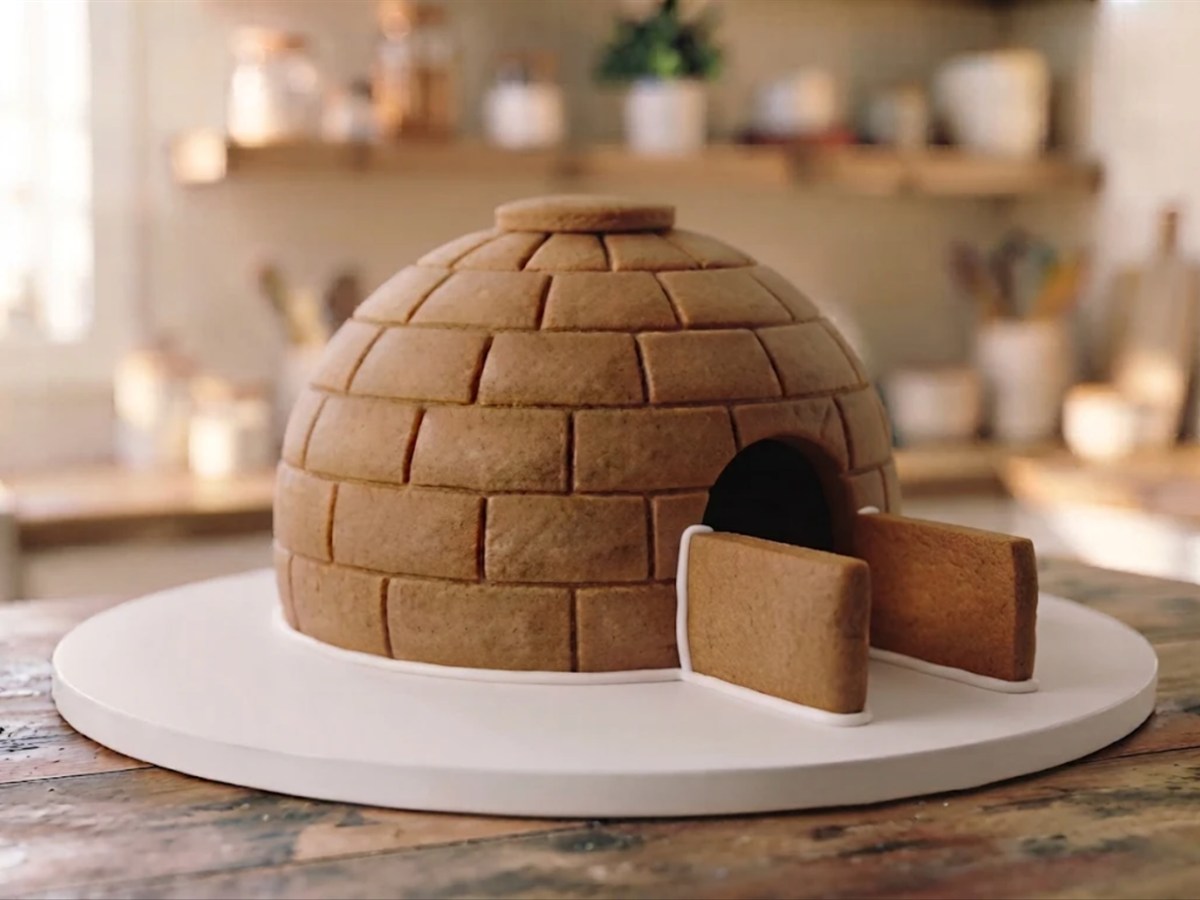
13.Stand the tunnel walls against the doorway
Pipe two lines of icing on the board in front of the doorway, 2 inches apart, and along the back edge of each wall. Stand the walls with their slanted ends against the dome on either side of the doorway, prop them and wait 2 hours.
Why this matters: the gap between the walls matches the doorway, so the tunnel and the door line up as one opening.
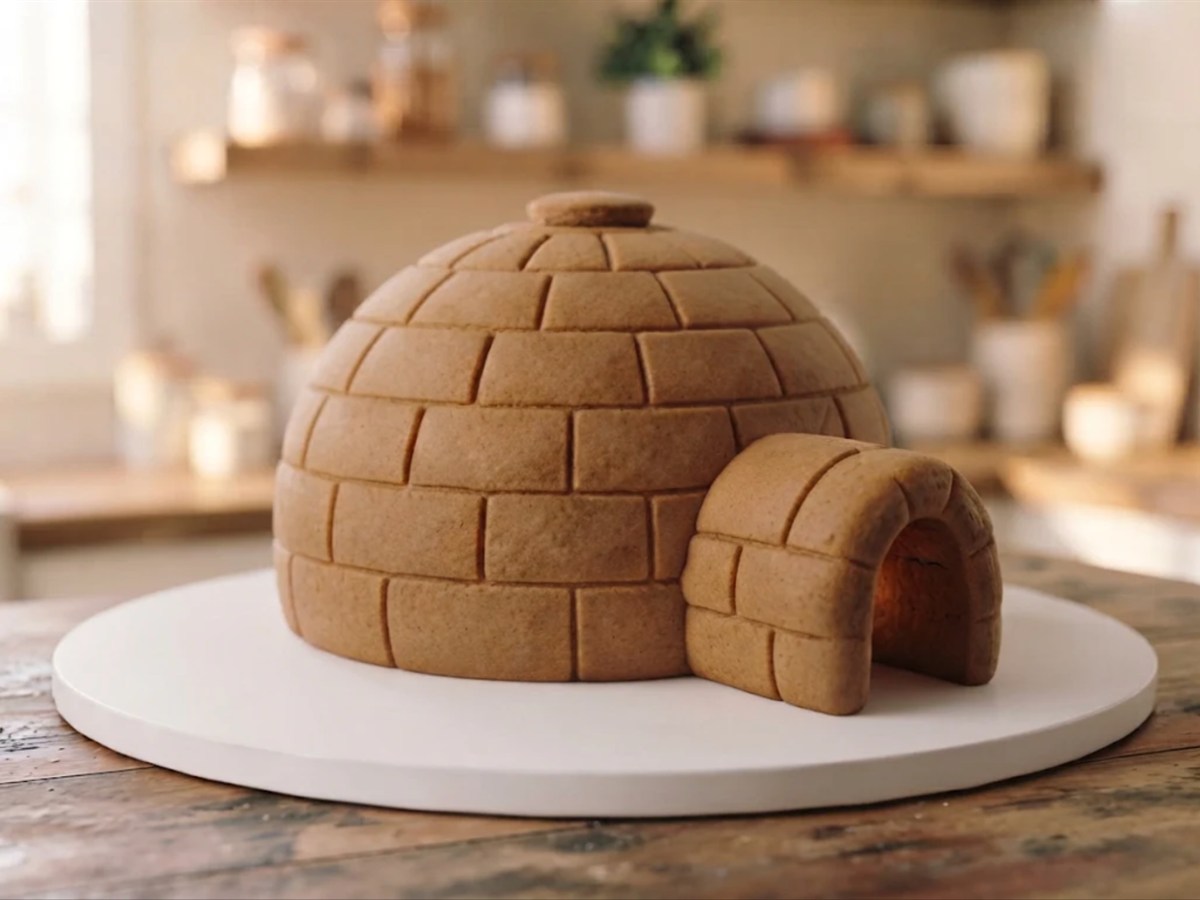
14.Set the tunnel roof on the walls
Pipe icing along the wall tops and the curved edge of the roof. Set the roof on the walls with its curved edge against the dome, hold it for a minute and wait 2 hours.
Why this matters: the roof is curved to the dome, so it closes against it. Any small gap left is a line of icing, not a hole.
15.Pipe the ice blocks and add the snow
Pipe white icing along every scored line on the dome and the tunnel. Spoon snow round the base and over the tunnel, and set out your animals. Our guide to edible snow that stays put compares coconut, sanding sugar and icing snow.
Why this matters: the snow hides the icing line at the base, so the igloo looks like it is sitting in a drift.
16.Let it stand overnight
Leave the igloo where it is overnight before you move it, then lift it by the board, never by the dome.
Troubleshooting
| What you see | Why it happens | What to do |
|---|---|---|
| The dough slid down the bowl | Too much oil, or the dough was warm | Push it back up, chill the bowl 15 minutes and bake. Next time wipe the oil nearly dry. |
| A seam opened in the oven | The edges were not pressed together | Pipe icing into the seam from inside and outside once cool, and pipe a block line over it. |
| The dome will not come off the bowl | The foil was skipped, or the dome is still warm | Let it cool fully, then slide a thin knife round the rim. Use foil every time. |
| The dome cracked as it came off | It was lifted warm, or underbaked | Glue the crack with icing from inside and cover it with a block line or snow. Bake a little longer next time. |
| The dome rocks on the board | The rim baked uneven | Rub the high spots on the fine side of a grater. |
| A gap shows where the tunnel meets the dome | The roof spread in the oven | Fill it with a thick line of icing and pile snow over it. |
| The ice window is cloudy or ran | Too little heat, or too much candy | Lumpy: give it a few more minutes. Spilled: snap the thin edge off once cool. Fill two pieces deep. |
| The dome went soft after a few days | Damp air | Move it away from the kitchen and steamy rooms. Kim Shupe lost a house to a humid day. |
No-Bake Sugar Cube Igloo and Other Easy Versions
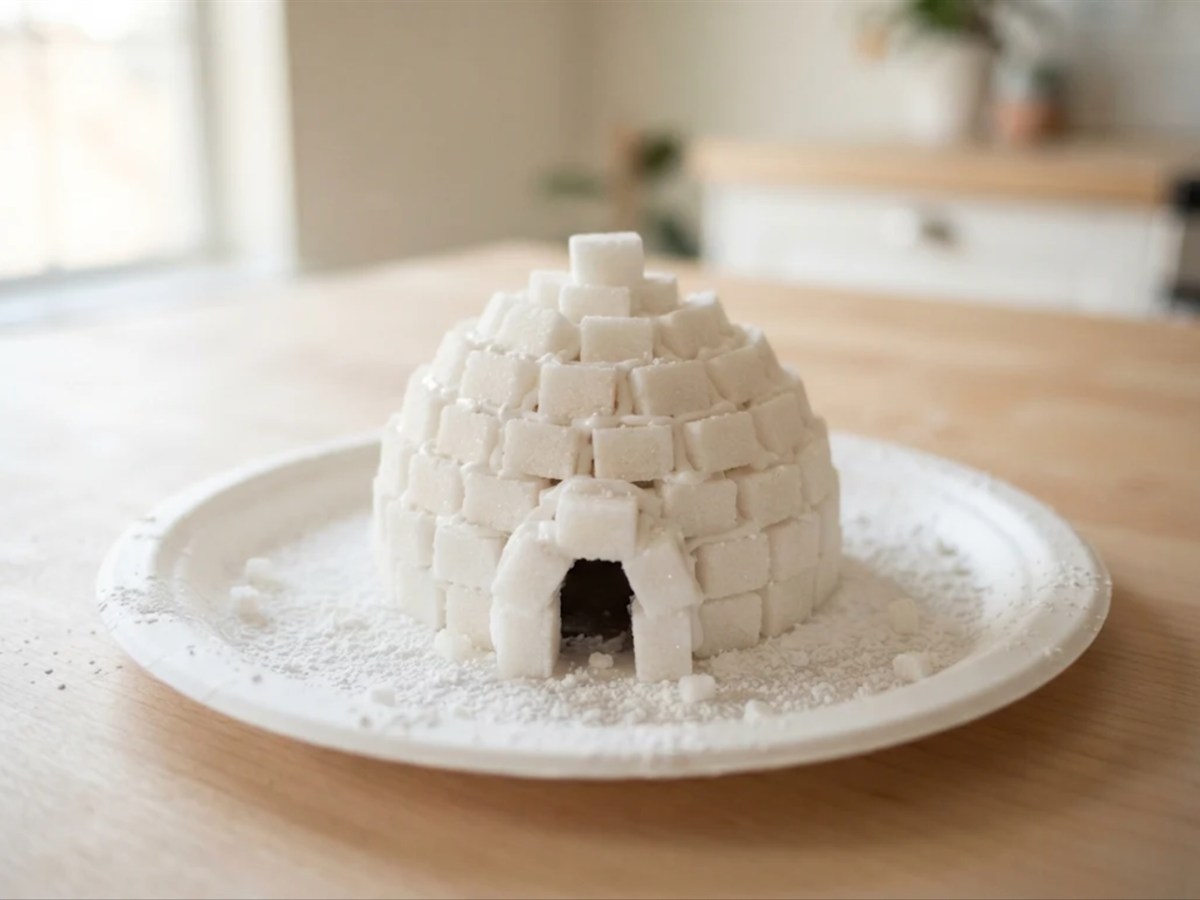
Sugar cube igloo. For small kids, draw a 4 inch circle on a paper plate and lay a ring of sugar cubes on it with a dab of stiff royal icing as mortar on each. Build ring on ring, setting each a little further in, and leave a gap at the front for the door. Let each ring firm for a few minutes before the next. Close the top with a single cube. It takes about 45 minutes and teaches the real igloo idea of rings that lean in.
Graham cracker igloo hut. For a dome-free shortcut, build a small square hut the way a graham cracker hut with icing glue goes together, frost it white and pipe blocks on every side. It reads as an igloo from across the room.
Block-ring purists. Want to build it the old way? Cut blocks about 3/4 by 1 1/4 inches from the same dough, the size the Raspberri Cupcakes builder used, bake them, and build rings over the bowl as a guide only. Then lift the bowl out, as she did, and close the top with the cap from this template.
Storage Instructions
Keep the igloo in a cool, dry room, away from the stove and sunny windows. Damp air softens gingerbread and makes candy glass sticky. Kept dry, it holds its shape through the season, and our guide to how long a gingerbread igloo keeps covers when to stop eating it and keep it for display.
FAQ
Can I use a Pyrex bowl?
Yes. An oven-safe glass bowl is what Kim Shupe used. Cover it with foil so the dome lifts off, and expect the bake to run longer than a flat panel because glass holds heat.
Can I make a gingerbread igloo without a bowl?
Yes, with the block method or the sugar cube version above. Both work, but they take more patience, and the top always needs a flat cap.
Is the igloo edible?
Yes, though house dough bakes hard. If you plan to eat it, use the meringue powder royal icing from our icing page and skip the foil bits: peel every scrap out of the inside.
How do I make the inside glow?
Put a battery tea light under the dome before it goes on the board. Light shows through the doorway and through an ice window if you cut one.
More Winter Gingerbread Builds and Recipes
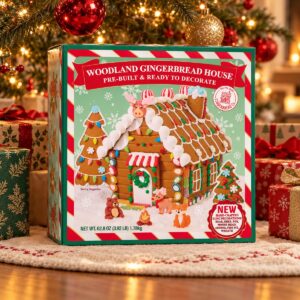
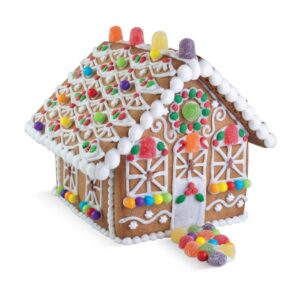
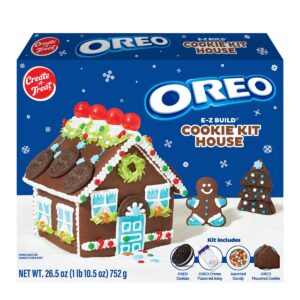
Browse more winter gingerbread house ideas for snowy scenes to set beside your igloo, or free printable house templates with straight walls for your next build. If a wall ever starts to lean, our tips for gingerbread walls that stay up work on any house. For a quick second build, our rankings point you to a gingerbread house kit to build beside the igloo, sorted from the boxes that stay standing to the wobbly ones.