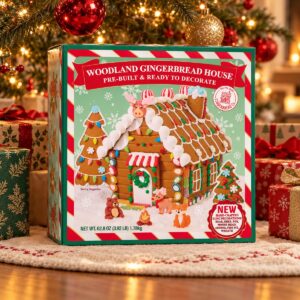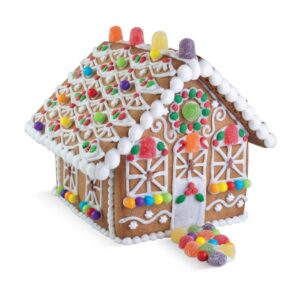
Every kid who has waved at a fire engine wants a fire station, and contest judges and grandparents love one too. Yet search for one and you find news photos, a plywood yard pattern and decor you can’t eat. Nobody hands you a template with sizes.
This one does. Our house dough and royal icing recipes set every bake temperature and wait, and a script checked the free template so the bay doors, the hose tower and all sixteen windows fit together. It is written for families with a truck fan at home, contest entrants and anyone baking a thank you for their local station.
You will build a station about 9 1/4 inches tall over two days from one batch of dough. Start with the template.
Fire Station Gingerbread House: At a Glance
- Difficulty: Intermediate. The station is a flat-roofed box, and the hose tower is a second, taller box with a small pyramid roof.
- Total time: about 2 days, in seven sessions. Most of it is icing drying.
- Active time: about 6 1/2 hours, counting the dough chill and the bake.
- Makes: one fire station about 7.8 inches wide with its tower, 4 inches deep and about 9 1/4 inches to the tower tip. 14 baked pieces, 16 candy glass windows.
- Template: free 5-page PDF, US Letter, true size with a 1 inch test bar on every page.
Tools: printer, ruler, scissors, a small sharp knife, rolling pin with 1/4 inch guides, parchment, 2 half sheet pans, a zip bag and a rolling pin for crushing candy, piping bags with small round tips, cans for propping, an offset spatula, a board at least 10 by 12 inches.
Materials
- 1 batch of our gingerbread house dough, rolled for walls that stay flat
- 2 batches of stiff royal icing that holds a joint like mortar
- About 20 clear hard candies such as Jolly Ranchers or Life Savers, in yellow or amber plus one accent color, and a few spare
- Gel food coloring: red for the brick and the doors, a touch of black for the apron, yellow for the plaque
- For the night look, a battery micro LED string with a small battery box
- Optional: fire truck cookies to park out front
Steps
- Print the template at Actual Size and measure the test bar.
- Make the dough and chill it for at least an hour.
- Roll the dough 1/4 inch thick and cut the station walls and the roof.
- Cut the tower walls, cap and tower roof faces.
- Cut out every window and hose arch before baking.
- Bake at 300 degrees F, then melt crushed candy into the windows.
- Trim every piece against the template while it is warm.
- Pipe the brick, bay doors and plaque while the pieces lie flat.
- Build the tower roof on its cap, then leave everything overnight.
- Stand the four station walls on the board, then wait 2 hours.
- Add the lights and set the flat roof, then wait 2 hours.
- Build the hose tower against the left wall, then wait 2 hours.
- Lift the tower roof onto the tower, then wait 4 hours.
- Ice the apron in front of the bay doors.
- Park the trucks and finish the yard.
- Let it stand overnight before you move it.
Notes: times are worked out from the set times on our icing page, not timed on a build. Ovens and doughs vary, so treat every bake time here as a starting point: check early, go by the matte surface and firm edge, and bake a test strip with one candy window before you build. Nobody has baked this sheet yet, so tell us how yours goes.
Free Printable Fire Station Gingerbread House Template
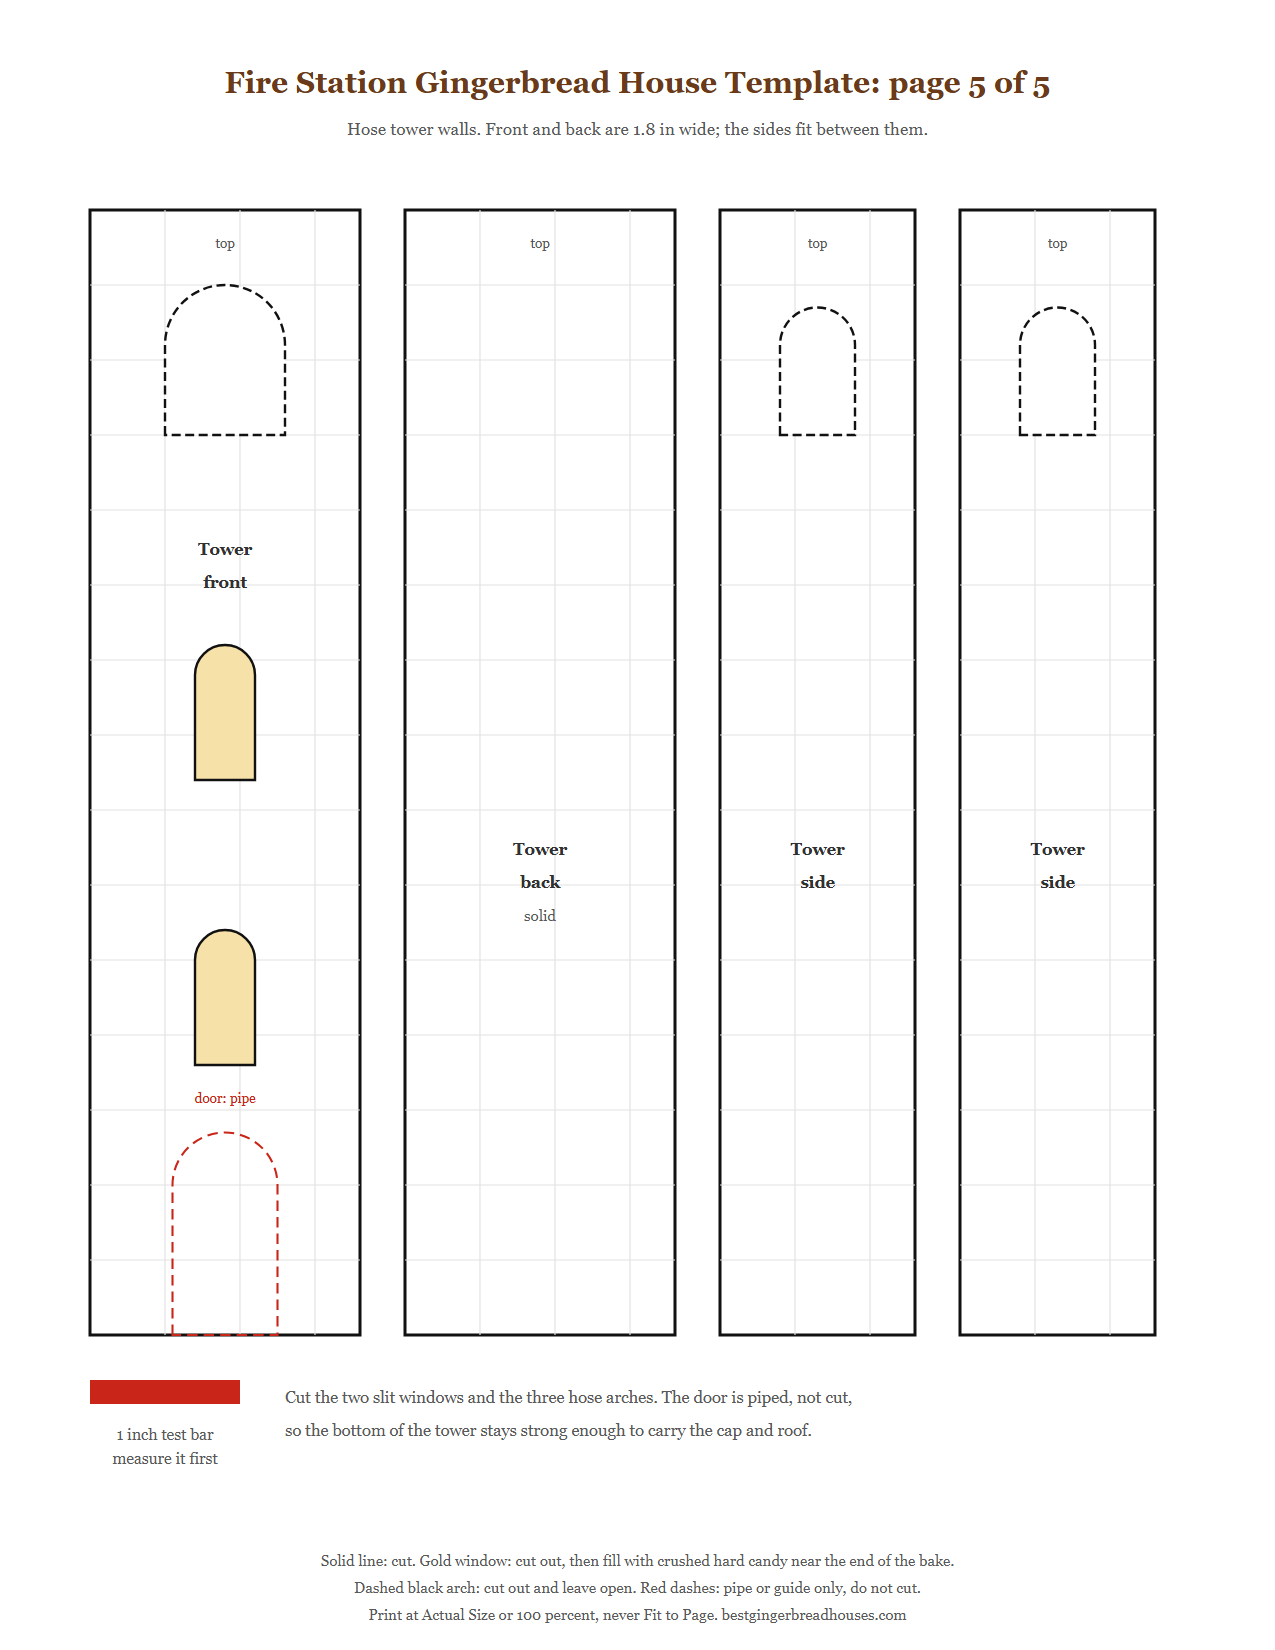
The template is five US Letter pages with every piece at true size over a faint 1/2 inch grid. Download the PDF, print it at Actual Size, and check that the red bar measures 1 inch before you cut anything. Gold shapes are candy glass windows. Dashed black arches are hose openings you leave empty. Red dashes are piping guides you never cut.
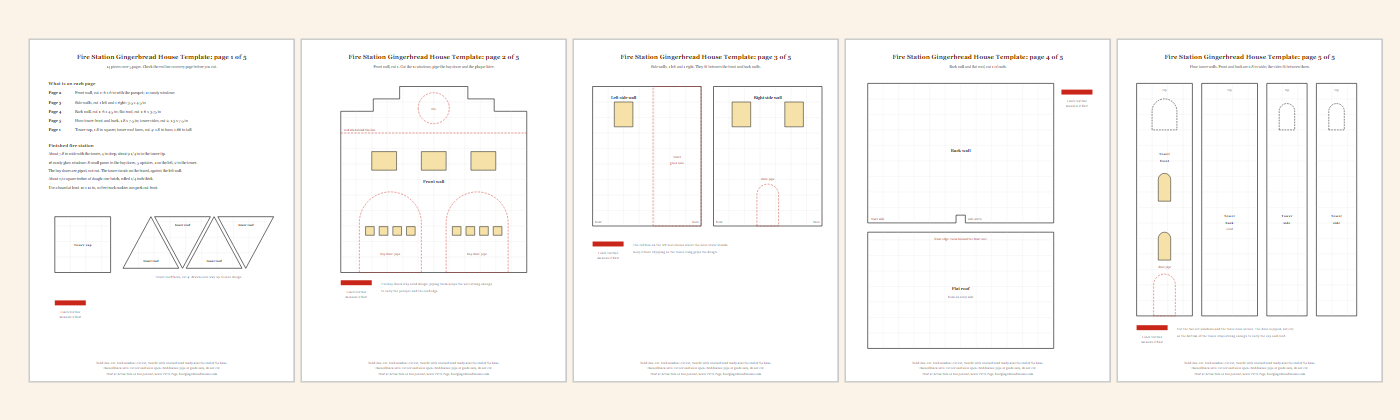
| Piece | Cut | Size |
|---|---|---|
| Front wall | 1 | 6 in wide, 5.2 in at the corners, 5.6 in on the middle tier, 6 in at the top step; 2 piped bay doors, 11 candy windows |
| Side walls | 2 | 3.5 x 4.5 in; the left has 1 window, the right has 2 and a piped door |
| Back wall | 1 | 6 x 4.5 in, solid, with a wire notch |
| Flat roof | 1 | 6 x 3.75 in, flush on every side |
| Tower front | 1 | 1.8 x 7.5 in, 2 slit windows, an open hose arch, a piped door |
| Tower back | 1 | 1.8 x 7.5 in, solid |
| Tower sides | 2 | 1.3 x 7.5 in, an open hose arch near the top |
| Tower cap | 1 | 1.8 in square |
| Tower roof faces | 4 | 1.8 in base, 1.66 in tall |
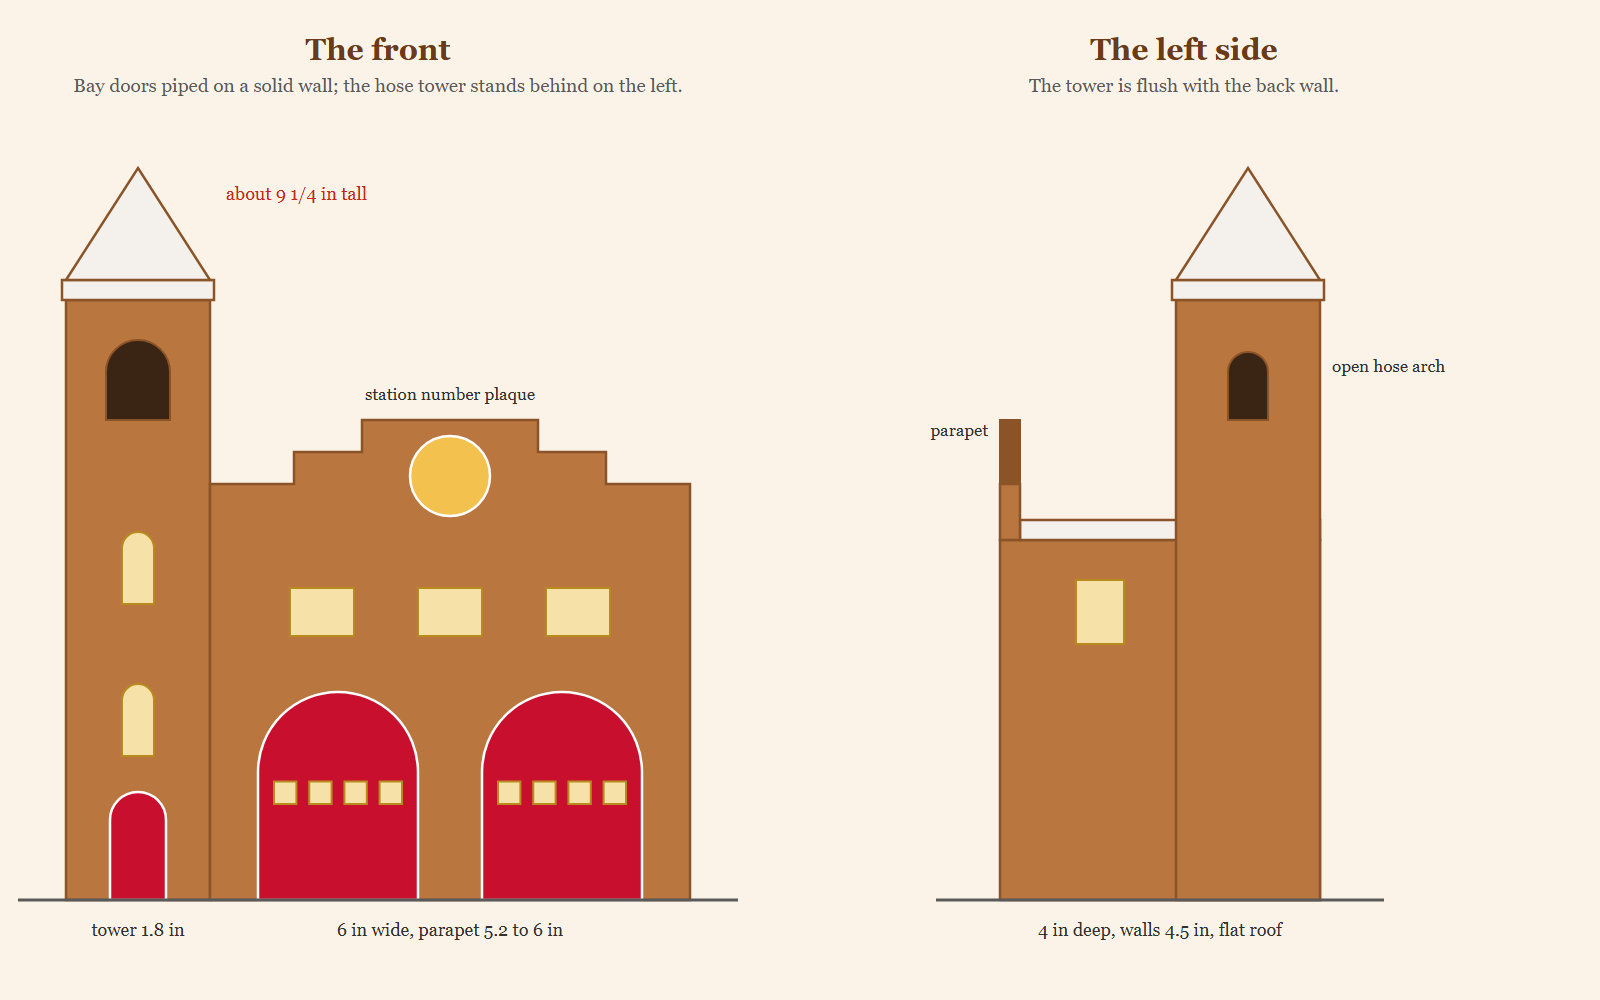
The pieces come to about 170 square inches. One batch of house dough covers about 225. The front wall rises past the roof into a stepped parapet, the false front of old brick firehouses, with a round plaque on its top step.
Why the Bay Doors Are Piped and the Tower Stands Alone
Big truck doors and a tall tower make a building read as a fire station. They are also the two parts most likely to sink a gingerbread build.
The bay doors are piped, not cut. Two real openings 2 inches wide would take 4 of the front wall’s 6 inches out of its base. That leaves three thin posts holding up everything above. Piping keeps the wall one solid piece, and a row of small candy panes in each door still glows.
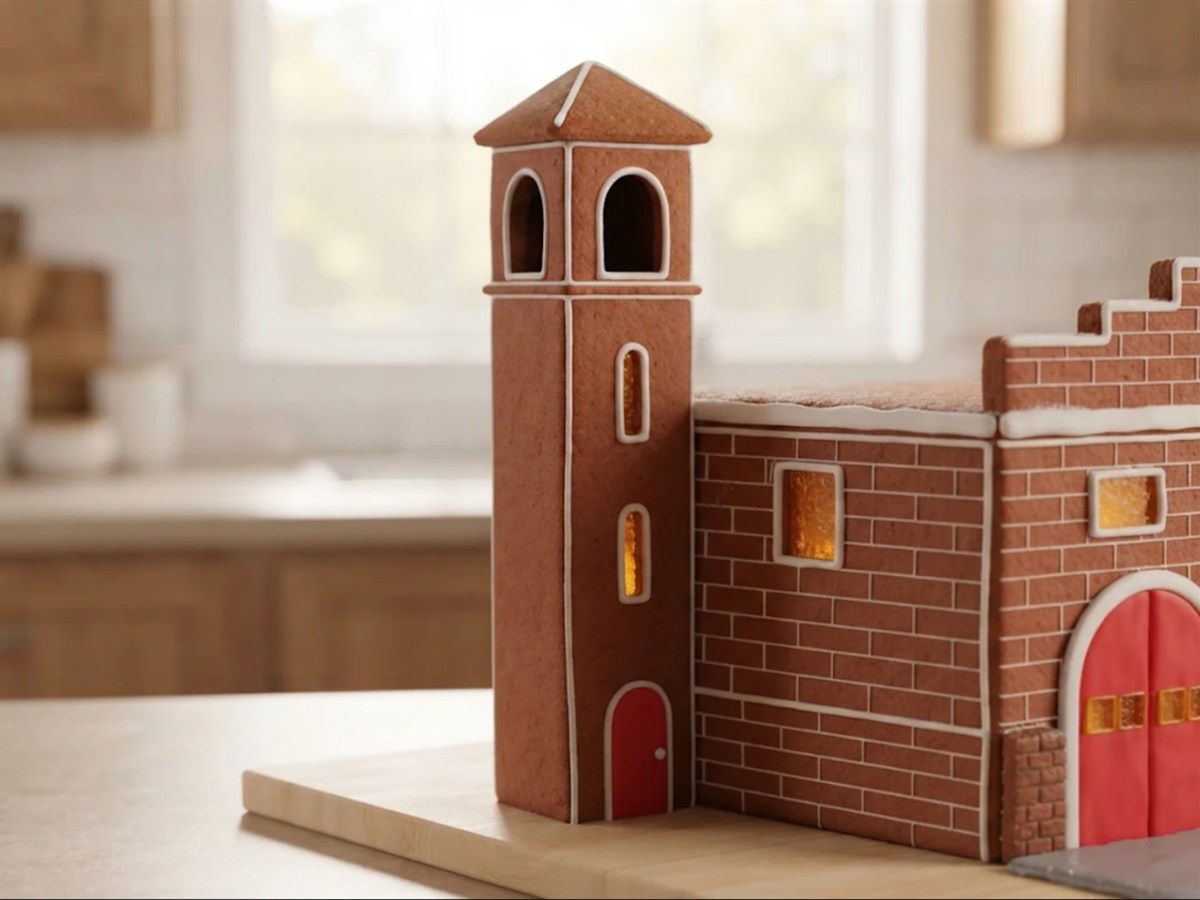
The hose tower stands on the board. A 7 1/2 inch tower perched on a roof presses on the weakest joint of the house. Ours stands on the board against the left wall, so it carries its own weight.
The tower is real history. Many older stations had tall towers for hanging wet hoses to dry. The 1894 Pullman firehouse in Chicago, built with round arches like these, still has one, and the National Park Service says its tower was used both to watch for fires and to hang and dry hoses.
The roof is flat and hidden. It sits on the side and back walls and tucks behind the parapet, with no ridge to line up.
Picture a seven-year-old who asked for “the fire station with the big red doors.” Cut those doors open and the front wall can bow under the roof by morning. Pipe them thick and red with glowing panes, and the station stands all season.
Glowing Bay Doors and a Number for Your Station
The glass is crushed hard candy, melted into the window openings in the oven. Clear candies like Jolly Ranchers and Life Savers work; anything opaque or shell-coated does not. Our guide to making candy glass gingerbread house windows covers the method.
Sixteen windows, four sizes. Eight small square panes sit in the bay doors, four to a door, six upstairs windows light the second floor, and two slim slits run up the tower. Plan on 1 candy for each pair of bay door panes, 2 per upstairs window and 1 or 2 per tower slit.
Amber reads as a working station. It looks like lights left on for the night shift. Save red for the tower slits so it does not fight the red doors.
Watch the yellow. Sweetopia’s Marian found her yellow candy melted less clearly than her red, blue and green, so bake a test strip with one pane before you commit a whole bag.
Make it their station. The round plaque on the parapet’s top step is left blank in our photos, ready for a station number. Pipe your local station’s number or the birthday kid’s age, and try it in the designer below.
Station Front Designer
Type a station number, pick a look and a glass color, and see the front of your fire station before you bake. You get the candy count and the icing colors to mix.
For planning only: candy counts are estimates scaled from our candy guide, so buy a few spare and bake a test pane first. Results are not a guarantee and this is not professional baking advice. Nothing you type leaves your browser.
Three Fire Station Looks
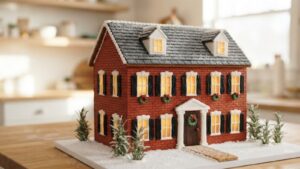
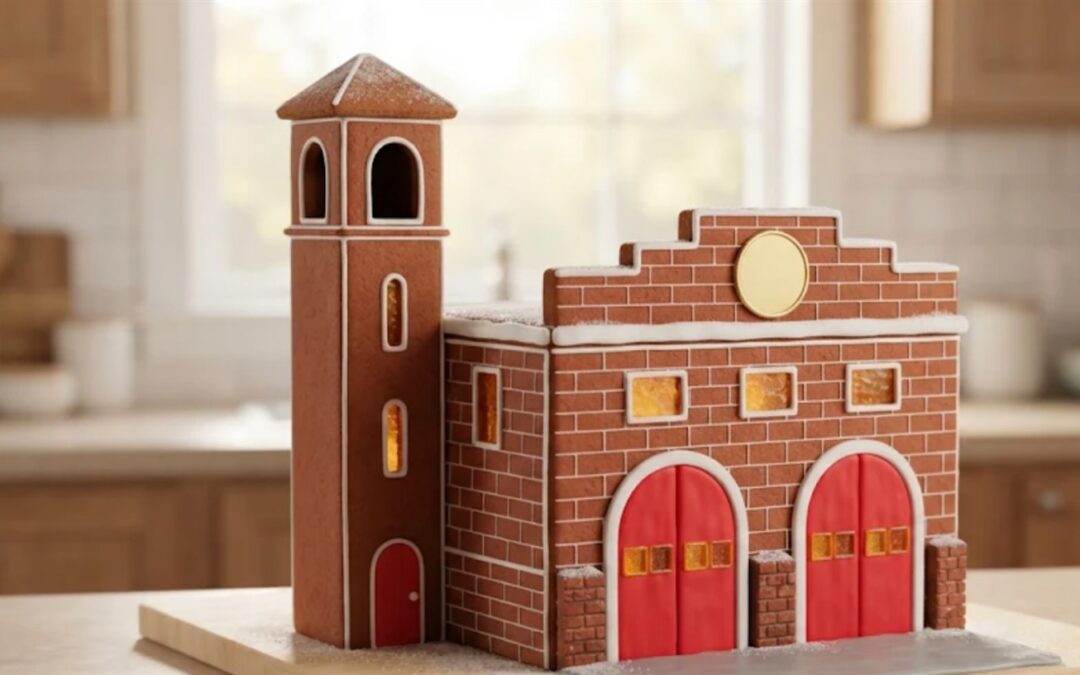
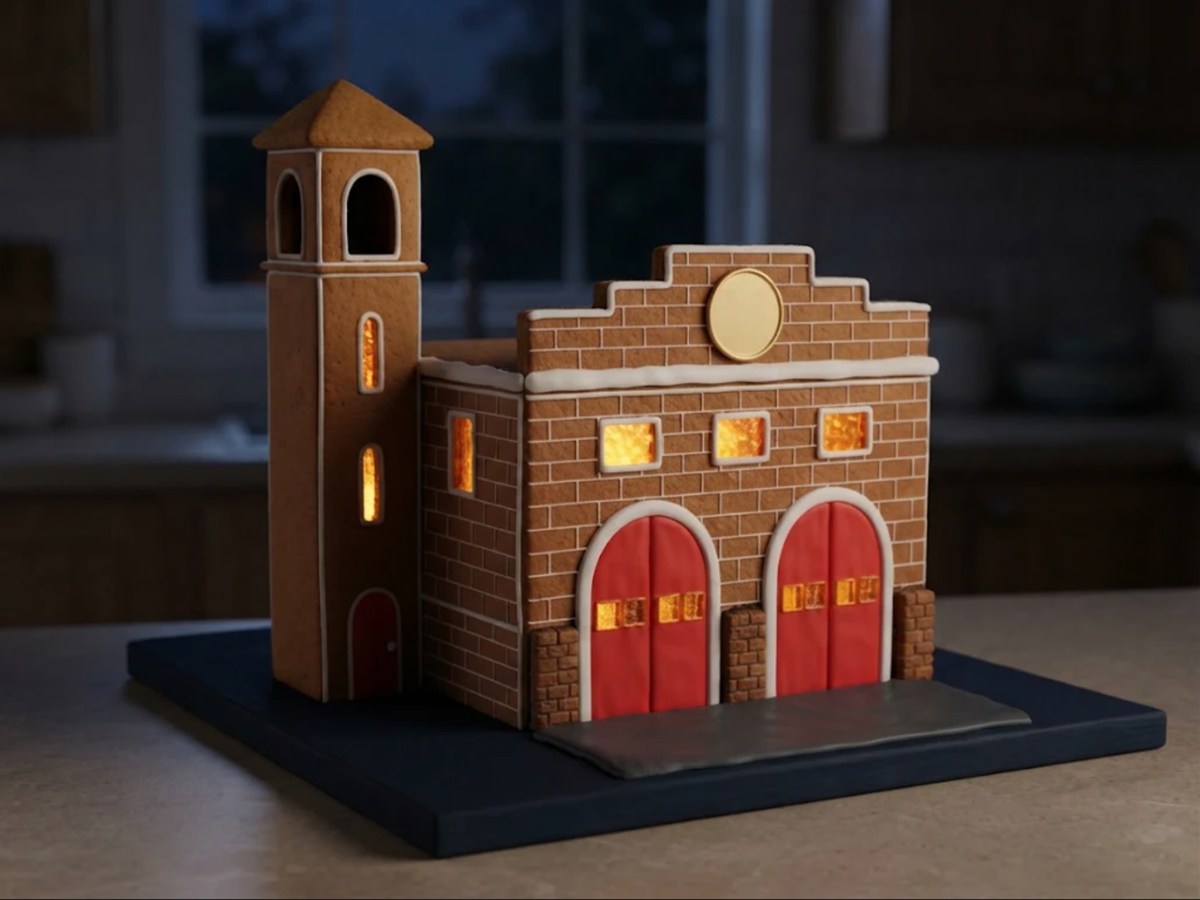
Red brick firehouse. Flood the station walls with brick red icing, then pipe thin white mortar lines while the pieces lie flat. Pipe the bay doors bright red with white frames, the cornice and window trim white, and the plaque gold. This is the look in the photo at the top, where the tower stays plain gingerbread with white trim; flood it brick red too if you like.
Modern white station. Flood the walls smooth white, pipe the bay doors red with a white grid like real sectional doors, and run one red stripe along the walls just under the roof line. The tower gets a red roof.

Night shift. Keep the walls bare gingerbread, pipe only white brick outlines and trim, fill every window with amber and coil a warm white LED string inside. On a dark board, the crew looks on duty.
Parking the Fire Trucks Out Front
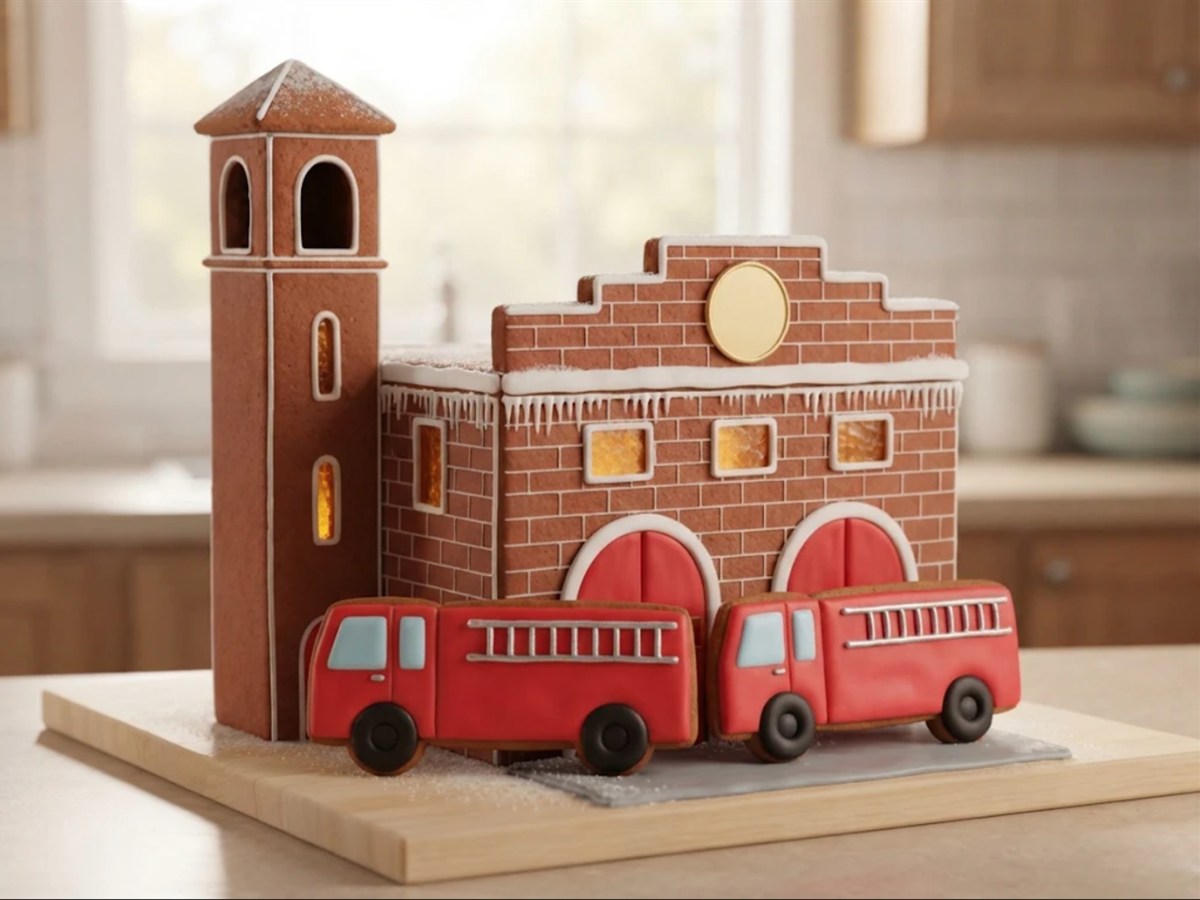
A fire station looks empty without a truck. The board in front of the bay doors is the apron, 3 1/2 inches deep on a 10 by 12 board. That fits the truck from our firefighter gingerbread cookies, about 3 inches long, with room to spare.
Stand each truck cookie upright on its wheels with a blob of stiff icing behind it, nose toward the street. Add the hydrant and the spotted dog from the same template at the corner of the board.
Say you bake for a five-year-old’s fire truck party. Build the station the weekend before, bake the truck cookies the day before, and park two trucks on the apron just before the guests arrive. The station is the centerpiece and the trucks are the favors.
Gingerbread Firehouses Real Bakers Have Built
A thank you that lasted 17 years. Maureen Peterson of South Florida delivered gingerbread houses to Miami-Dade Fire Station 50 every year for 17 years, CBS Miami reported in 2011. Its crews brought her husband Ed back “four different times before they got him to the hospital,” which gave her 12 more years with him. She put 12 candy bars inside each house, one for each year.
A firehouse contest. The Aurora Regional Fire Museum in Illinois has run a Gingerbread FIREhouse Contest. In 2010, its second year, it drew more than a baker’s dozen entries the Daily Herald reported. Entries had to show a firefighting structure, everything except the base had to be edible, and the judges included the city’s fire chief. This build passes that rule: only the board is not edible.
A 12 foot fire truck. At Stein Eriksen Lodge in Utah, pastry chef Jeremy Garcia’s team built a gingerbread fire truck 12 feet long with members of the Park City Fire Department, TownLift reported. It took 190 pounds of gingerbread and more than 50 hours.
How Long It Takes, Day by Day
Plan on seven sessions over two days, about 6 1/2 hours of hands-on work. All the piping happens flat on day 1. Pick your finish time and the planner counts back.
| When | What you do | Hands-on | Then wait |
|---|---|---|---|
| Day 1, morning | Print, make and chill the dough, cut, bake, melt the candy glass and trim. | About 3 1/4 hours | About 30 minutes |
| Day 1, afternoon | Pipe brick, bay doors, trim and the plaque flat. Build the tower roof on its cap. | 1 hour | Overnight, pieces flat |
| Day 2, early morning | Stand the four station walls. | 30 minutes | 2 hours |
| Day 2, mid morning | Add the lights and set the flat roof. | 20 minutes | 2 hours |
| Day 2, midday | Build the hose tower against the left wall. | 30 minutes | 2 hours |
| Day 2, afternoon | Set the tower roof on the tower. | 15 minutes | 4 hours |
| Day 2, evening | Ice the apron, park the trucks, finish the yard. | 40 minutes | Overnight before you move it |
In a damp kitchen, let each wait run longer; the planner adjusts for that.
Fire Station Build Day Planner
Pick when you want the fire station finished, for a party, a contest drop-off or a delivery to your local station. The planner counts back through every drying time and tells you when to start baking.
For planning only: icing sets faster or slower with the weather, so treat each wait as a minimum and check that joints feel firm before moving on. Results are not a guarantee and this is not professional baking advice. Nothing you enter leaves your browser.
How to Make a Fire Station Gingerbread House Step by Step
1.Print the template and measure the test bar
Print all five pages at Actual Size or 100 percent, never Fit to Page, and check that the red bar reads exactly 1 inch.
Why this matters: a template printed small gives a roof that falls between the walls.

2.Make the dough and chill it
Make one batch of house dough, split it in two, flatten each half into a thick disc, wrap and chill for at least an hour.
Why this matters: cold dough holds the square window corners and the parapet step. Warm dough slumps and rounds them off.
3.Roll and cut the station walls and roof
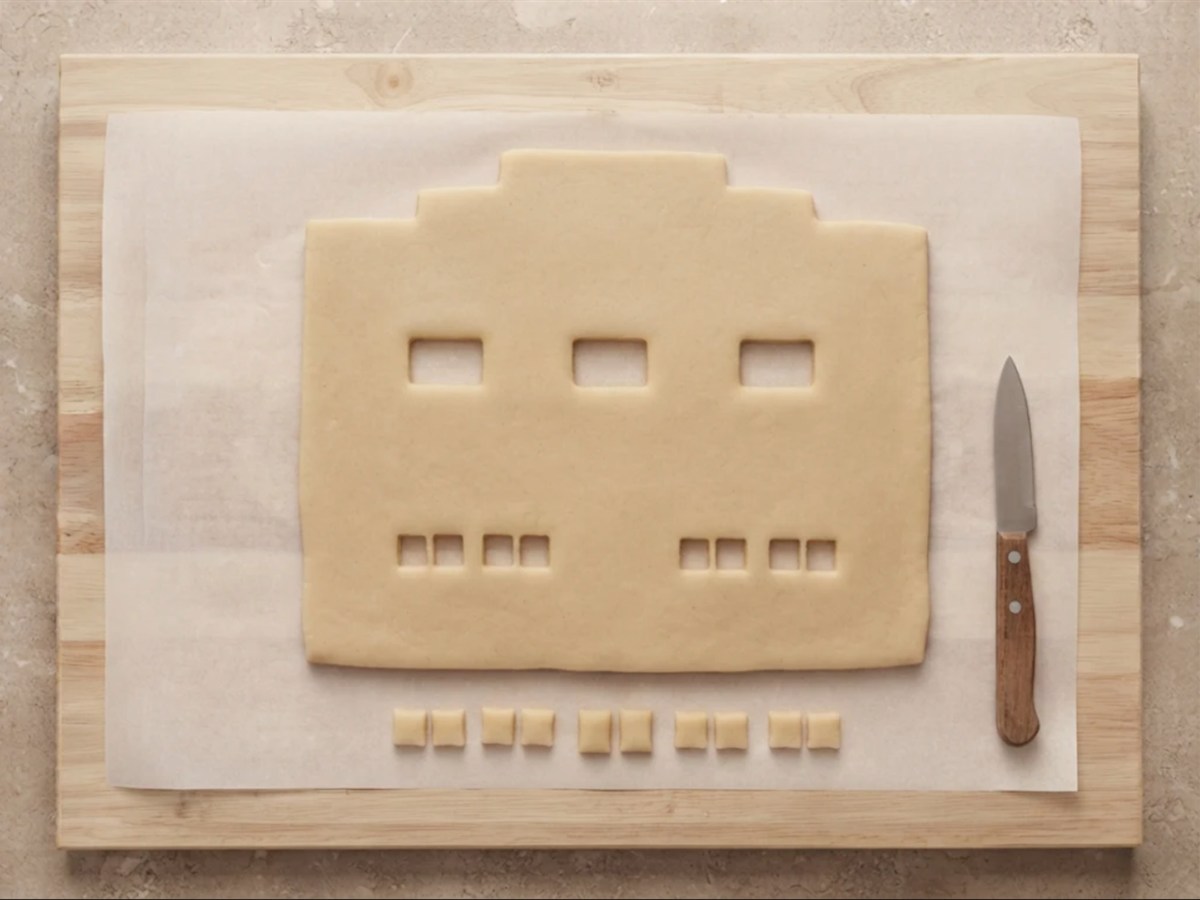
Roll a disc on parchment to an even 1/4 inch between guide strips. Cut the front wall, the two side walls, the back wall and the flat roof right on the parchment, so you never lift a piece with holes in it.
Why this matters: the front wall is the biggest piece and has seven windows. Moved raw, it stretches, so slide the parchment onto the pan instead.

4.Cut the tower, cap and tower roof
From the second disc, cut the four tower walls, the cap and the four tower roof faces.
Why this matters: the tower walls are tall and narrow. Cut each long edge in one clean stroke so they stay straight.
5.Cut out the windows and the hose arches
With a small sharp knife, cut out the eight small bay door panes, the three upstairs windows on the front, the three side windows and the two tower slits, then the three hose arches near the top of the tower. Leave every door solid.
Why this matters: windows cut after baking crack the wall.
6.Bake the pieces, then melt in the candy glass
Bake at 300 degrees F. Large pieces take 22 to 30 minutes, until matte with a firm edge. Pull the pans with windows about 5 minutes early, fill each opening with crushed candy about two pieces deep, and bake again until the candy has pooled flat and gone glassy.
Check as you go: hard crack, where candy flows, is 300 to 308 degrees F at sea level per Colorado State University Extension, so candy melts slowly at 300. If it is still lumpy after about 10 minutes, raise the oven to 325 degrees F and watch closely. At altitude that target drops by about 2 degrees F for every 1,000 feet, so check sooner.

7.Trim every piece while it is warm
Within two minutes of each pan coming out, lay the paper piece back on the baked one and trim any edge that spread. Leave every piece on its pan until fully cool.
Why this matters: the side walls have to fit exactly between the front and back.
8.Pipe the brick, bay doors and plaque while the pieces lie flat
Pipe or flood the brick for your look, then the bay doors: a thick red arch, filled red, with a white frame around each row of candy panes. Pipe white trim under the parapet and round every window and the side and tower doors. Pipe the plaque gold, and add a station number on it if you want one.
Why this matters: lines piped on a standing wall slide downhill.

9.Build the tower roof on its cap and leave it overnight
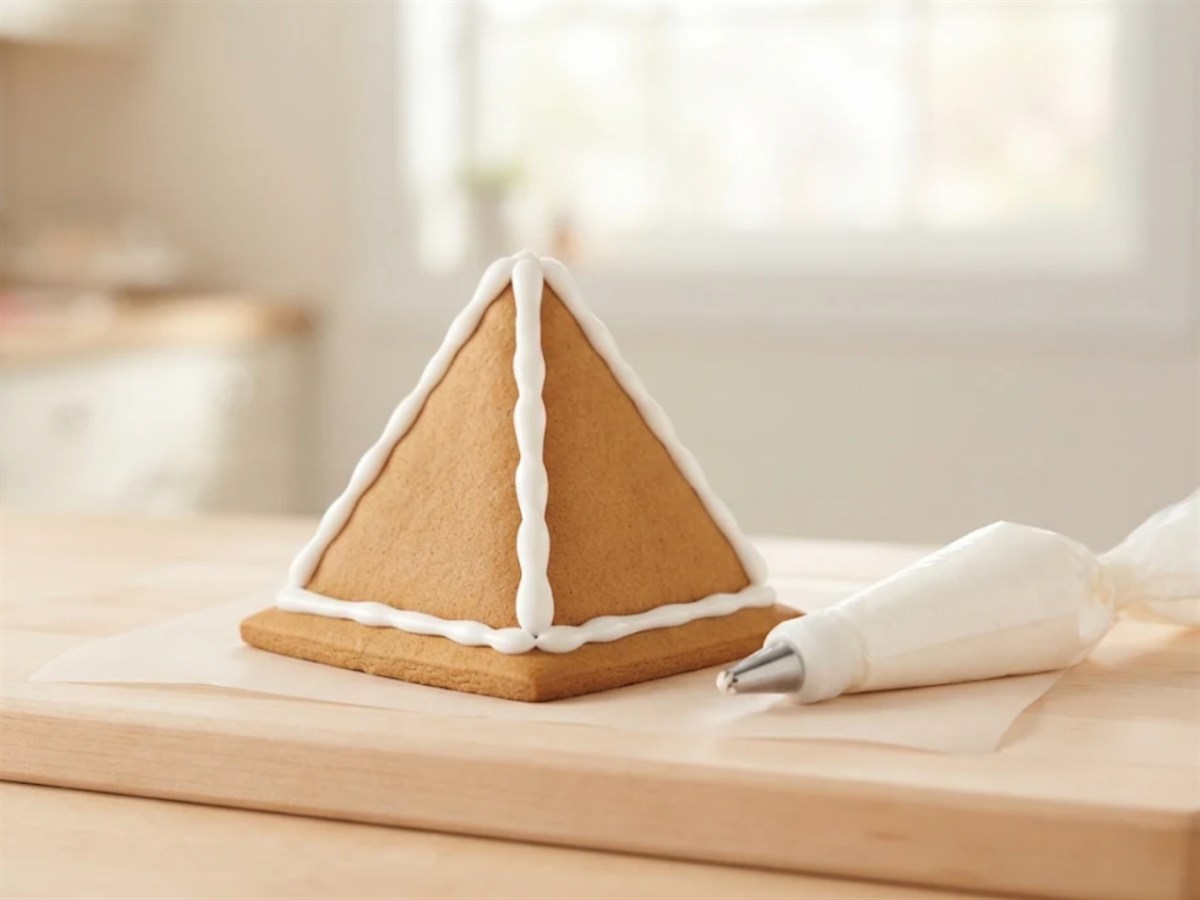
Pipe a line of stiff icing round the edge of the cap. Stand the four roof faces on it, leaning in so their points meet, and pipe icing down each seam. Leave the tower roof and every flat piece alone overnight.
Why this matters: four triangles hold each other up once their tips touch. Built a day early, it goes on as one piece.
10.Stand the four station walls
Pipe a rectangle of icing on the board where the station will sit, about 3 1/2 inches back from the front edge and about 4 inches in from the left edge, leaving room for the apron and the tower. Stand the front wall, then the two side walls between the front and back, then the back wall with its wire notch at the bottom. Prop with cans and wait 2 hours.
Why this matters: the side walls fit between the front and back. Set them outside and the roof will not fit.

11.Add the lights and set the flat roof
For a lit station, switch the LED string on to test it, coil it inside and feed the wire out through the notch. Pipe icing along the tops of the side and back walls and across the back of the front wall at the dashed roof line. Lower the roof in from the back so its front edge tucks behind the parapet, then wait 2 hours.
Why this matters: once the roof is on, you cannot reach inside to fix the lights.
12.Build the hose tower against the left wall
Pipe a square of icing on the board against the back half of the left wall, flush with the back wall. Stand the tower back first, then the side against the station, then the outer side, then the front with its hose arch at the top. Pipe the inside corners, prop and wait 2 hours.
Why this matters: a tower that stands on the board and leans on two walls is far stronger than one perched on a roof.
13.Lift the tower roof onto the tower
Pipe a line of stiff icing round the top edge of the tower walls. Lift the tower roof by its cap and set it straight down, then wait 4 hours.
Why this matters: four hours lets the joint harden before any snow or decoration adds weight up top.
14.Ice the apron
Tint a little icing grey with a dot of black and spread it on the board in front of the bay doors, about 3 1/2 inches deep and as wide as the station. Smooth it with an offset spatula.
Why this matters: the apron hides the icing line at the base of the front wall, and it gives the trucks a flat place to park.
15.Park the trucks and finish the yard
Stand the truck cookies on the apron with a blob of icing behind each one. Spoon snow on the roof and the tower cap, pipe a few icicles from the cornice, and spread snow round the sides and back.
Why this matters: a parked truck tells everyone what the building is at a glance.
16.Let it stand overnight
Leave the station where it is overnight before you move it, then lift it by the board, never by the tower.
Troubleshooting
| What you see | Why it happens | What to do |
|---|---|---|
| The candy windows are cloudy or bubbly | Too little heat, or too much | Lumpy: bake a few minutes more at 325 degrees F. Brown and bubbling: pull it sooner next time, especially at altitude. |
| Candy leaked under the wall | The parchment was wrinkled, or the window was overfilled | Snap the spill off once cool. Next time, smooth the parchment. |
| The front wall bows out at the top | The roof went on before the walls set, or the parapet was pushed | Prop it back with a can, pipe a thick seam down both front corners inside and wait the full 2 hours. |
| The roof drops between the walls | The side walls spread, or the template printed small | Rest the roof on two upright cookie strips glued inside, then check the test bar before the next build. |
| The tower leans away from the station | Too little icing on the board, or it was not pressed to the wall | Push it back, pipe a thick seam down both inside corners and prop it. |
| The tower roof slips | It went on before the tower walls set | Lift it off, wait the full 2 hours, then set it again on fresh icing. |
| The tower roof tips will not meet | Pieces spread in the oven | Fill the gap with a star of icing; trim warm next time. |
| The red piping runs into the white | Red icing was too thin, or piped before the white crusted | Thicken the red with powdered sugar and let each color crust for about an hour before the next goes beside it. |
Easier Versions: Smaller, Kit and No-Bake
Skip the tower. For a one-day build, leave the hose tower off. The bay doors and plaque still say firehouse, and you skip two waits.
Kit station. Start from a boxed house kit, pipe two red arched doors on the front and a number over them. The kits we graded are ranked by how well they hold together, so you can pick a sturdy box with a flat front wall to pipe on.
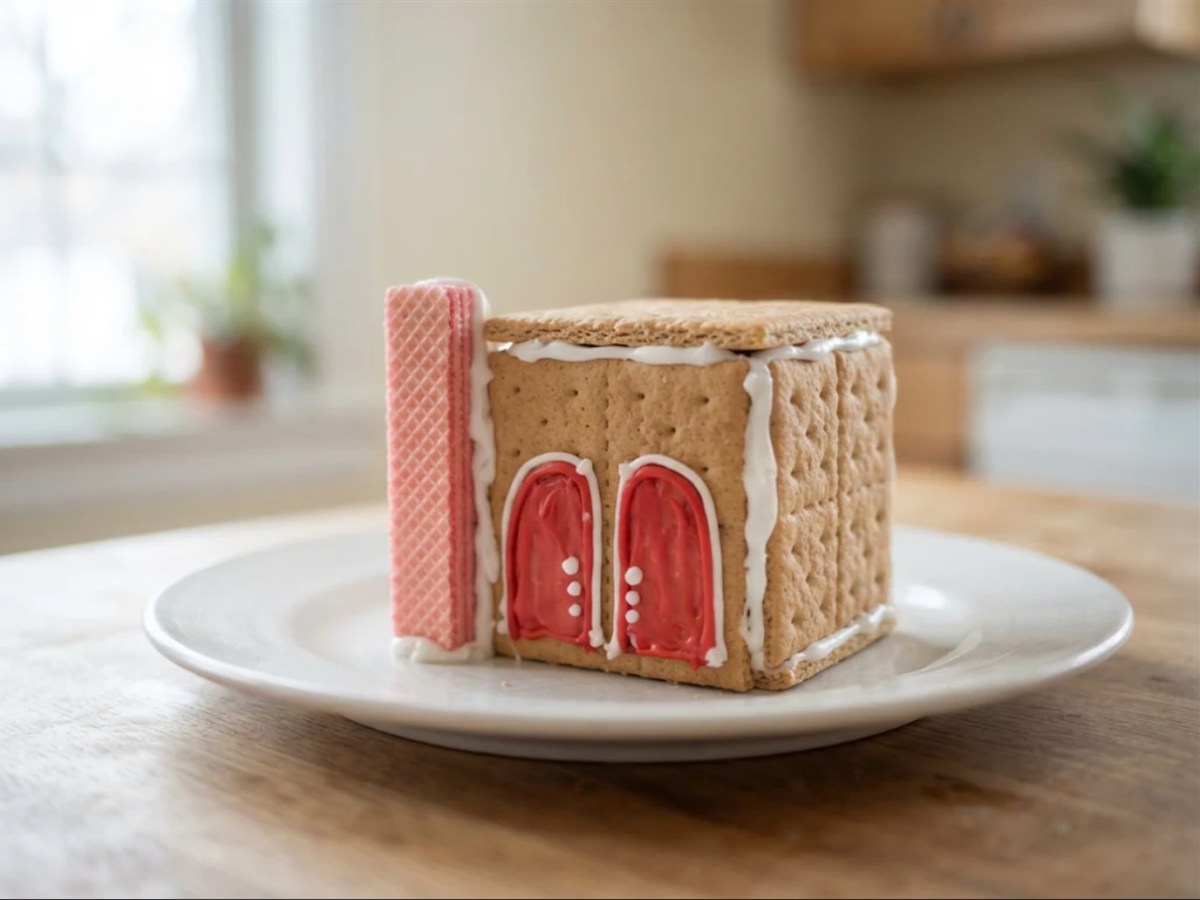
No-bake graham fire station. Stand four graham cracker halves into a box with a fifth laid flat on top as the roof. Pipe two red arched doors on the front, and stand a wafer cookie upright at one side for the tower. It takes about 30 minutes. See our no-bake graham cracker house that stands for the icing that holds crackers.
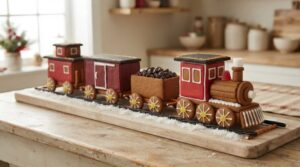
For a whole street, set the station beside our train station gingerbread house, or add it to a gingerbread village of matching houses.
Storage Instructions
Keep the station in a cool, dry room, away from the stove and sunny windows. Damp air makes candy glass sticky and can soften the red icing until it bleeds. Our guide to how long a gingerbread house keeps covers when to stop eating it and keep it for display.
FAQ
Can I cut the bay doors open?
You can cut one. Leave the other piped, so the front wall keeps a solid side, and glue a 1/2 inch strip of baked dough across the inside above the opening as a header.
Can I make it bigger?
Yes. Printed at 120 percent, the station stands about 11 inches tall and needs about 245 square inches of dough, so make one and a half batches and use a 12 by 14 inch board. At that size the pages spill past the edges of Letter paper, so print them on 11 by 17 paper at a copy shop.
Is the candy glass safe to eat?
Yes, it is melted hard candy, but hard on teeth. For an edible station, use the meringue powder icing.
Can I give it to a fire station?
Yes, and it is a lovely way to say thank you; Maureen Peterson did it for 17 years. Let it cure overnight, carry it flat in a box, and call ahead.
More Gingerbread House Builds and Recipes
Browse other gingerbread house themes for your next build, or try another tower build like our gingerbread church with a bell tower. Entering it in a firehouse contest? Our guide to how gingerbread house competitions are judged helps you plan. For a truck tray beside it, add construction truck gingerbread cookies. Our fixes for leaning gingerbread walls work on any house.